04G35s Build Thread
 02-08-15, 10:26 AM
#51
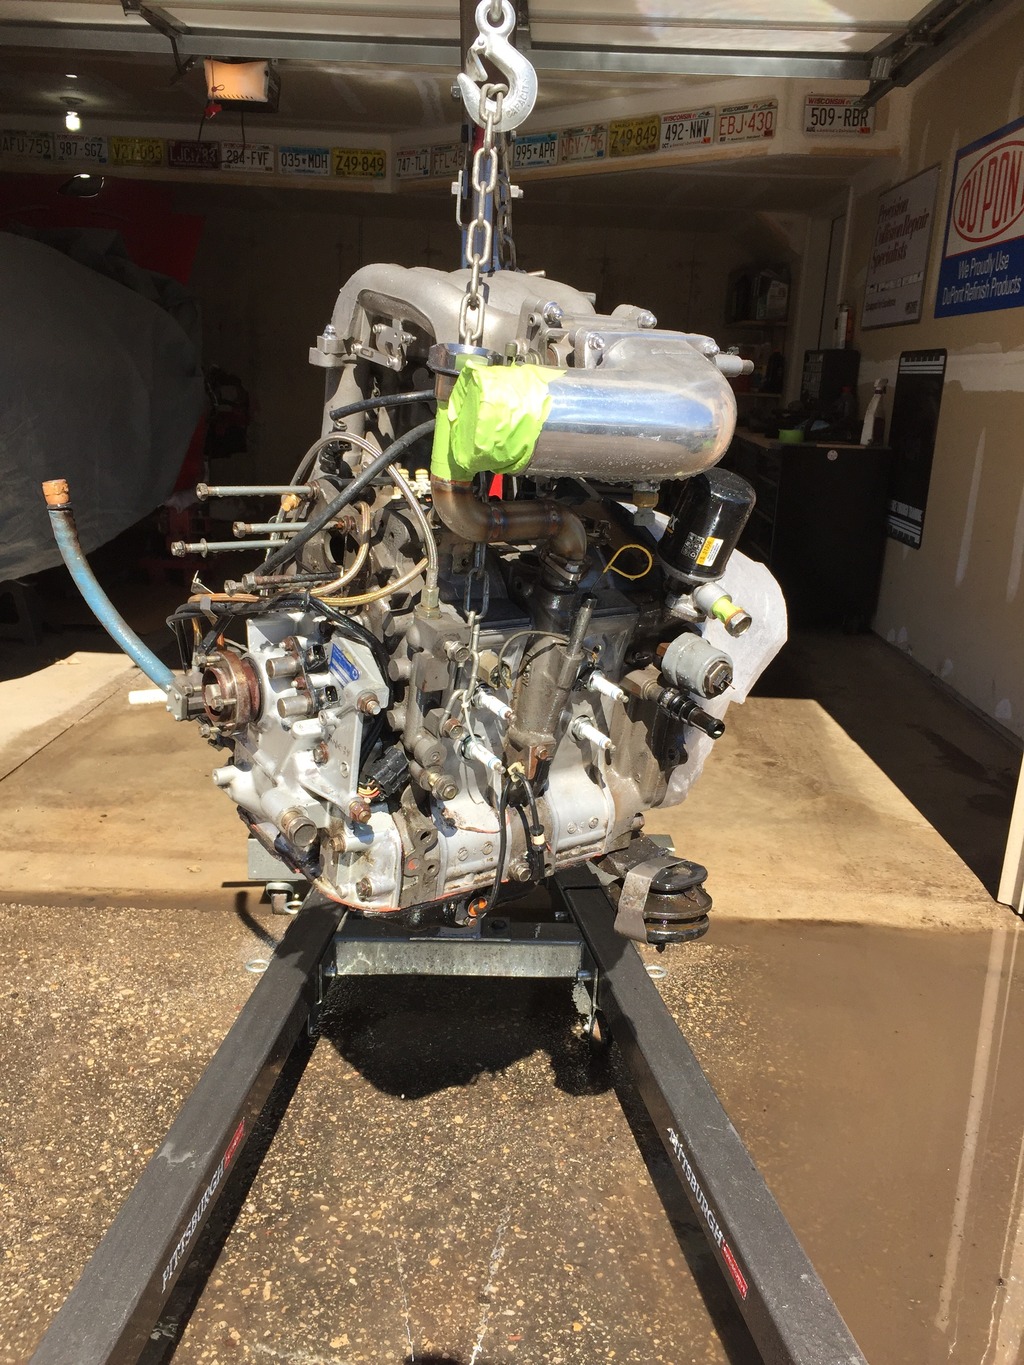
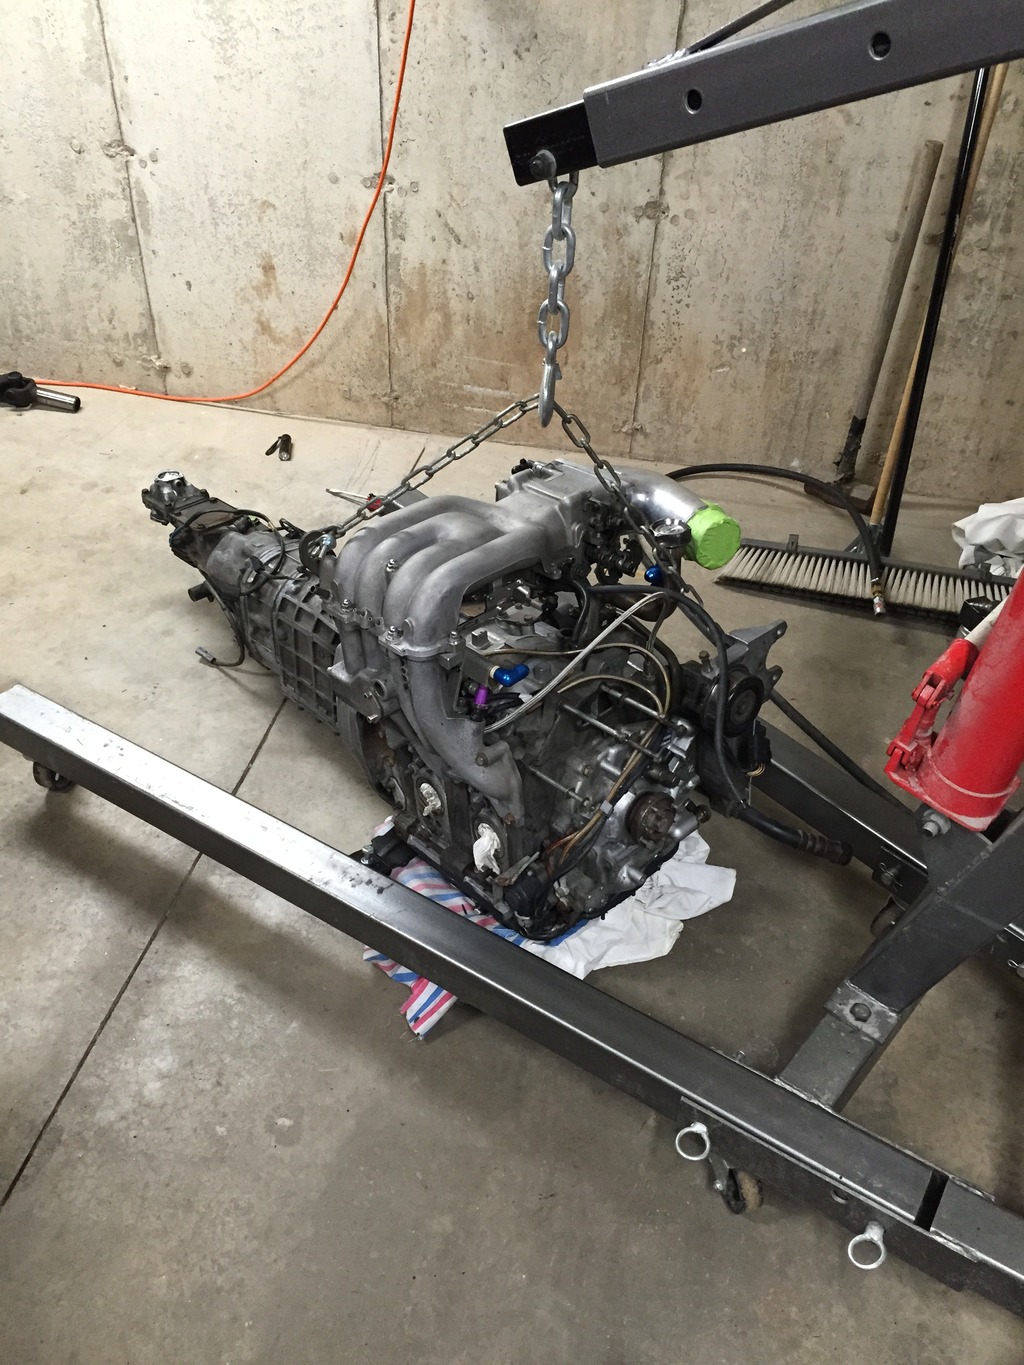
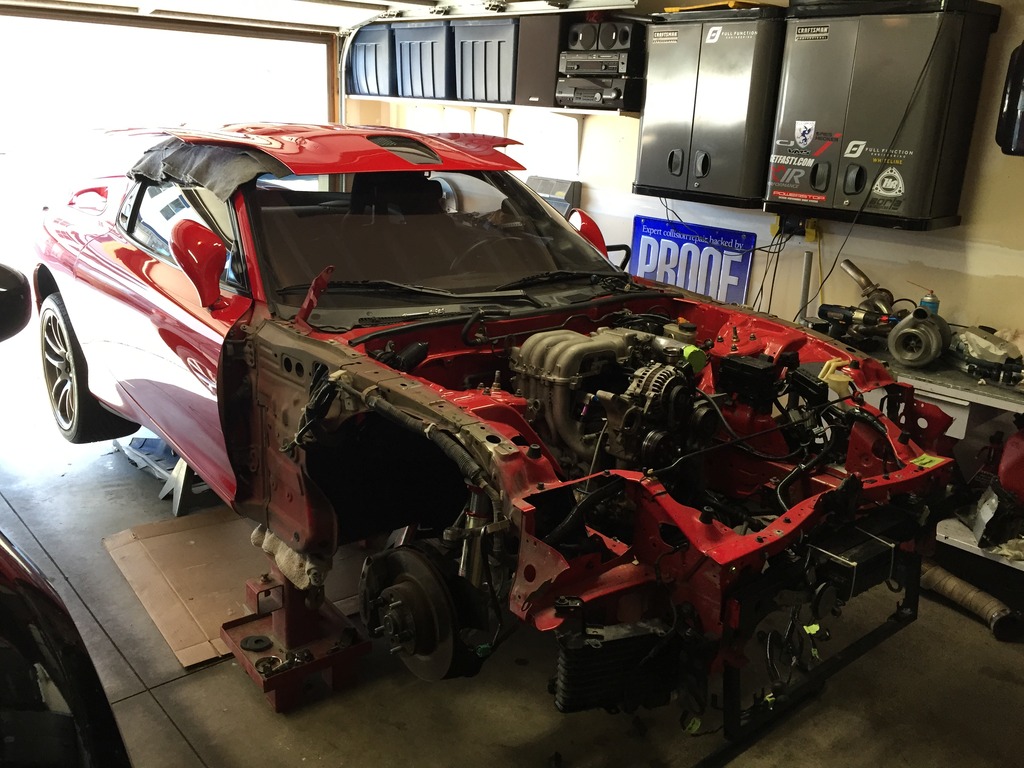
Update:
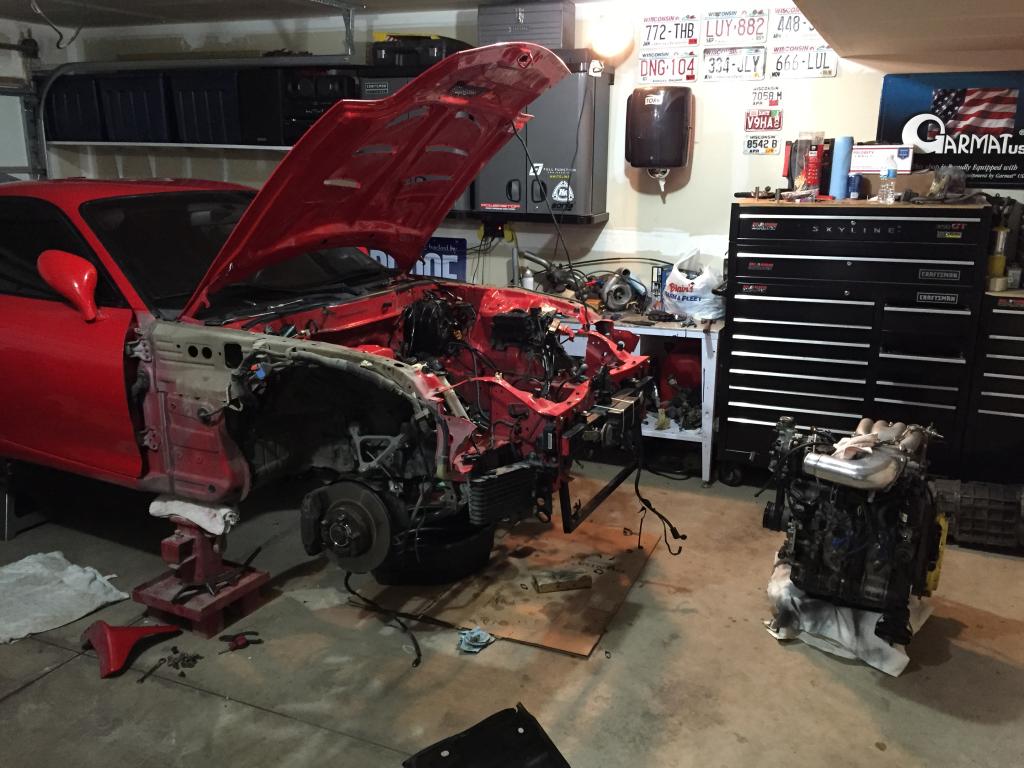
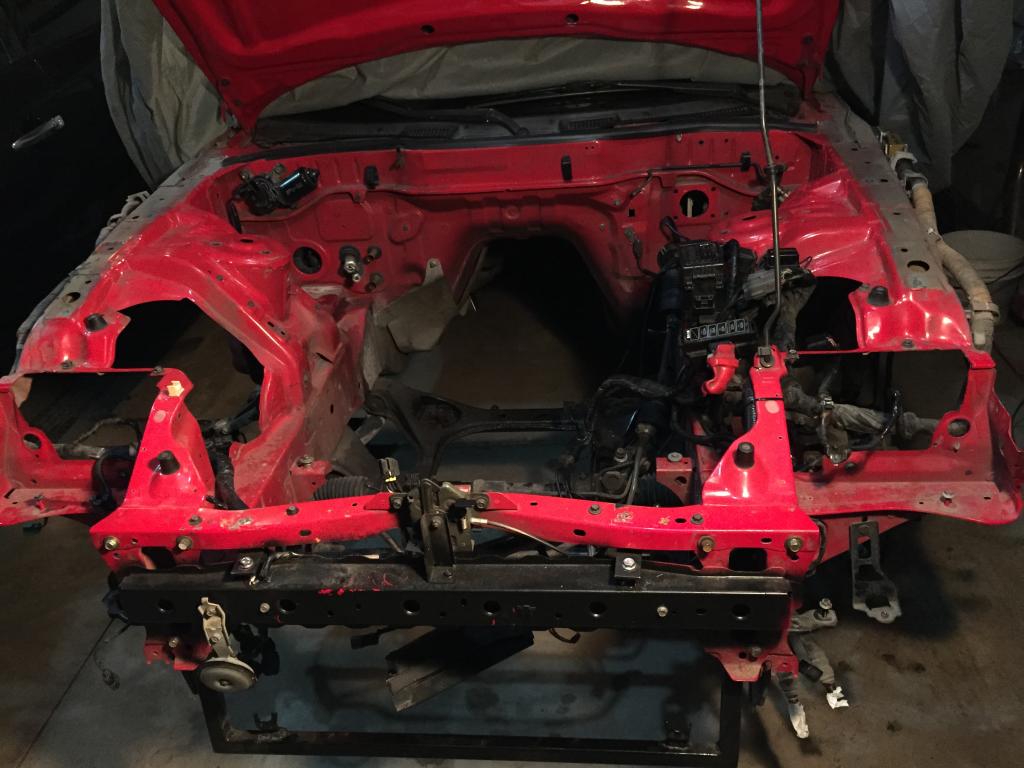
I got the engine out and started cleaning up all the wiring issues I found in the car. On top of that all the other issues that keep popping up. I will be surprised if I get this car on the road this summer! Here are some photos:

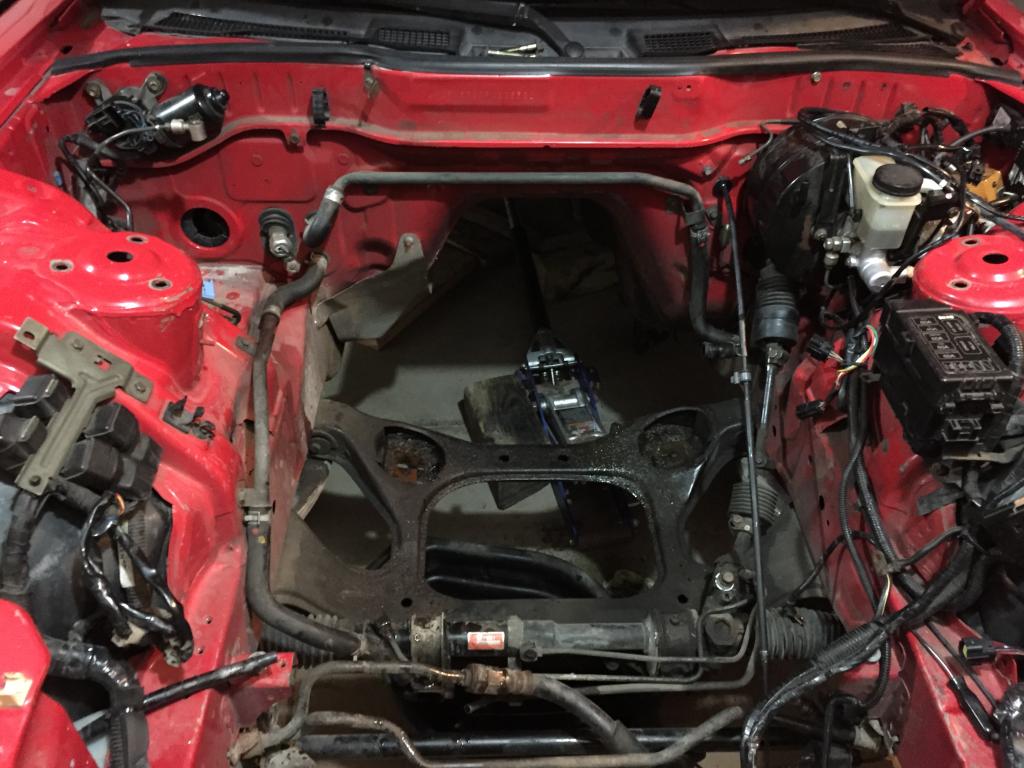
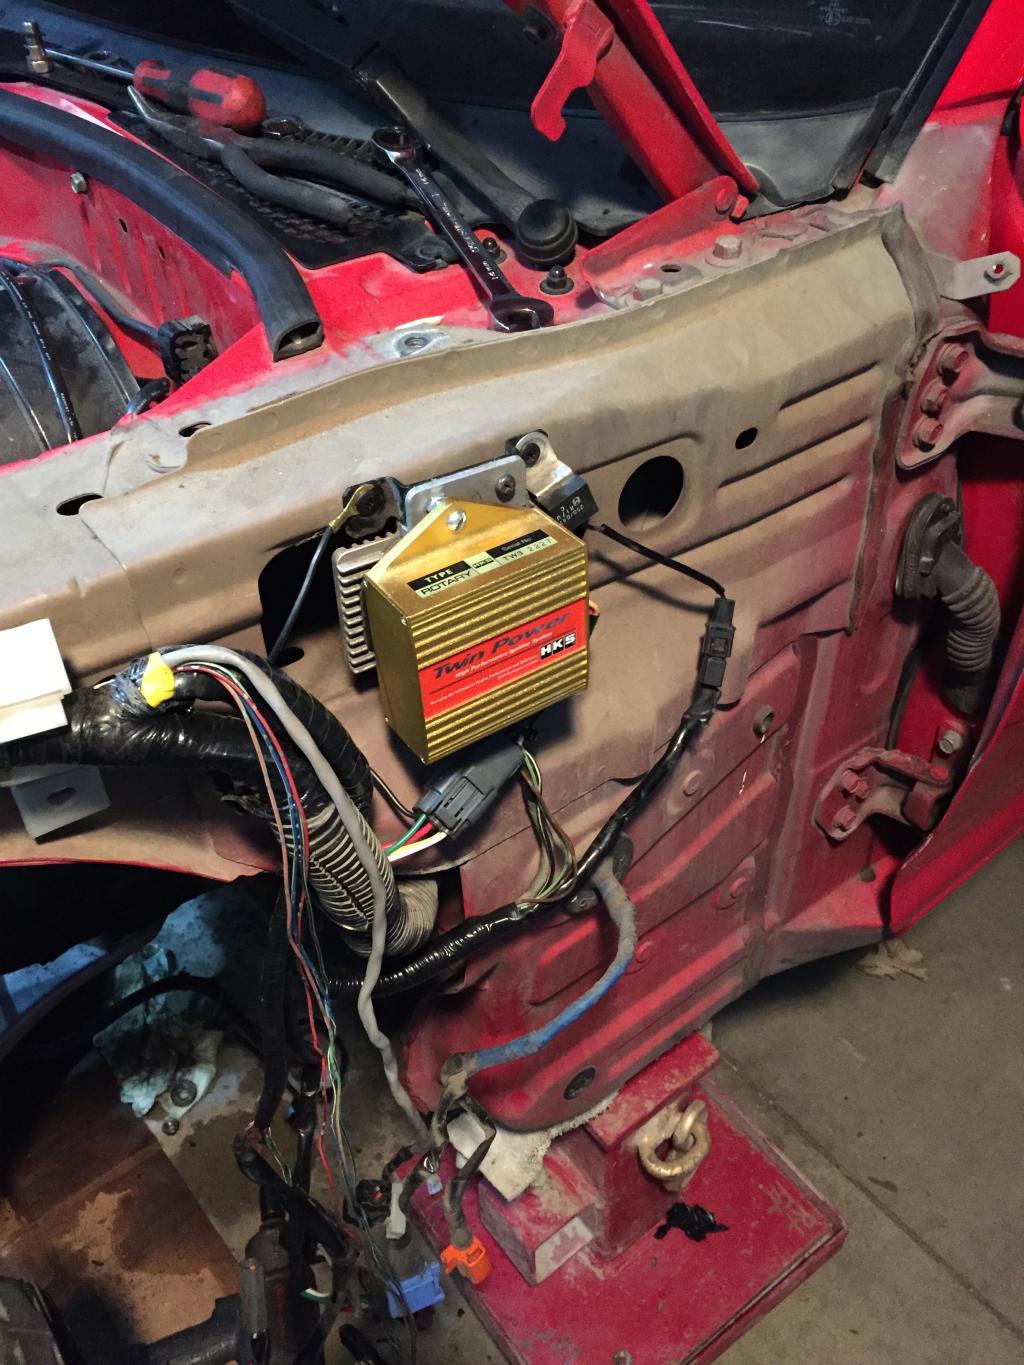
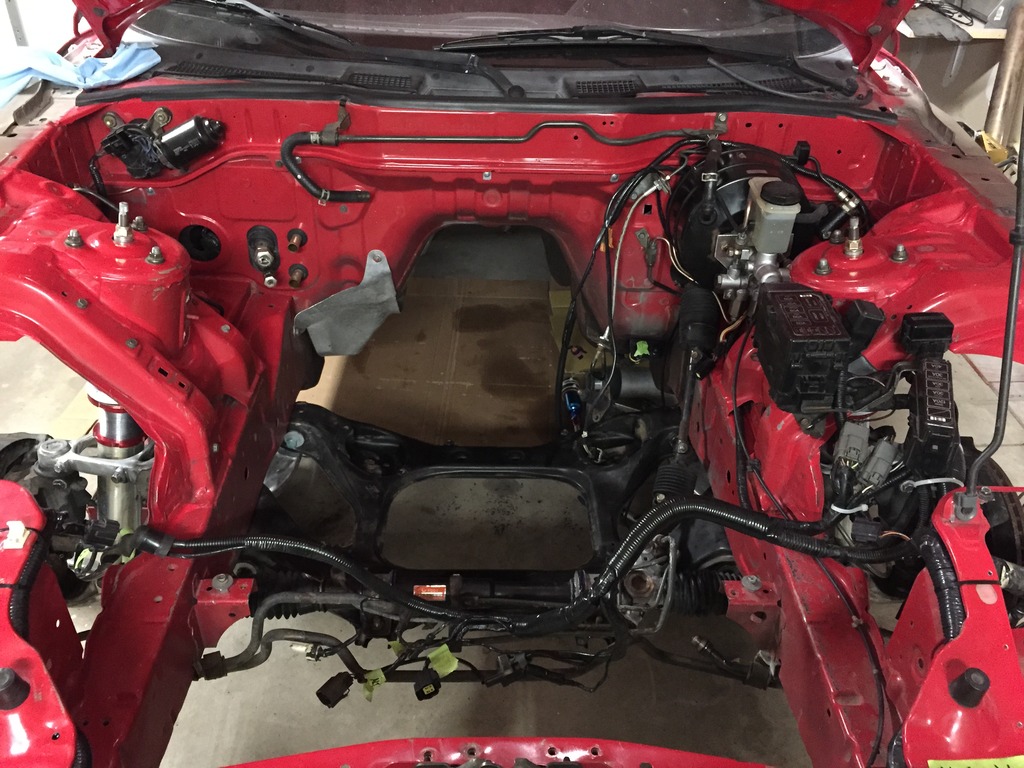
De-loomed the main harness on both sides of the car and moved the connectors I am no longer using to clean up the engine bay. Also moved the ignitor and HKS Twin Power to behind the fender.
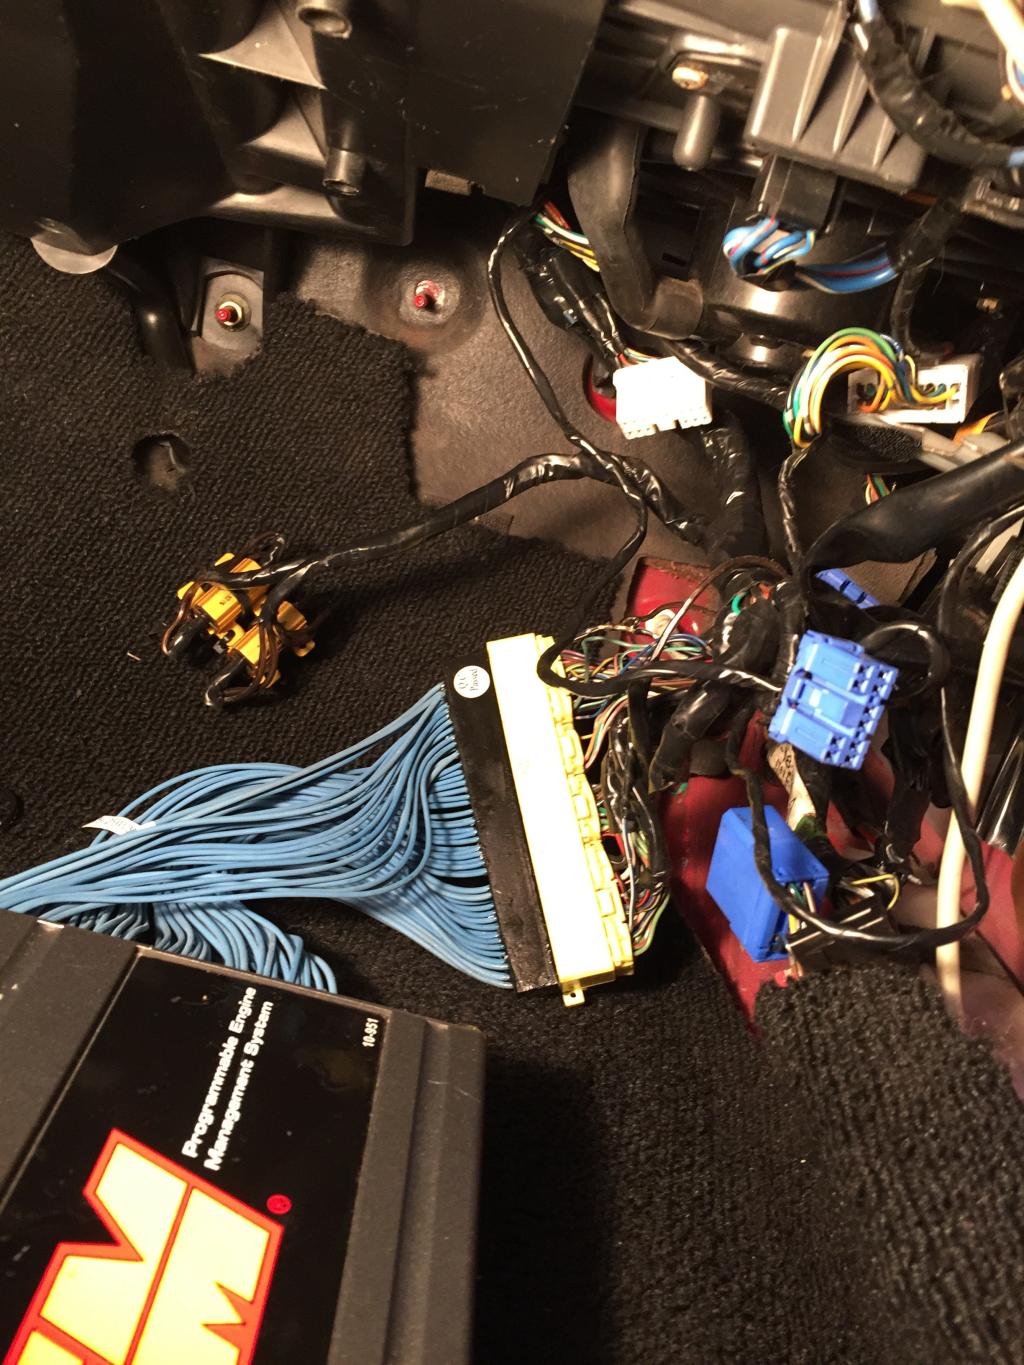
Now for the rats nest of wiring the prior owner had "professionally" done. Half the wires in the engine harness are speaker wire!
How I left the car:
I got the engine out and started cleaning up all the wiring issues I found in the car. On top of that all the other issues that keep popping up. I will be surprised if I get this car on the road this summer! Here are some photos:


De-loomed the main harness on both sides of the car and moved the connectors I am no longer using to clean up the engine bay. Also moved the ignitor and HKS Twin Power to behind the fender.

Now for the rats nest of wiring the prior owner had "professionally" done. Half the wires in the engine harness are speaker wire!

How I left the car:

 02-08-15, 10:38 AM
#52
That sounds like something "RS MOTORS" in Minnesota use to own! Lol
They are known for "professionally" doing wiring with speaker cables. Actually they relocated a battery with monster cable, which was spliced 3 times (yeah it had 2-4 burn marks in it too).
Don't you just love how people do half-assed wiring?!?!?
Looking good otherwise. Keep on truckin!
-Nick
They are known for "professionally" doing wiring with speaker cables. Actually they relocated a battery with monster cable, which was spliced 3 times (yeah it had 2-4 burn marks in it too).
Don't you just love how people do half-assed wiring?!?!?
Looking good otherwise. Keep on truckin!
-Nick
02-17-15, 08:08 AM
#53
Another small update:
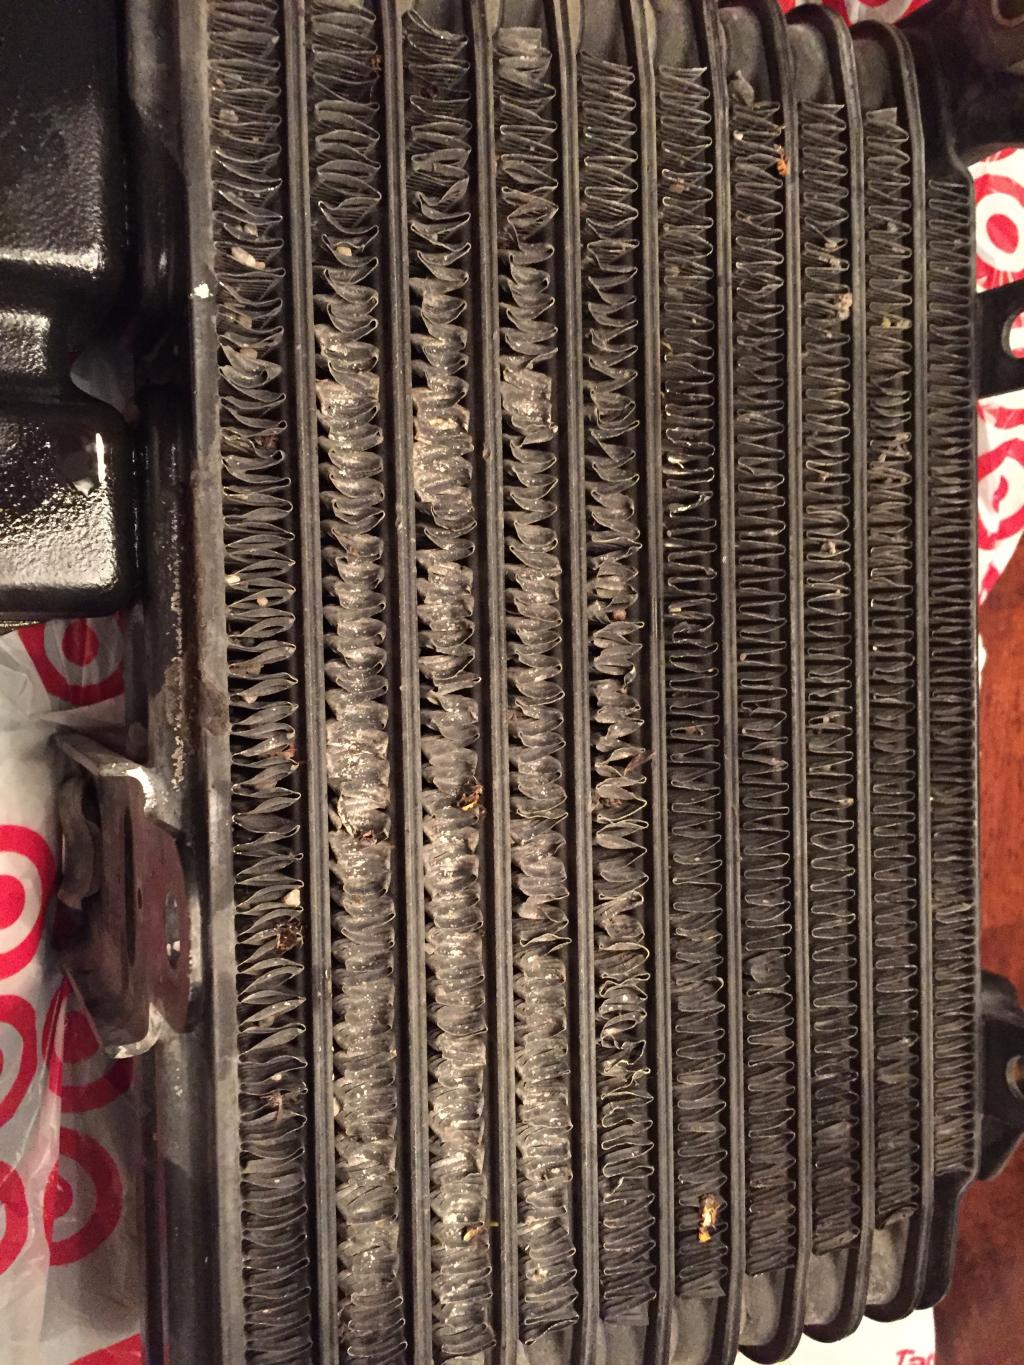
I decided to pull my oil coolers and spend a couple hours straightening all of the bent fins. I have it on the mod list to buy 32 row oil coolers but I figured this will get me through until I buy them:
Before:
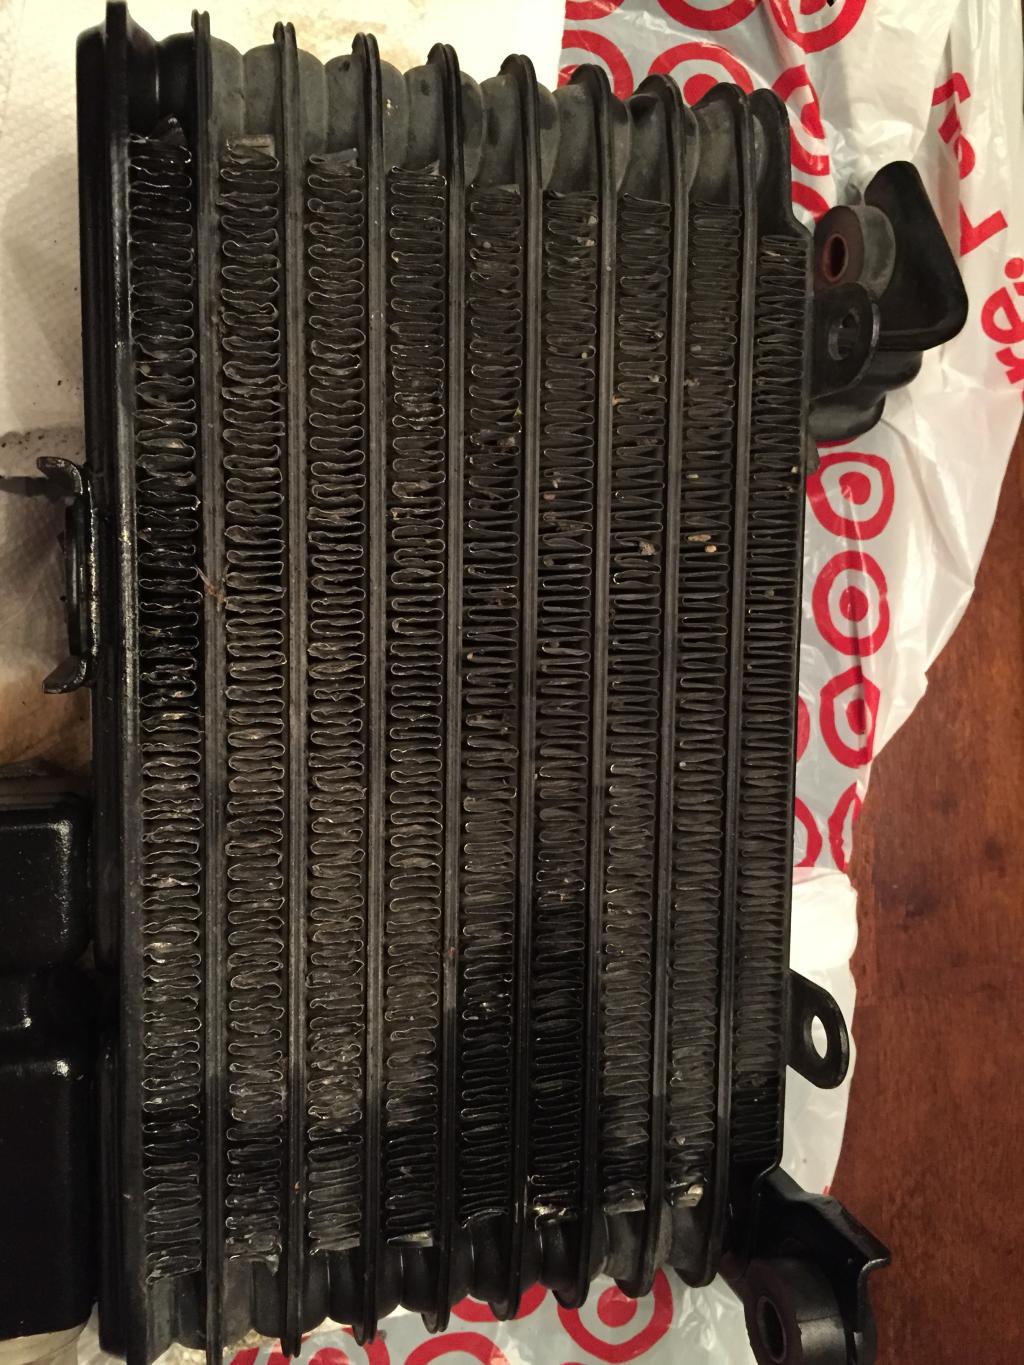
After:
By the way they are not leaking, its just oil from removing them.
I decided to pull my oil coolers and spend a couple hours straightening all of the bent fins. I have it on the mod list to buy 32 row oil coolers but I figured this will get me through until I buy them:
Before:

After:

By the way they are not leaking, its just oil from removing them.
 03-08-15, 07:20 PM
#56
Thank you.
Another update. I was able to spend a couple hours getting started on my brake line setup. I made a bracket to mount my proportioning valve under my master cylinder and began to bend line. I don't think I did to bad for never making brake lines before.

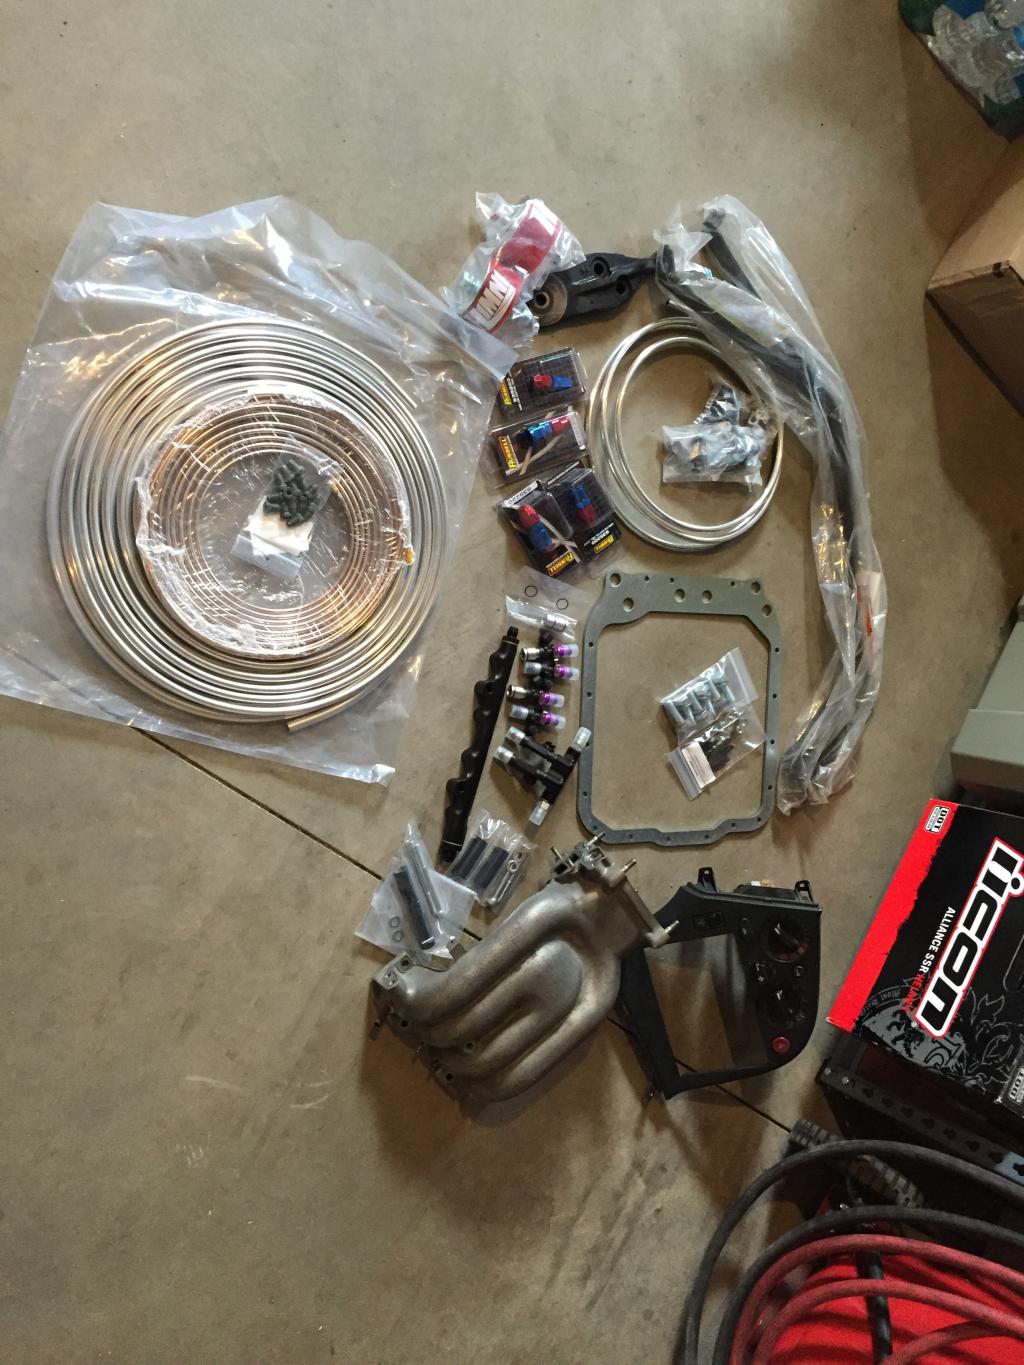
And here is a photo of one box of new parts for the RX7. I have quite a bit of work in front of me!
Still need to make the lines for the front wheels then bend up some new -8 and -6 fuel lines for under the car.
Another update. I was able to spend a couple hours getting started on my brake line setup. I made a bracket to mount my proportioning valve under my master cylinder and began to bend line. I don't think I did to bad for never making brake lines before.

And here is a photo of one box of new parts for the RX7. I have quite a bit of work in front of me!

Still need to make the lines for the front wheels then bend up some new -8 and -6 fuel lines for under the car.


 03-20-15, 02:44 PM
#63
Another small update (I keep getting an hour here and there to work on this thing!)
This weekend I de-greased and power washed the engine and redid the oil pan seal (Pulled the old cardboard gasket and replaced with with RTV and put on a Banzai brace). Also added a Lt steel engine mount bracket and new Himni mounts.
I made a flange for bulkhead fitting for my fuel lines on the fire wall. It will make it easy to disconnect the lines if needed:
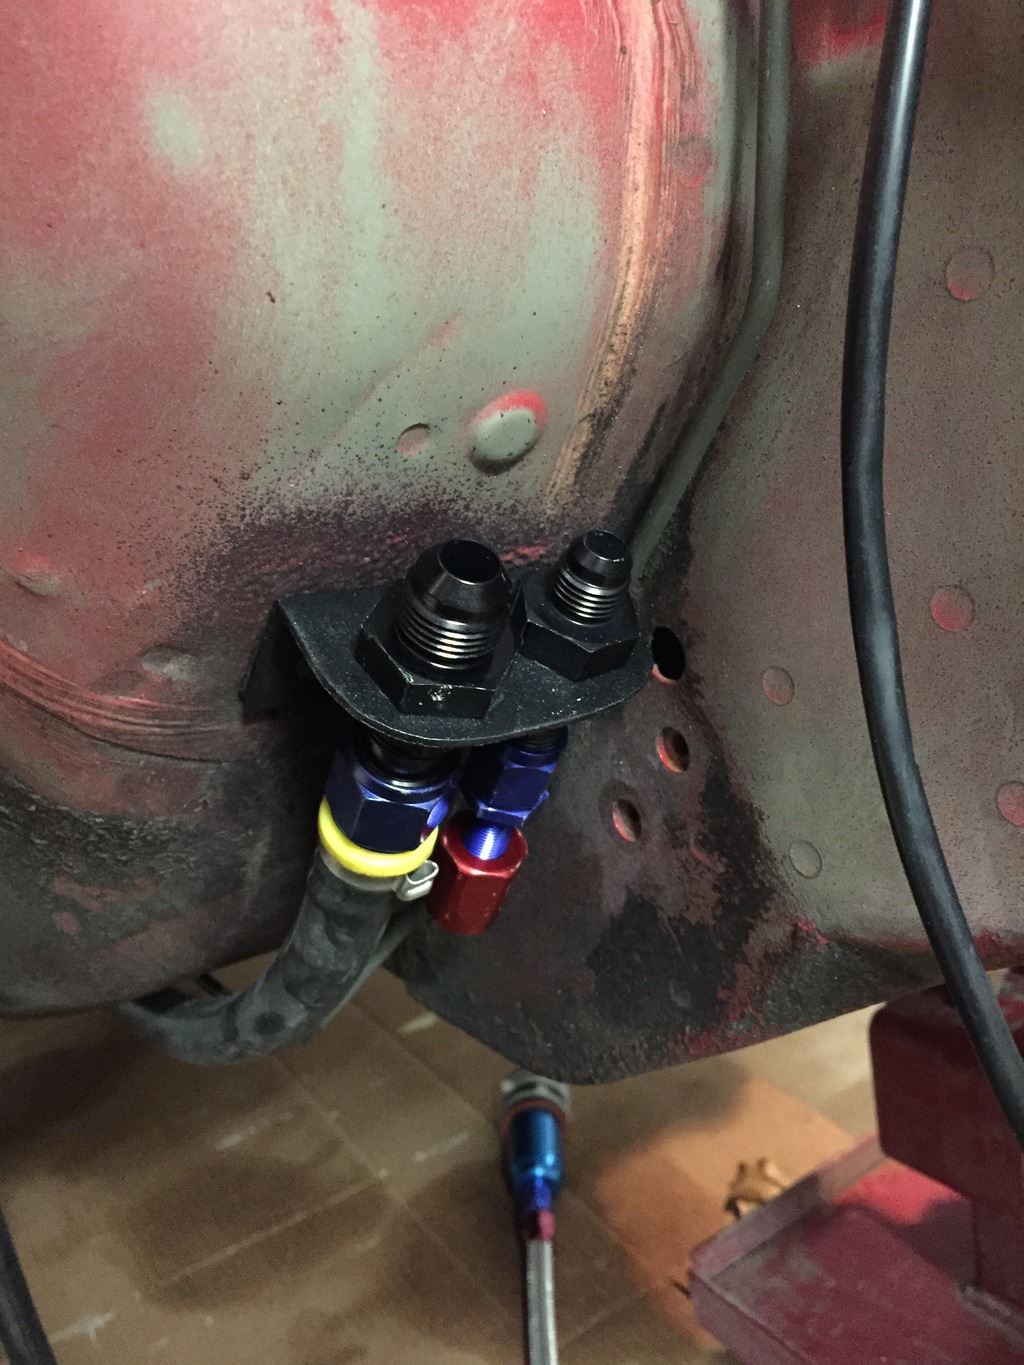
The lines will be replaced with -8 and -6 custom bent aluminum line within a week or so.
Also made a plate to mount my coils where the OEM A/C compressor use to be. This should help with heat soak and makes even more space under the intake manifold:

I will hopefully get the engine and front suspension back in the car next Friday!
This weekend I de-greased and power washed the engine and redid the oil pan seal (Pulled the old cardboard gasket and replaced with with RTV and put on a Banzai brace). Also added a Lt steel engine mount bracket and new Himni mounts.

I made a flange for bulkhead fitting for my fuel lines on the fire wall. It will make it easy to disconnect the lines if needed:

The lines will be replaced with -8 and -6 custom bent aluminum line within a week or so.
Also made a plate to mount my coils where the OEM A/C compressor use to be. This should help with heat soak and makes even more space under the intake manifold:

I will hopefully get the engine and front suspension back in the car next Friday!
 03-31-15, 08:41 AM
#66
Well I decided to just take a day off of work to make some progress on the car and got quite a bit done in 8 hours! My build has suddenly taken a new direction now that I found out my wife is pregnant. I was going to get the engine built (Confirm it is actually ported) but now my goal is the get the car running and leave it at the modest 500rwhp it had when I pulled it apart this winter. Once our baby gets older ill pull it all apart again and go for more.
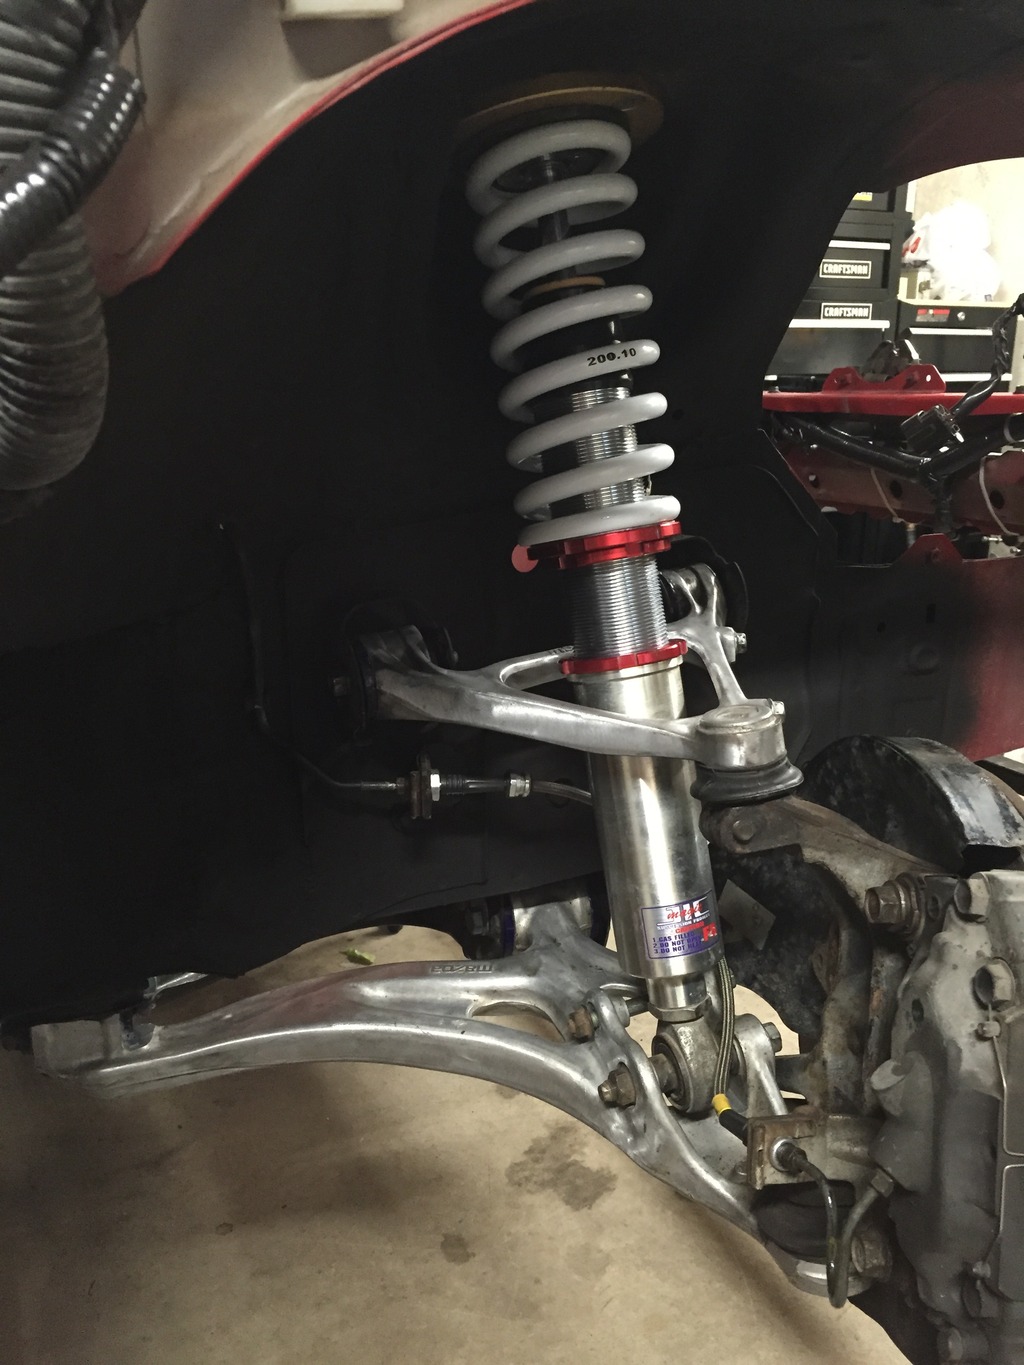
First thing I did was get the suspension and cross member back in. I replaced all the bushings with Superpro including the steering rack and sway bar. (The upper control arms are a bitch. Superpro really dropped the ball on that design).
At this point I did not take as many photos as I would have liked. I replaced the fuel tank straps, ran a new -6 return line, and got the trans back on the motor. I had a friend come over and we got the engine back in the car.
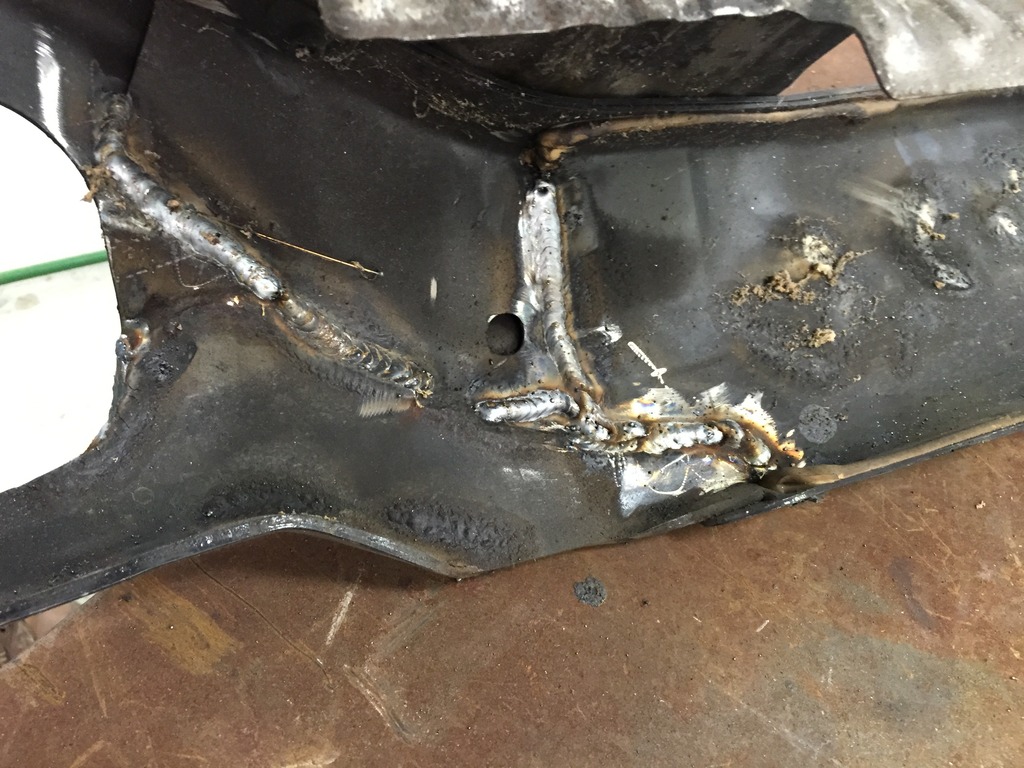
After all that I decided before I re-installed the PPF I needed to reinforce it. I decided to weld up every seam I could find that the factory ether stitch welded or just ignored all together. I did not take a picture of the entire thing but you get the idea. I also welded up all the webbing on the other side. This will get blasted and powder coated.
Before:
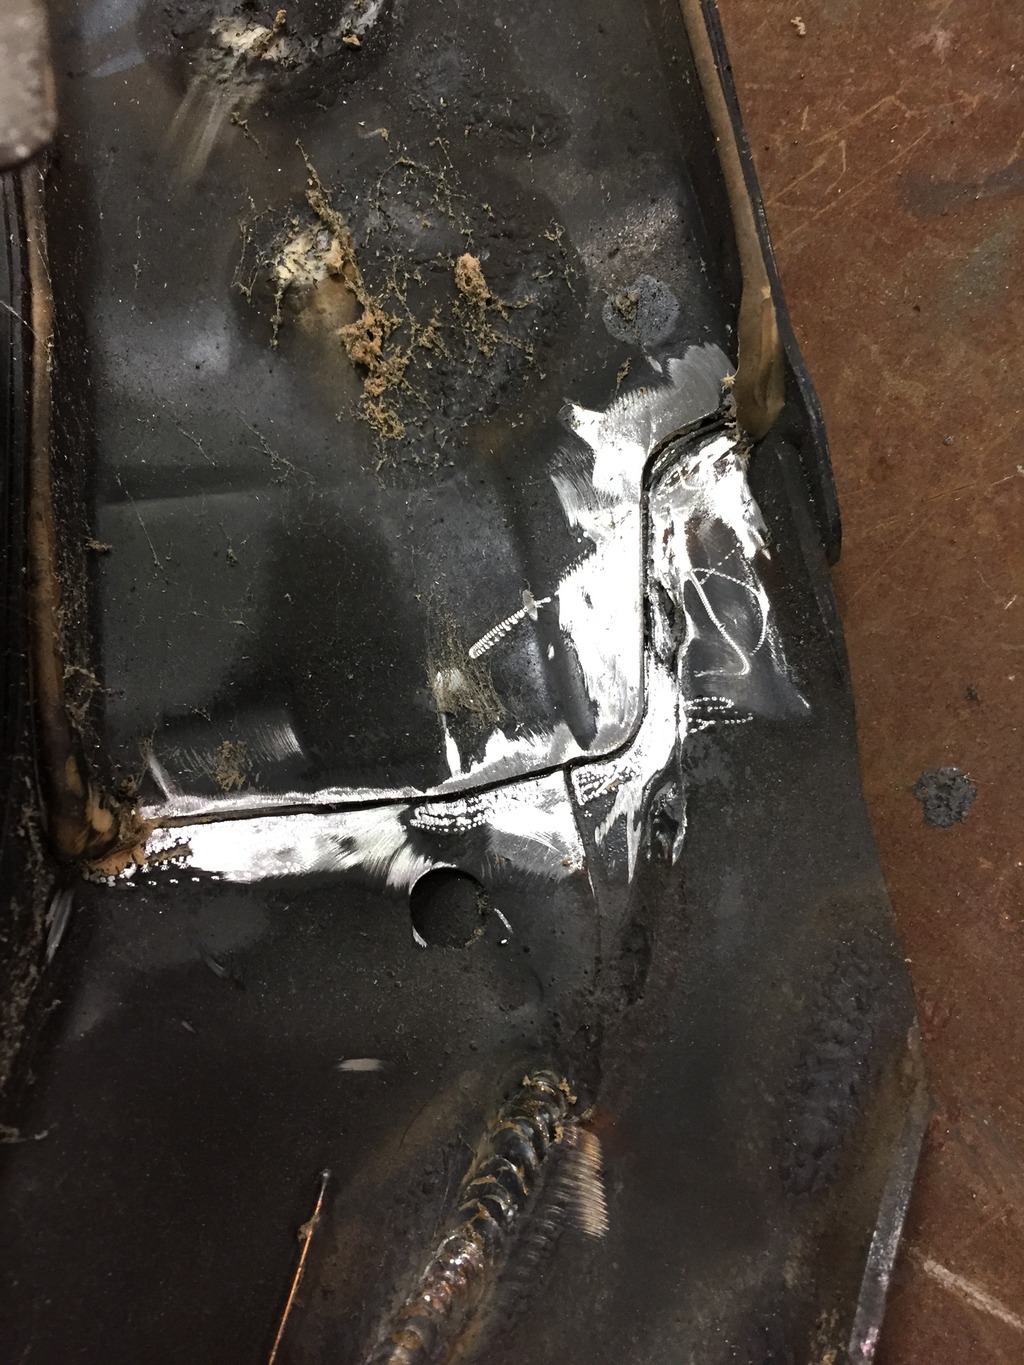
After:
From here I just have a lot of time consuming little crap to get the car up and running again. I will need some help from an AEM "Expert" on how to scale my maps for my new injectors, but that will come later.
First thing I did was get the suspension and cross member back in. I replaced all the bushings with Superpro including the steering rack and sway bar. (The upper control arms are a bitch. Superpro really dropped the ball on that design).


At this point I did not take as many photos as I would have liked. I replaced the fuel tank straps, ran a new -6 return line, and got the trans back on the motor. I had a friend come over and we got the engine back in the car.


After all that I decided before I re-installed the PPF I needed to reinforce it. I decided to weld up every seam I could find that the factory ether stitch welded or just ignored all together. I did not take a picture of the entire thing but you get the idea. I also welded up all the webbing on the other side. This will get blasted and powder coated.
Before:

After:

From here I just have a lot of time consuming little crap to get the car up and running again. I will need some help from an AEM "Expert" on how to scale my maps for my new injectors, but that will come later.
04-06-15, 02:53 PM
#68
Thank you, my wife and I could not be more excited.
Another small update. I got the PPF powder coated and put back in... forgot to take photos but we all know what a clean PPF looks like.
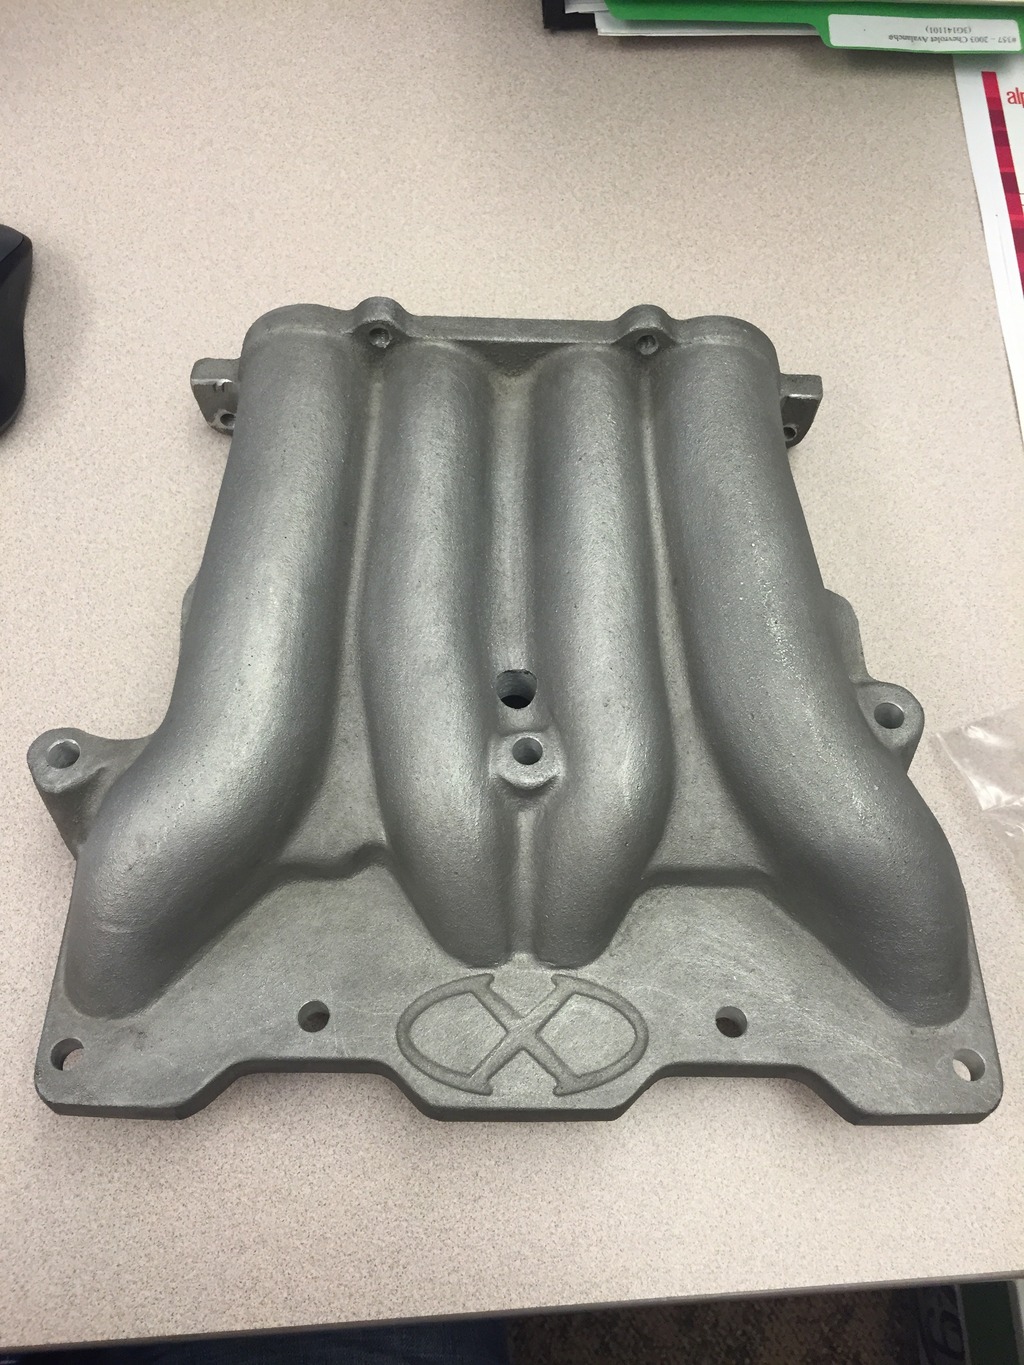
I also go a new Xcessive LIM in the mail, I should finally be able to wrap up my fuel system after another million dollars in fittings.
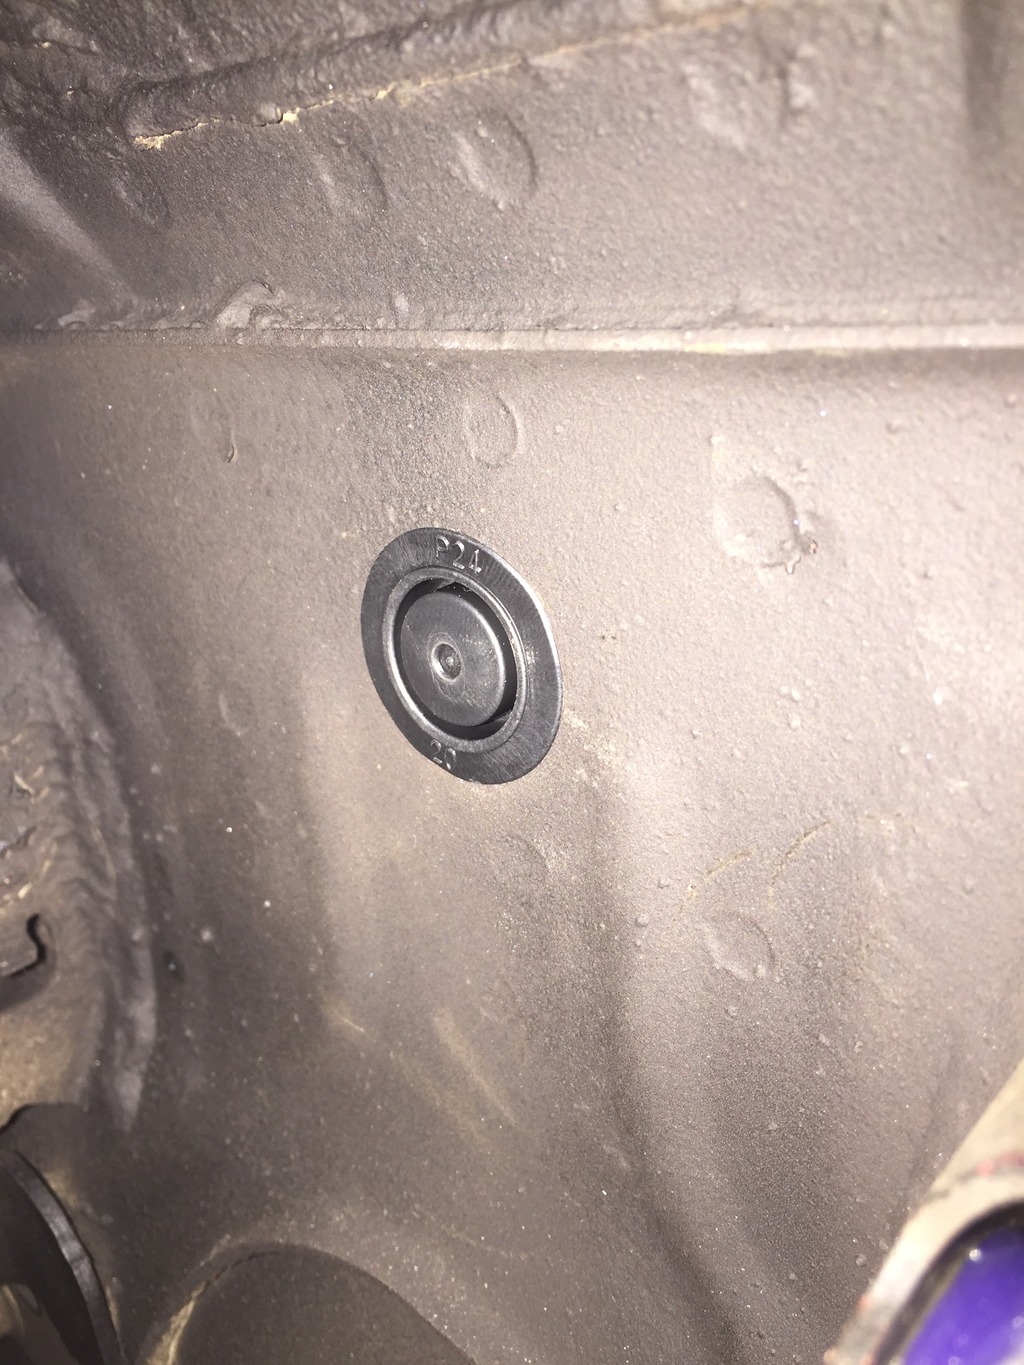
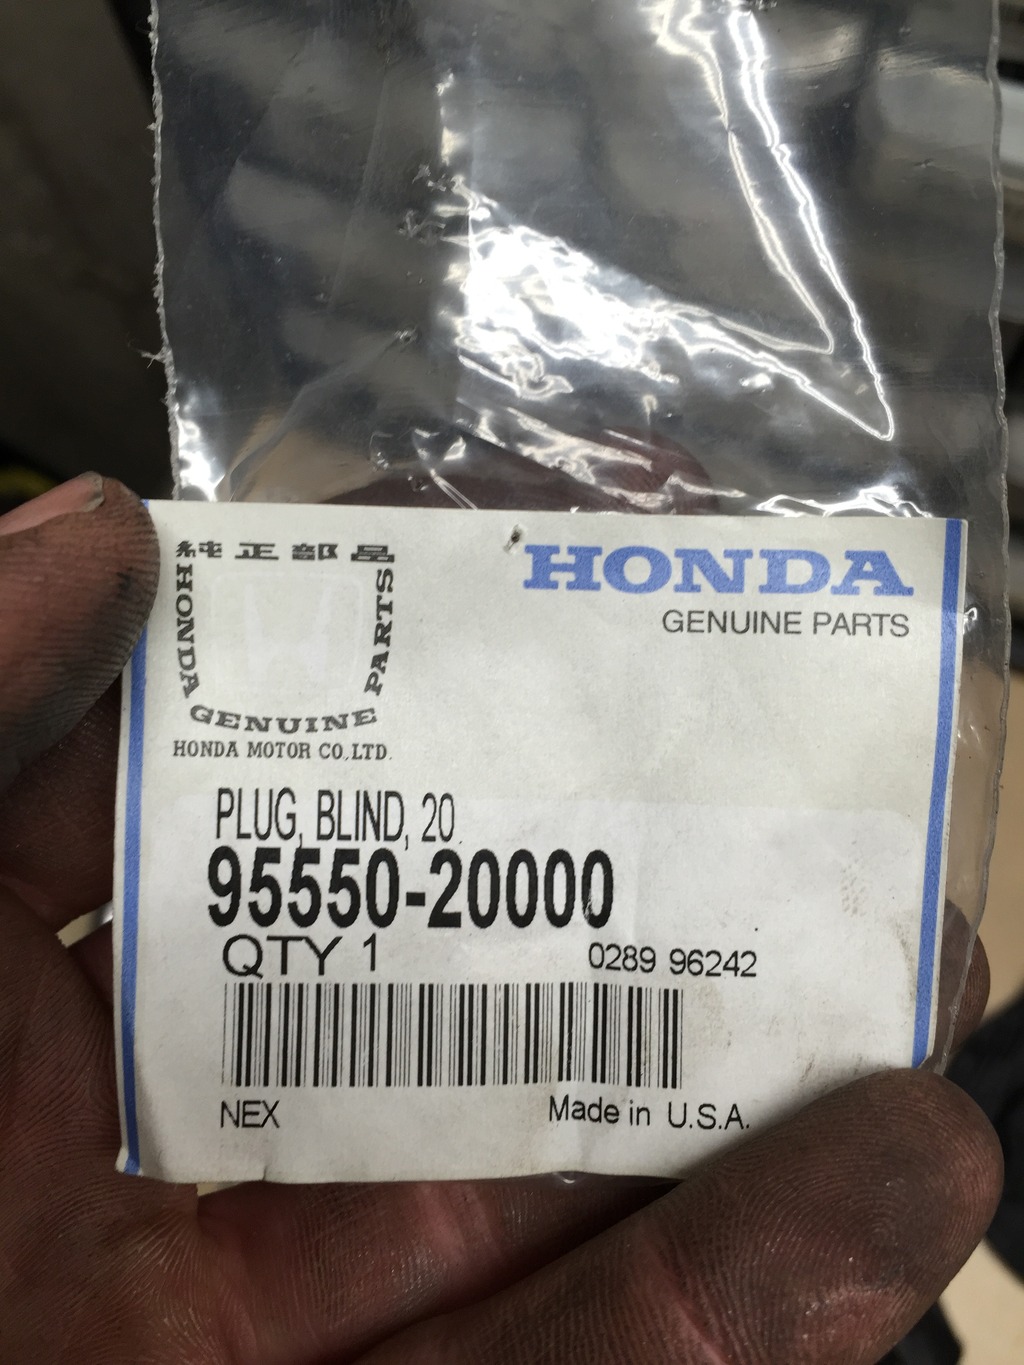
Also a little trick for everyone that has deleted their ABS, I had some old blind plugs from my Honda days laying around and they just happen to fit perfectly. Here is what it looks like and the part number:

I need to now source some plugs for broken connectors in my harness and then get the engine all wired up. Also need to figure out what to use for a power steering cooler since the stock one is stupid big and just gets in the way with a v-mount. Its all the little stuff that takes time and money.
Another small update. I got the PPF powder coated and put back in... forgot to take photos but we all know what a clean PPF looks like.
I also go a new Xcessive LIM in the mail, I should finally be able to wrap up my fuel system after another million dollars in fittings.

Also a little trick for everyone that has deleted their ABS, I had some old blind plugs from my Honda days laying around and they just happen to fit perfectly. Here is what it looks like and the part number:


I need to now source some plugs for broken connectors in my harness and then get the engine all wired up. Also need to figure out what to use for a power steering cooler since the stock one is stupid big and just gets in the way with a v-mount. Its all the little stuff that takes time and money.
 04-07-15, 07:12 PM
#71
There was nothing to straighten, it did not show any signs of cracking or twisting.
And I will be taking it to the Lake Mills Cars and Coffee meet the first Sunday of every month. I would love to get it there for May but I have a ton of work to do.
And I will be taking it to the Lake Mills Cars and Coffee meet the first Sunday of every month. I would love to get it there for May but I have a ton of work to do.
04-08-15, 12:08 PM
#73
Sorry I was reading that on my cell phone and must have been reading to quickly.
I did weld up every seam that I could find on the PPF as well as all of the webbing on the back side. I dont think I should have to worry about the frame cracking on me.
I did weld up every seam that I could find on the PPF as well as all of the webbing on the back side. I dont think I should have to worry about the frame cracking on me.
04-08-15, 02:37 PM
#74
I wanted to go to the Lake Mills c&c last year but my work schedule would never allow it. i have a new job now so i hope to be able to make it out there now. did they start already?