Post pics of your engine bay


 06-10-09, 06:30 AM
#82
Our 91 Vert 402rwhp @14.7psi on pump gas, whole project can be seen here: http://www.banzai-racing.com/br_projects_vert_pg5.htm
There has been some small stuff added since these were taken..
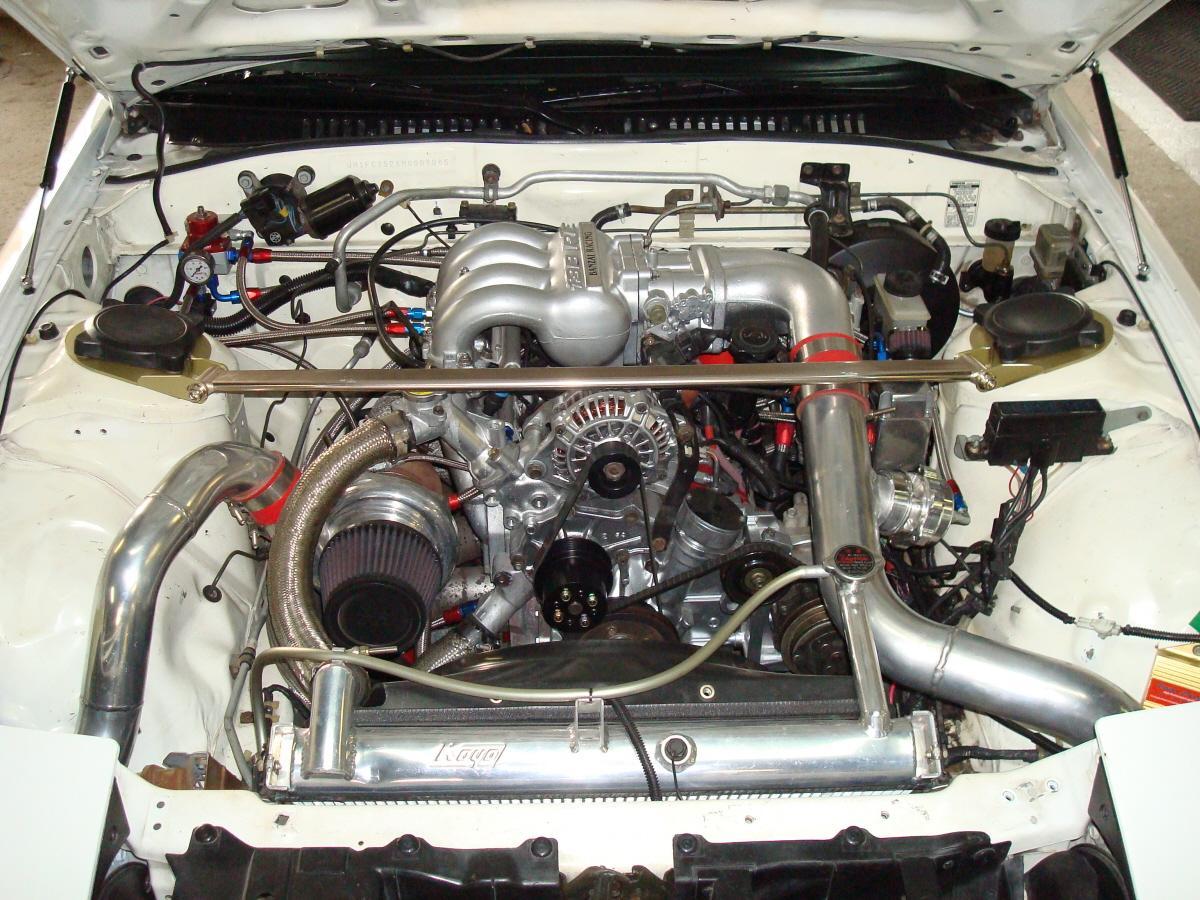
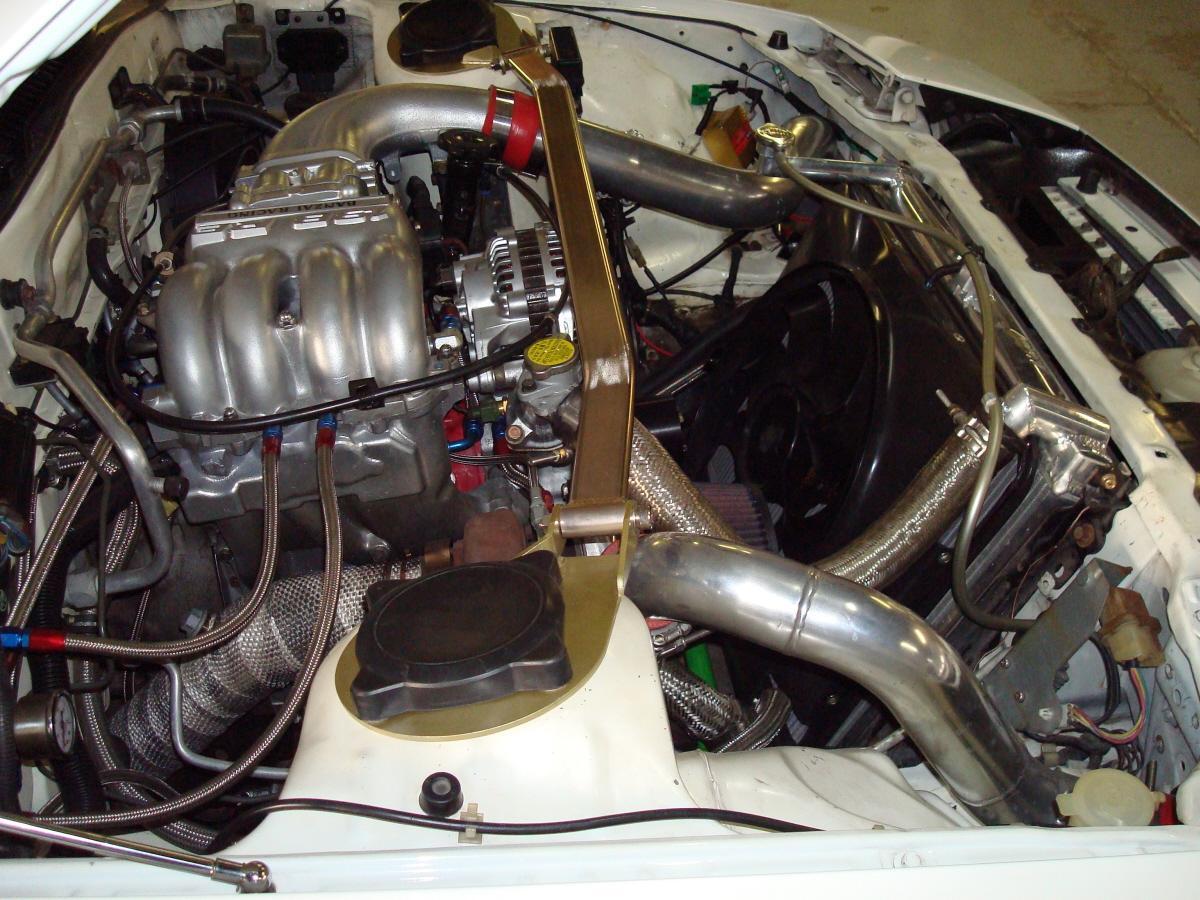
There has been some small stuff added since these were taken..
 06-11-09, 04:25 PM
#86
three spinning triangles
Join Date: Oct 2003
Location: SE Wisconsin
Posts: 1,441
Likes: 0
Received 0 Likes
on
0 Posts
that 13b-re power vert banzai has is HOT!
btw Banzai... youll be getting a PM from me in the next few days about that setup. i have a few questions.
btw Banzai... youll be getting a PM from me in the next few days about that setup. i have a few questions.
06-14-09, 01:44 PM
#87
1991 NA (daily driver).
Finally got off the schneid and tackled a bunch of little projects I've been postponing till the weather warmed up.
Tore off the intake(s), cleaned the 5th & 6th ports and VDI, painted the manifold, dynamic chamber, waterpump and housing, pulleys and various bracketry.
Replaced all the vacuum lines, fuel lines and caps (easily the most time consuming part of the project).
Relocated leading coil pack (surprisingly simple to do and eliminated about 20' of plug wire), installed new Godspeed radiator and made new front beauty panel out of 3/16" ABS sheet.
Deleted the AWS and secondary throttle plates along with the thermovalve and dashpot.
Had a cat delete ("test") pipe made... will save the (barely) functional cats for the next emission test in two years.
She runs great.
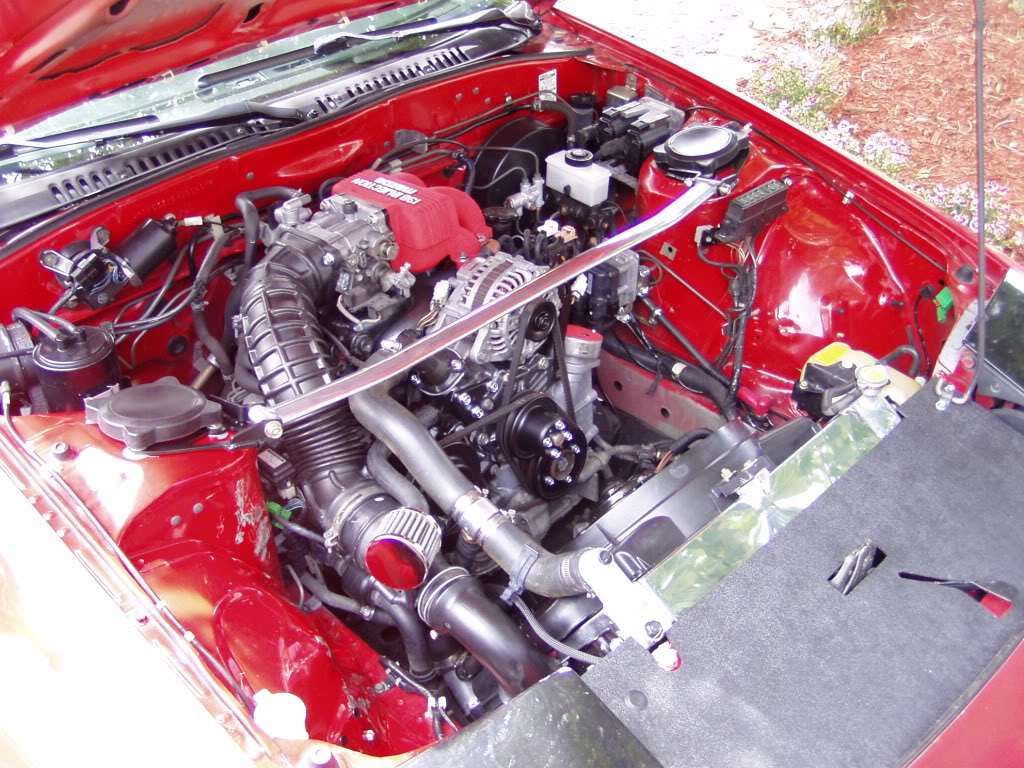
Thermowax and BAC are intact and functional.
Finally got off the schneid and tackled a bunch of little projects I've been postponing till the weather warmed up.
Tore off the intake(s), cleaned the 5th & 6th ports and VDI, painted the manifold, dynamic chamber, waterpump and housing, pulleys and various bracketry.
Replaced all the vacuum lines, fuel lines and caps (easily the most time consuming part of the project).
Relocated leading coil pack (surprisingly simple to do and eliminated about 20' of plug wire), installed new Godspeed radiator and made new front beauty panel out of 3/16" ABS sheet.
Deleted the AWS and secondary throttle plates along with the thermovalve and dashpot.
Had a cat delete ("test") pipe made... will save the (barely) functional cats for the next emission test in two years.
She runs great.
Thermowax and BAC are intact and functional.
06-14-09, 02:14 PM
#88
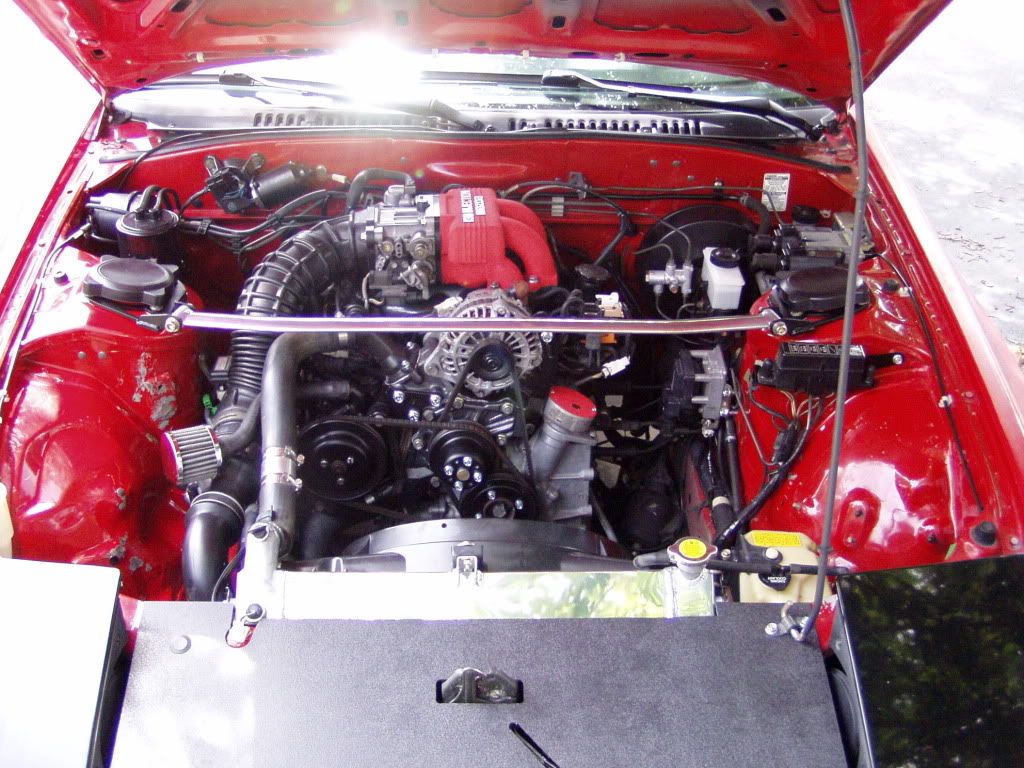
clokker, you make me want to pickup an N/A for a 2nd FC, and daily driver.
engine bay is awesome looking!
you should paint those banged up wheel wells, relocate the charcol canister, remove the cruise control, relocate the fuse box, and overflow tank...it will be so clean and simple in there.
engine bay is awesome looking!
you should paint those banged up wheel wells, relocate the charcol canister, remove the cruise control, relocate the fuse box, and overflow tank...it will be so clean and simple in there.
06-14-09, 04:11 PM
#89
Thank you.
One of these days...
Don't see the point in removing the canister, keeps the car from smelling of gas.
I take frequent road trips and the CC comes in handy.
The coolant recovery tank is already "custom" (to the extent that it's from another car) and I'm not sure where I'd move the fuse box to...not that I haven't thought about it.
06-14-09, 04:17 PM
#90
get some longer hose, and relocate the charcol canister....put it down low like where the fuel filter is, but on the passanger side.
the fuse box can be moved down on the frame rail, under where the battery tray is/used to be...next to the radiator fan shroud.
if you use the cruise control, leave it where it is. if you dont use it, removing it will make things alot cleaner.
the fuse box can be moved down on the frame rail, under where the battery tray is/used to be...next to the radiator fan shroud.
if you use the cruise control, leave it where it is. if you dont use it, removing it will make things alot cleaner.
06-14-09, 05:09 PM
#93
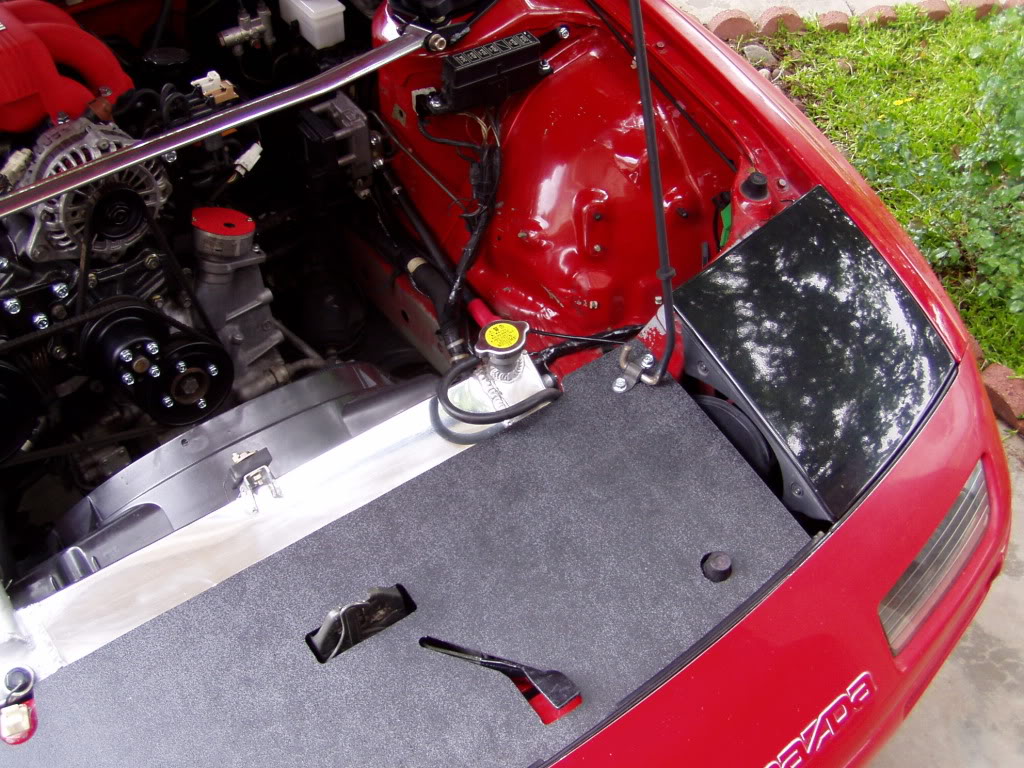
Yes, but I spent a lot of time looking for the perfect tank just to move it out of the front. It's original space is now occupied by a large K&N and the other side houses the fan control circuitry.
Part of the aesthetic I was going for was to keep the bay looking more-or-less OEM, just cleaned up a bit.
Part of the aesthetic I was going for was to keep the bay looking more-or-less OEM, just cleaned up a bit.
06-14-09, 05:49 PM
#95
An alloy tank puts me on the road to an engine bay like yours...gorgeous, but way too high maintenance for a beater daily car.
I have seen some aluminum tanks used as power steering reservoirs that look like they could be suitably modified for recovery use but that level of effort has been reserved for the V-8 FD project lately.
I have seen some aluminum tanks used as power steering reservoirs that look like they could be suitably modified for recovery use but that level of effort has been reserved for the V-8 FD project lately.
 06-15-09, 07:39 AM
#99
First, remove everything you can- battery, coils, fusebox, intake...everything that can be unbolted- and spend some quality time with Simple Green/Purple Power and a scrub brush to get the sheetmetal as clean as possible.
This is harder than it sounds since there are some fairly inaccessible areas to get to.
Then, look at all the minor bracketry (like the piece that holds the fuse box to the strut tower) and if it's corroded, clean it off and paint it. Satin black is a better choice (and more "factory" looking) than gloss- plus, it dries fast and doesn't show flaws as much.
Start reinstalling pieces, making sure they're clean as possible.
Now, you're reassembled and have a baseline to work with- you didn't think you were done, did you?
Examine the bay as a whole...what part/area looks the best, which is the worst?
You'll have to bring the worst part up to the level of the best- what you want is a consistent level of finish.
Nothing looks more jarring than one shiny/new part floating in a sea of grime and corrosion.
Better to have everything be "OK" than a mixture of very good and bad.
New hardware goes a long way as well.
I see in your pic that there are a lot of white zip ties...black are less noticeable and if there are multiple ties on one run, make the spacing even.
Even better than zip ties....spend some quality time in a junkyard looking at engine bays. Manufacturers use a plethora of clever clips, clamps and holders for wires, hoses and tubes.
Many of these can be used in your bay and will give a more professional appearance than just ziptying *****-nilly.
They also use lots of formed hoses and it's likely you can find some that will fit your needs. These will eliminate the look of randomly draped tubes all over the place.
All this will make the engine compartment look much nicer, and you haven't even modified or moved anything around yet.
06-16-09, 08:17 AM
#100
OK, Grip and Rob...this is for you.
Went to the junkyard looking for exhaust hangers and just by chance, spotted a coolant reservoir that looked promising...
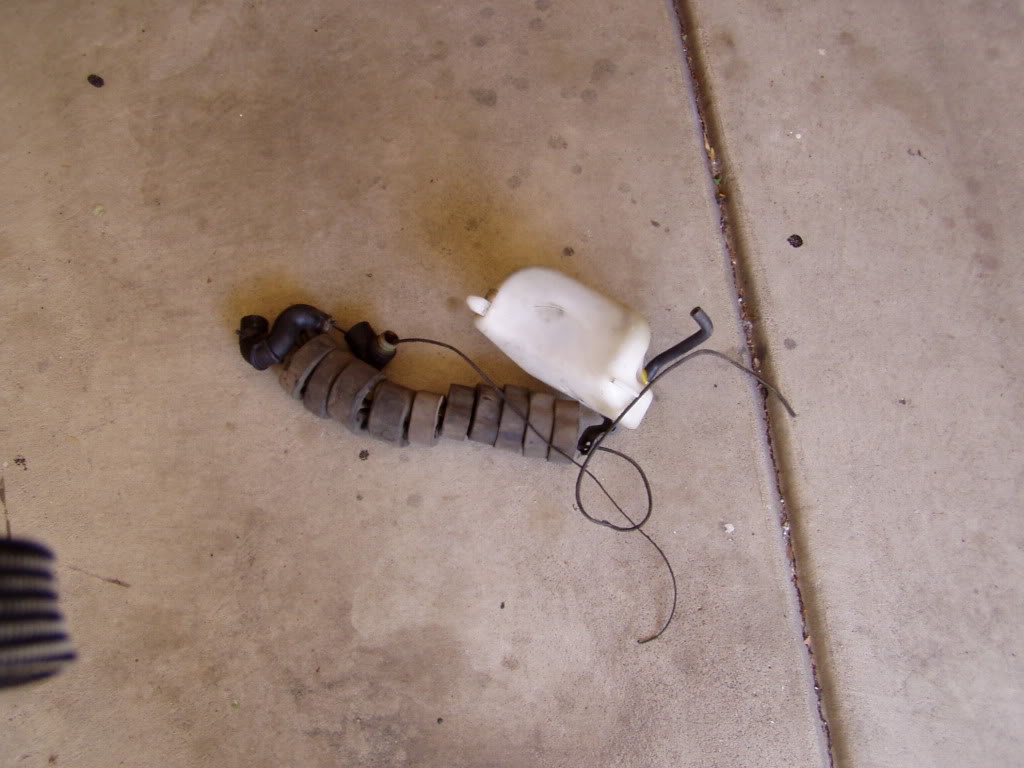
Total cost of everything pictured was $3.24...Jeez, I love junkyards.
Did a bit of relay relocation and it fits like so...
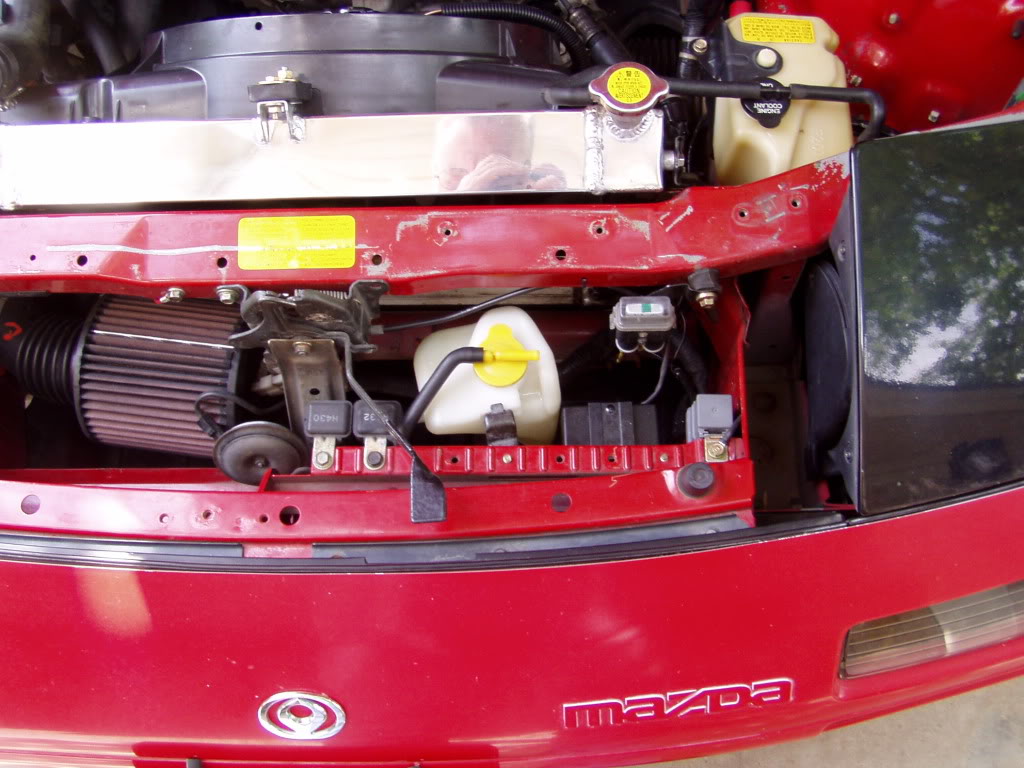
And the final install looks like this...
It is nicer, no?
Played around with the fusebox a little but couldn't find any functionally superior place to stick it without fooling with the wiring.
It could be different but I didn't see how it was any better, so it returned to the stock location.
Now it's time to move on to the next project...alternator relocation.
Went to the junkyard looking for exhaust hangers and just by chance, spotted a coolant reservoir that looked promising...
Total cost of everything pictured was $3.24...Jeez, I love junkyards.
Did a bit of relay relocation and it fits like so...
And the final install looks like this...
It is nicer, no?
Played around with the fusebox a little but couldn't find any functionally superior place to stick it without fooling with the wiring.
It could be different but I didn't see how it was any better, so it returned to the stock location.
Now it's time to move on to the next project...alternator relocation.