DIY: Electric Fan Shroud
 12-16-08, 08:59 PM
#1
DIY: Electric Fan Shroud
For those of us that are brave enough to run an electric fan, and have the will to do it the right way (instead of strapping a 16" FAL fan to the back of your radiator) I made a little DIY showing you how to make a custom fiberglass shroud.
This was my first attempt at fiberglass, and it wasn't hard at all. I made my shroud about 2 years ago, and it has been working great for me ever since, so I figured now's a good time to write a DIY on my success.
For this DIY, I will just be going through the steps, as I have no need or will to make another shroud for instructional purposes.
Tools:
-Paintbrush
-Cup (for fiberglass resin)
-Saw
-Hammer
-Stapler
Materials:
-Plywood
-Nails
-Fiberglass Mat and Resin
-Stretchy Fabric
-Seran Wrap
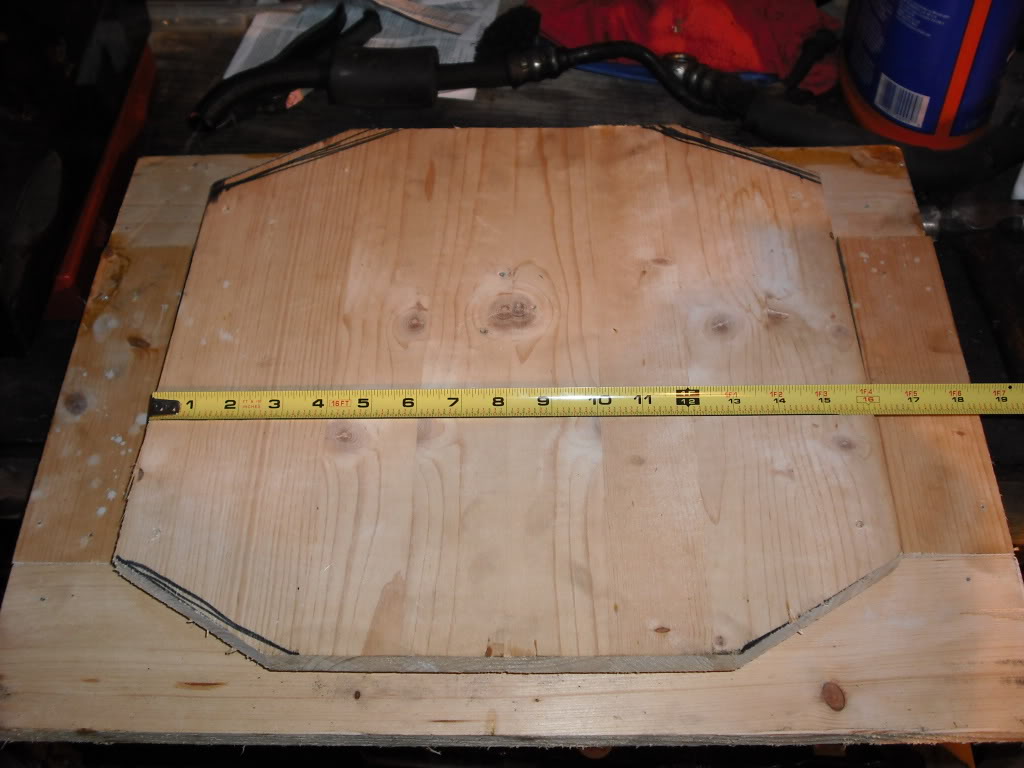
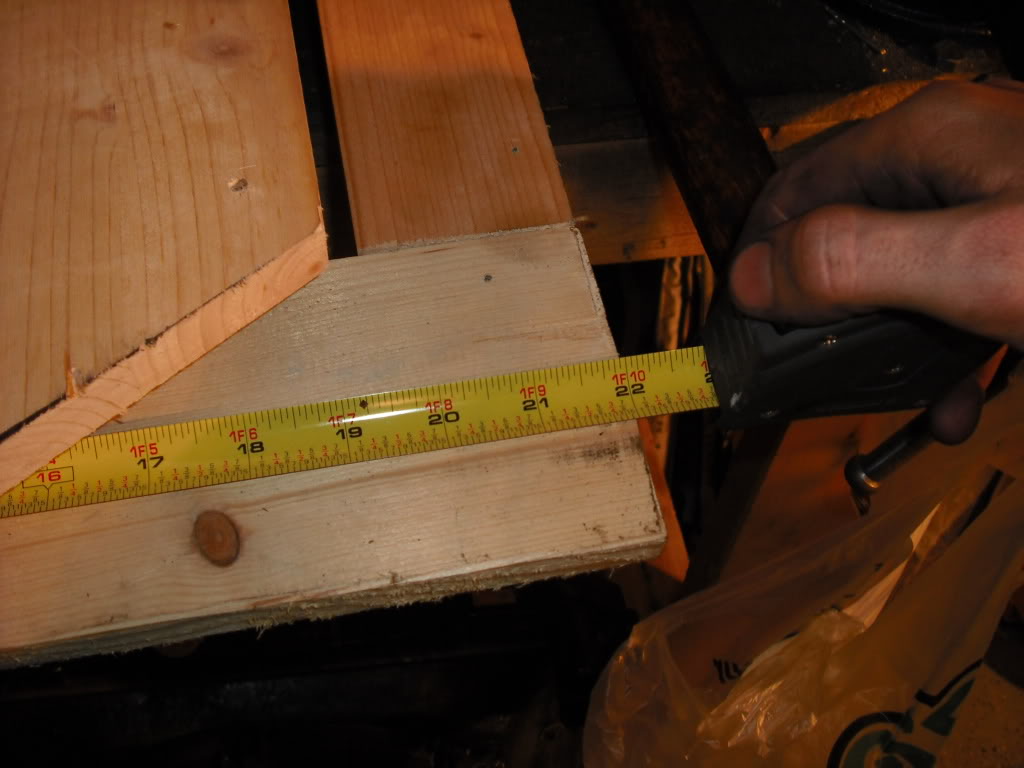
Step 1:
Make this frame from the plywood. Really, who cares how it looks, it just needs the outer dimensions to work. Cut one piece about 16" square, and the other one 17" by 22". Note that the small piece is raised up about 1" from the large piece, so jam a block of wood in between, and nail them together. You can cut the corners off the small piece like mine is, it sort of helps with flow or something. Congratulations, you have a frame.
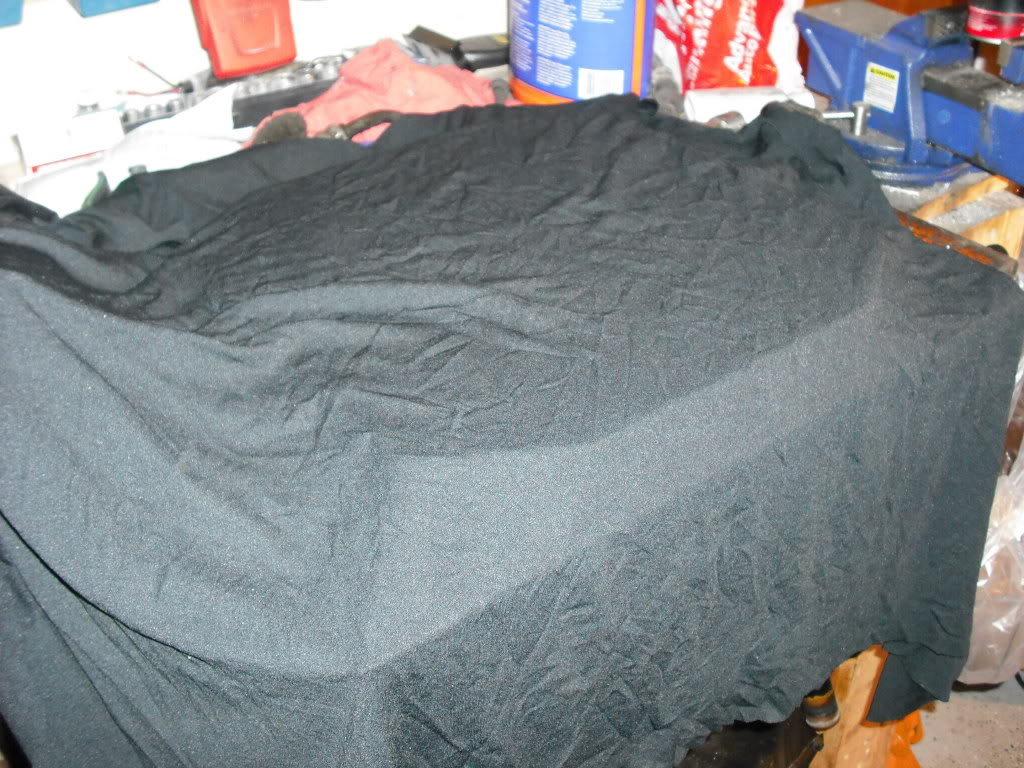
Step 2:
Cover it with seran wrap, then stretchy fabric. The seran wrap allows you to actually remove the shroud from the frame when done. Stretch the fabric tight around the frame so that it contours nicely. Staple the fabric to the back of the frame.
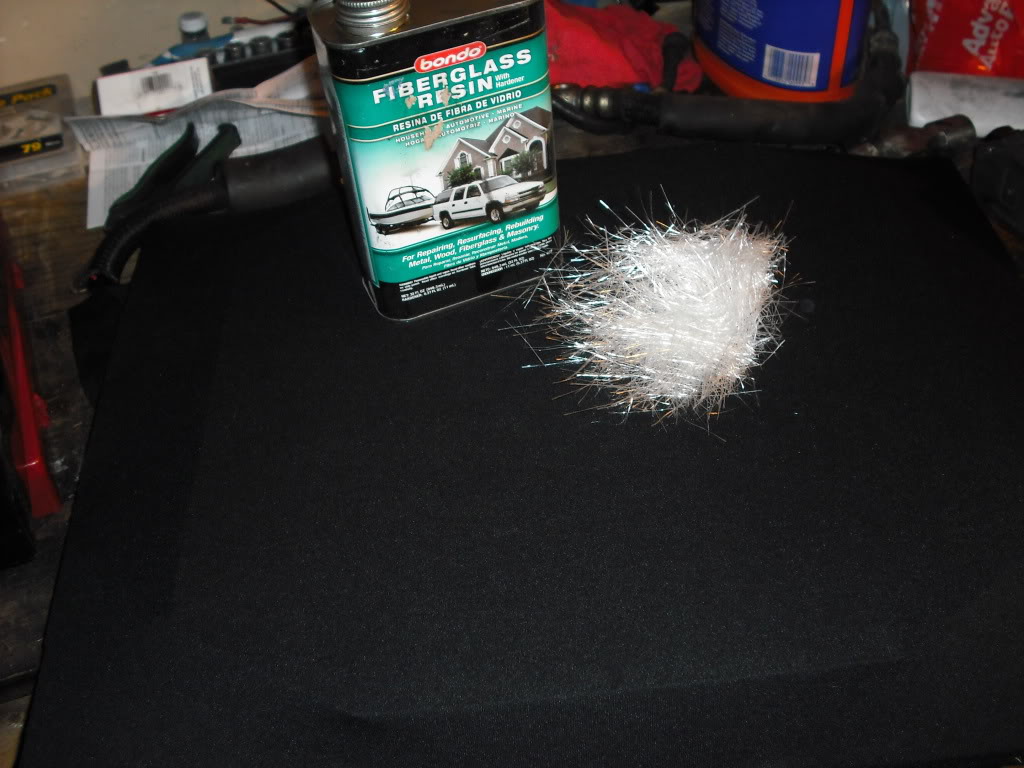
Step 3:
Mix the resin in the required amounts. Start covering the fabric with fiberglass mat, then brush on some resin. Be liberal and soak that fiberglass down.
Step 4:
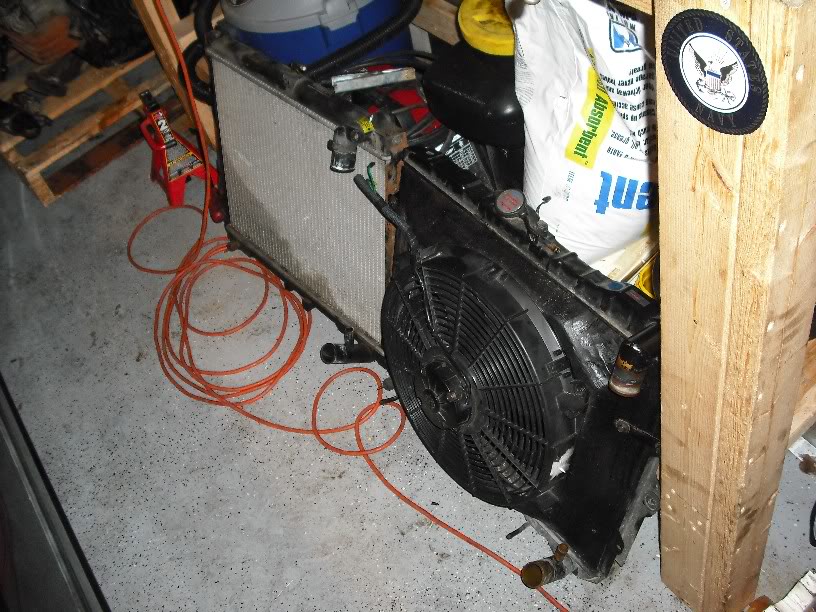
Wait a day or so, then when it dries, use some kind of cutting tool to cut the shroud off, and cut a hole in the center for your 16" e-fan. I used an angle grinder, but I'm a bit overkill like that. Drill some holes. Some are for mounting the fan to the shroud, some are for mounting the shroud to the radiator. I made some ghetto-straps to go from the shroud to the stock mounting locations on the car.

Step 5:
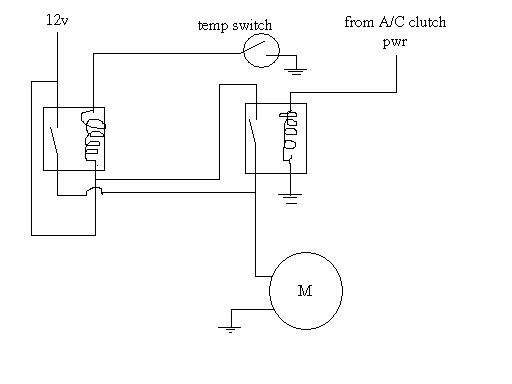
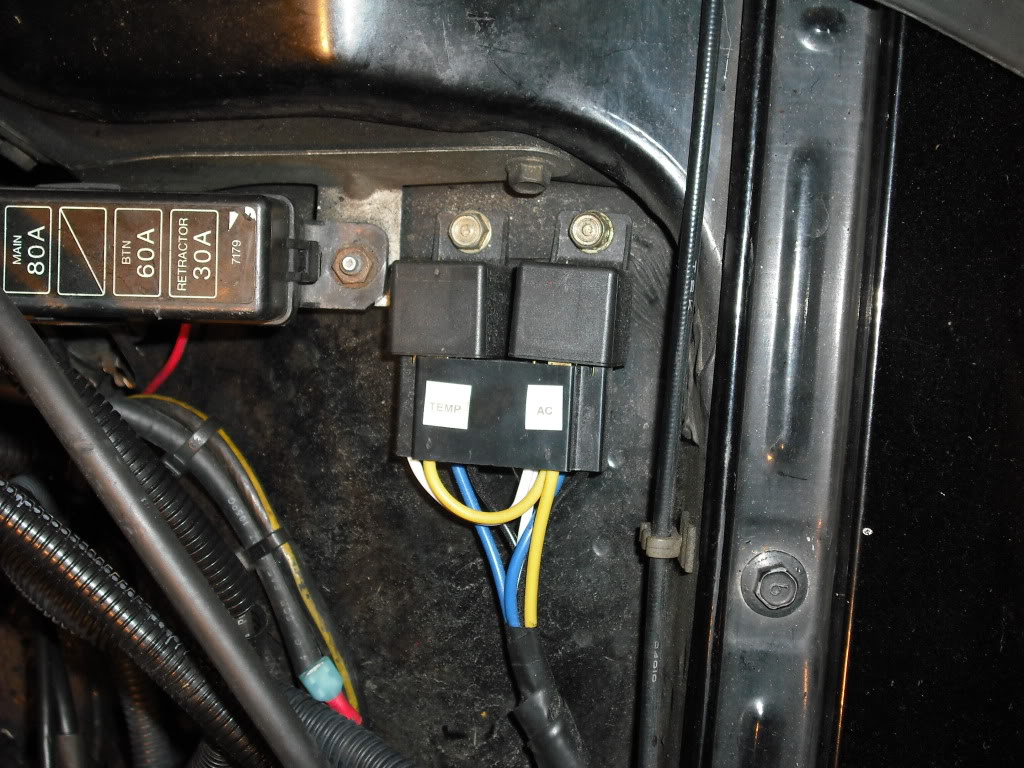
... For some of you, this is the hardest step. Wire this b**** up. Pay close attention to the way the schematic is, because you DON'T want the temp switch to reverse power the A/C on your car. This would suck, because if that happened, every time the temp switch closed, the A/C would kick on. This is why you need 2 relays. DON'T GET THAT CHEAP E-FAN RELAY KIT FROM AUTOZONE!!!!!! That one actually has 1 relay with 2 inputs, and a diode in the input from the A/C clutch power. I used this with NO LUCK!! The diode burned up within a week.
Have fun, and don't forget to make it look nice. Don't leave wires hanging everywhere, and PLEASE use the right type of weather resistant connections. Heat shrink is your friend.
This was my first attempt at fiberglass, and it wasn't hard at all. I made my shroud about 2 years ago, and it has been working great for me ever since, so I figured now's a good time to write a DIY on my success.
For this DIY, I will just be going through the steps, as I have no need or will to make another shroud for instructional purposes.
Tools:
-Paintbrush
-Cup (for fiberglass resin)
-Saw
-Hammer
-Stapler
Materials:
-Plywood
-Nails
-Fiberglass Mat and Resin
-Stretchy Fabric
-Seran Wrap
Step 1:
Make this frame from the plywood. Really, who cares how it looks, it just needs the outer dimensions to work. Cut one piece about 16" square, and the other one 17" by 22". Note that the small piece is raised up about 1" from the large piece, so jam a block of wood in between, and nail them together. You can cut the corners off the small piece like mine is, it sort of helps with flow or something. Congratulations, you have a frame.
Step 2:
Cover it with seran wrap, then stretchy fabric. The seran wrap allows you to actually remove the shroud from the frame when done. Stretch the fabric tight around the frame so that it contours nicely. Staple the fabric to the back of the frame.
Step 3:
Mix the resin in the required amounts. Start covering the fabric with fiberglass mat, then brush on some resin. Be liberal and soak that fiberglass down.
Step 4:
Wait a day or so, then when it dries, use some kind of cutting tool to cut the shroud off, and cut a hole in the center for your 16" e-fan. I used an angle grinder, but I'm a bit overkill like that. Drill some holes. Some are for mounting the fan to the shroud, some are for mounting the shroud to the radiator. I made some ghetto-straps to go from the shroud to the stock mounting locations on the car.
Step 5:
... For some of you, this is the hardest step. Wire this b**** up. Pay close attention to the way the schematic is, because you DON'T want the temp switch to reverse power the A/C on your car. This would suck, because if that happened, every time the temp switch closed, the A/C would kick on. This is why you need 2 relays. DON'T GET THAT CHEAP E-FAN RELAY KIT FROM AUTOZONE!!!!!! That one actually has 1 relay with 2 inputs, and a diode in the input from the A/C clutch power. I used this with NO LUCK!! The diode burned up within a week.
Have fun, and don't forget to make it look nice. Don't leave wires hanging everywhere, and PLEASE use the right type of weather resistant connections. Heat shrink is your friend.
 12-16-08, 09:27 PM
#2
Banned. I got OWNED!!!
The only thing that I would change about that would be to roll a thin layer of epoxy over the seran wrap first, then cover it with fabric, then wet it out some more, than start laying down the mat.
I've also never used the bondo stuff. I've only used West Systems or Evercoat Polyester - which is ******* nastiness in a can.
Good writeup though. Pull a mold and sell em
I've always made mine out of AL or steel. Never though of a FG on, kudo's
I've also never used the bondo stuff. I've only used West Systems or Evercoat Polyester - which is ******* nastiness in a can.
Good writeup though. Pull a mold and sell em
I've always made mine out of AL or steel. Never though of a FG on, kudo's
12-16-08, 09:54 PM
#4
Banned. I got OWNED!!!

Trending Topics
12-16-08, 11:36 PM
#9
Banned. I got OWNED!!!
 A good buddy of mine who is a FG WIZ gets angry to this day at the thought of working with the **** because of that. I think it's all in his head but whatever. Fiberglass has it purposes, but a rad panle deflector whatever you want to call it certainly isn't it. Nor is an bellypan.
 12-17-08, 01:07 AM
#11
Banned. I got OWNED!!!
 Meh, what's another year or two.
Props to the OP, I think he did a good job. There are some places where FG belongs though. Having spent ~ 20 years working with the cripe, I can tell you that a belly pan isn't one of them, and a deflector thingy can be made out of AL in about 10% of the time unless you're buying a prelaid sheet of something. Then the time would be about the same. But I'd much rather cut and shape AL over FG any day of the week and twice on Sunday
12-17-08, 04:33 AM
#12
Full Member
Join Date: Apr 2005
Location: Sydney Australia
Posts: 167
Likes: 0
Received 0 Likes
on
0 Posts
just for reference this is what i do when installing a thermo into a car
http://www.ausrotary.com/viewtopic.php?f=16&t=81884
http://www.ausrotary.com/viewtopic.php?f=16&t=81884
12-17-08, 12:48 PM
#15
I've worked with fiberglass for a long time and a bellypan is about as easy as it gets if you know what you are doing and where to buy your materials. It's a bit more intensive than just laying fiberglass down and hoping for the best but it's not hard to do well.
12-17-08, 08:25 PM
#16
I don't know how many layers it was. I think 2. I did, however, forget to mention that I did one layer of resin on the cloth before even laying down any glass. I was going to completely skip the glass and use the resin-covered cloth, but that wasn't very sturdy at all. That's how I figured out why FG is preferred. That stuff is surprisingly tough for its weight.
Uh... yeah. Let's just say "afterthought". Seriously, I didn't even think about doing that when I built it, which is why I used the ghetto-straps. Obviously everyone knows they don't have to replicate this verbatim, it's more of a guide. Feel free to make modifications, upgrades, etc to your own as you feel necessary. 
Reason #1 that I didn't make it out of aluminum:
Mine would have really looked like ****.
Reason #2:
Unless you know how to work the metal and planish it to a smooth finish, you can't get the same curves you can from FG. Don't get me wrong, I like the aluminum ones too. This is just a different option, for those of us who suck harcore at sheetmetal fab.
I don't understand why you'd go to all the trouble to custom build a shroud and NOT incorporate mounting flanges to match the radiator.
Reason #1 that I didn't make it out of aluminum:
Mine would have really looked like ****.
Reason #2:
Unless you know how to work the metal and planish it to a smooth finish, you can't get the same curves you can from FG. Don't get me wrong, I like the aluminum ones too. This is just a different option, for those of us who suck harcore at sheetmetal fab.
12-17-08, 10:20 PM
#17
Banned. I got OWNED!!!
Good call about wetting out the fabric before the mat went down. Still better though from my experience is to roll a layer of epoxy onto the "mold" and then put the fabric down. Work all the bubbles out and then repeat as necessary.
Here's a GOOD tip. Put a layer down and let it start to cure. There is a window of time when you can drag your finger across it without draging the epoxy, but it is still soft to the touch. At that point is when you want to apply your next layer. The sub layer is still kicking so you'll still get the chemical bond but it's solid enough that when you add the next layer, it won't displace the sub layer
Agreed 100% on not being able to get really nice curves out of AL without an incredible amount of work. Most of my shrouds though have been angular. Forgot to take pics for mounting, my bad. Tomorrow if I remember.
12-21-08, 12:49 PM
#18
1/4 Bet $500
iTrader: (1)

Join Date: Jan 2007
Location: Philadelphia
Posts: 34
Likes: 0
Received 0 Likes
on
0 Posts
Great post at just the right time. But if you shouldnt use a thermo switch from autozone then who sells a descent one? And also would any of you fine fellow be able to advise on how to wire up the fan? No A/C so i don think ill need to run for high speed.

Thread
Thread Starter
Forum
Replies
Last Post
12, build, custom, diy, electric, electrical, fal, fan, fans, fiberglass, make, shroud, shrouds, single, squareshroud