A Basic Tear Down, Port and Rebuild (what to look for and how to)


 02-09-07, 01:38 AM
#27
Passing life by
Thread Starter
RR - I will inspect again in the morning just because this is bugging me. The plates in the rear were realy good IMO and the front was trashed. The owner forgot to order and install the buttons as well.
02-09-07, 01:42 AM
#28
What, you mean the rubber plugs? I havent used those damn things since 2001. They are utterly useless. IN 10k miles they are hard as a rock. Their (supposed) jobs are to create compression and keep carbon from building up under the apex seal. Yet we know that a shitload of carbon builds up in the slot on stock original motors, and we also know that building engines without them do not suffer any compression loss (in my experience).
Also with even moderately ported engines they can become a liability, falling into the port.
Yeah, I know what you're gonna say..."oh, the factory put them there for a reason". Yeah, the same factory that put AWS and the thermal pellet in the e-shaft.
Yeah, theyre only $20 extra, but 20 here and 20 there, it all adds up.

 02-09-07, 12:33 PM
#32
Full Member

Join Date: Mar 2006
Location: phoenix
Posts: 55
Likes: 0
Received 0 Likes
on
0 Posts
. IN 10k miles they are hard as a rock. Their (supposed) jobs are to create compression and keep carbon from building up under the apex seal.
02-09-07, 12:57 PM
#33
Rotary Enthusiast
Join Date: Jun 2003
Location: Ottawa, Canada
Posts: 874
Likes: 0
Received 0 Likes
on
0 Posts
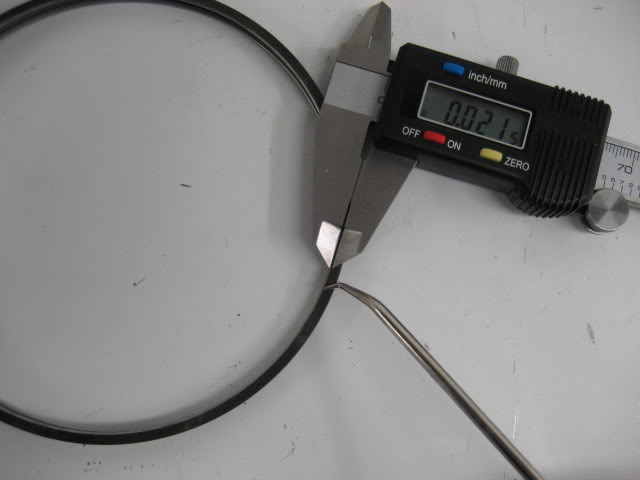
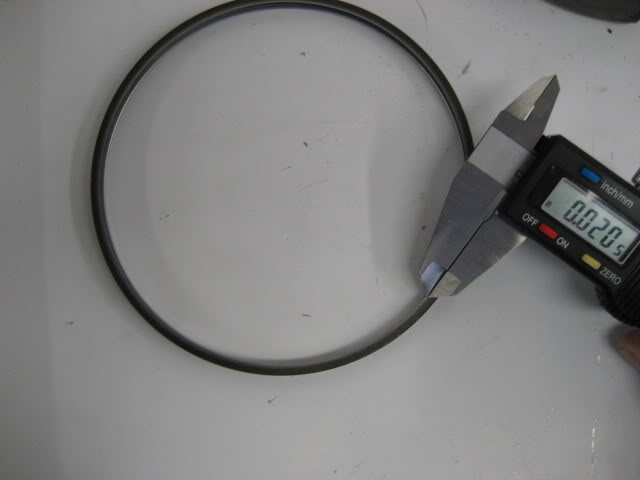
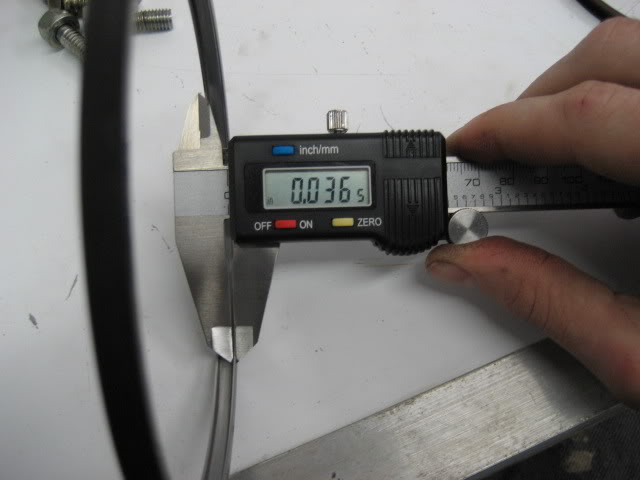
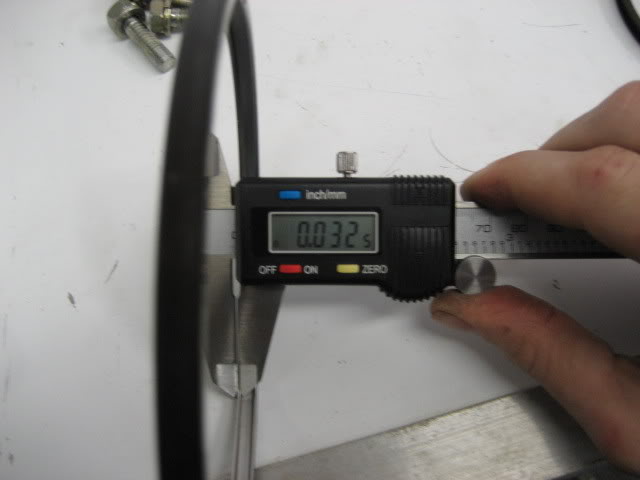
Just a quick question, when you are measuring the oil control rings with the calipers I am not quite sure what spec you are trying to meet? This doesn't look like the lip width check the manual describes. If it is, then why do you say they are fine when it says max 0.020 inch, and your caliper is reading well above that?
02-09-07, 01:05 PM
#35
Rotary Enthusiast
Join Date: Jun 2003
Location: Ottawa, Canada
Posts: 874
Likes: 0
Received 0 Likes
on
0 Posts
Exactly, I always measure the width of the wear. That's why they show to do it with a magnifying glass. It could just be a misunderstanding however, maybe wrong pic posted or something, but should be fixed in a howto thread.
02-09-07, 01:38 PM
#37
and to comment on the way how you 'rebuild' motors
you dont just toss all the seals in a cup and wash it
there are 12 corner seals, 3 to a set, and each set have to be on the same face iron.
as with apex seals, they have to be on the same rotor
sideseals, same story as corner seals - theres a reason people put seals and mark their location.
you dont just toss all the seals in a cup and wash it
there are 12 corner seals, 3 to a set, and each set have to be on the same face iron.
as with apex seals, they have to be on the same rotor
sideseals, same story as corner seals - theres a reason people put seals and mark their location.
02-09-07, 02:08 PM
#38
Passing life by
Thread Starter
I am sorry about that guys! I uploaded the wrong inspection folder in the mits of 100 pics. Here is the correct order if a Mod would not mind correcting it.
Oil control rings were great also.
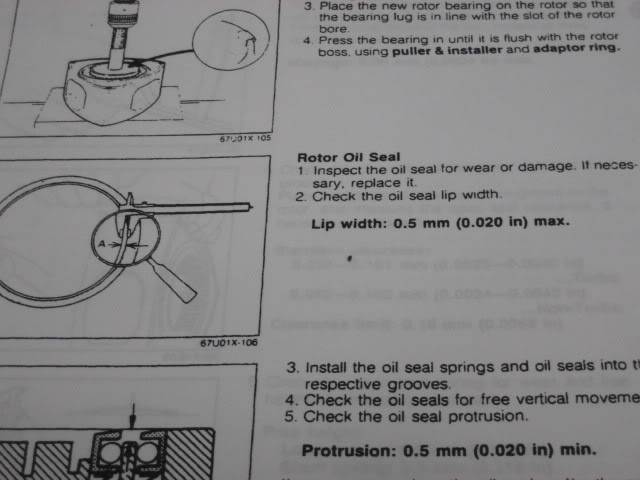
Inspect the seal width for consistency and warpage.
Oil control rings were great also.
Inspect the seal width for consistency and warpage.
02-09-07, 02:10 PM
#39
Originally Posted by slpin
and to comment on the way how you 'rebuild' motors
you dont just toss all the seals in a cup and wash it
there are 12 corner seals, 3 to a set, and each set have to be on the same face iron.
as with apex seals, they have to be on the same rotor
sideseals, same story as corner seals - theres a reason people put seals and mark their location.
you dont just toss all the seals in a cup and wash it
there are 12 corner seals, 3 to a set, and each set have to be on the same face iron.
as with apex seals, they have to be on the same rotor
sideseals, same story as corner seals - theres a reason people put seals and mark their location.
02-09-07, 03:50 PM
#43
Taste great, more filling
iTrader: (1)
Join Date: Feb 2005
Location: Dallas, TX
Posts: 2,012
Likes: 0
Received 0 Likes
on
0 Posts
Originally Posted by ultrataco
wow, very informative. keep it coming!
I now know I don't want to try rebuilding a motor myself.
I now know I don't want to try rebuilding a motor myself.
02-09-07, 04:14 PM
#44
Originally Posted by Richter12x2
You know your skills better than anyone else, but I was surprised how easy it was. If you're patient, observant, and careful, it's a breeze.

Sorry, I couldn't resist
 02-09-07, 05:40 PM
#46
Taste great, more filling
iTrader: (1)
Join Date: Feb 2005
Location: Dallas, TX
Posts: 2,012
Likes: 0
Received 0 Likes
on
0 Posts
Originally Posted by RotaryResurrection
This from the man that's re-rebuilding his engine with a fresh intermediate iron
Sorry, I couldn't resist
Sorry, I couldn't resist
 All I can say is I showed all the irons to three different people and noone could see anything wrong with it. :P It was a one in a million break and the iron looked absolutely fine. I pored over everything with a flashlight and couldn't find anything wrong.
 In fact, I eventually reassembled it over the kitchen sink so that I could see where my water leak was coming from. :P My wife thought it was funny and took a picture of it.
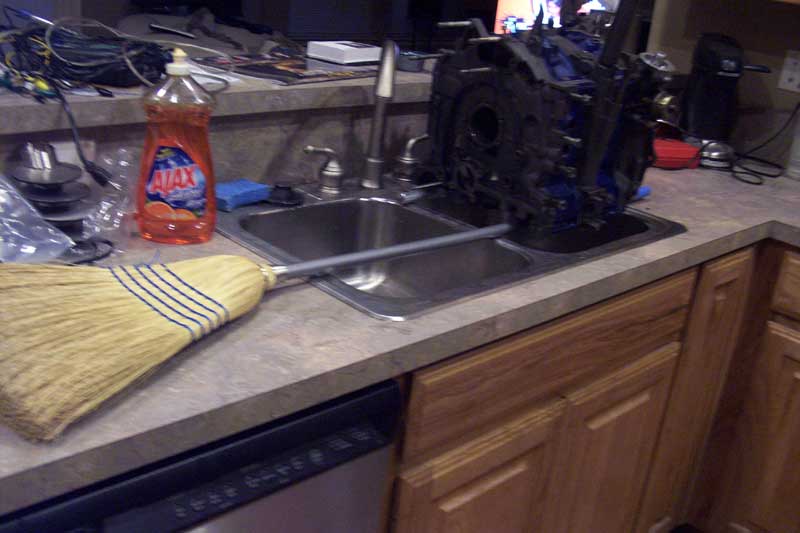
It held water until it was almost to the top of the water pump inlet before it started to leak between the intermediate iron and the rotor housing. So I took it apart and looked all over that side of it. I couldn't find anything wrong! So I took some 80 grit sandpaper and sanded every water passage on that side of the bottom of the intermediate iron smooth so I could tell there weren't any cracks in it. Nothing! So I presumed my RTV was leaking and started to clean it up again. When I was scraping out the seal groove on the intermediate housing, I just happened to see it flex, just a little bit. So I pushed on the wall and it flexed when I pushed on it. :P Then it broke off. There was a hairline crack at the bottom of the seal passage and the weight of the water was causing it to flex just enough to run out underneath it. :P
So I don't feel too bad about missing that on my first rebuild. Especially since it lasted through 500 miles and two Solo 2 events.
That's not my bad, that's just my luck.
02-09-07, 07:57 PM
#48
Taste great, more filling
iTrader: (1)
Join Date: Feb 2005
Location: Dallas, TX
Posts: 2,012
Likes: 0
Received 0 Likes
on
0 Posts
I gotta say though, even without the rotors and e-shaft that thing was heavy. I've got mad respect for the Walmart broom,
.... hmm, now that I think about it, maybe she was taking pictures so she could show the insurance guy what happened that caused us to have to get a new sink, garbage disposal, cabinet and concrete slab replaced if that broom had cracked.
.... hmm, now that I think about it, maybe she was taking pictures so she could show the insurance guy what happened that caused us to have to get a new sink, garbage disposal, cabinet and concrete slab replaced if that broom had cracked.