Fender cut for wide wheels, Pics part1
 04-25-06, 03:38 PM
#1
Rotary Enthusiast
Thread Starter
iTrader: (14)
Join Date: May 2004
Location: Drifting a Roundabout near you!
Posts: 1,366
Likes: 0
Received 10 Likes
on
10 Posts
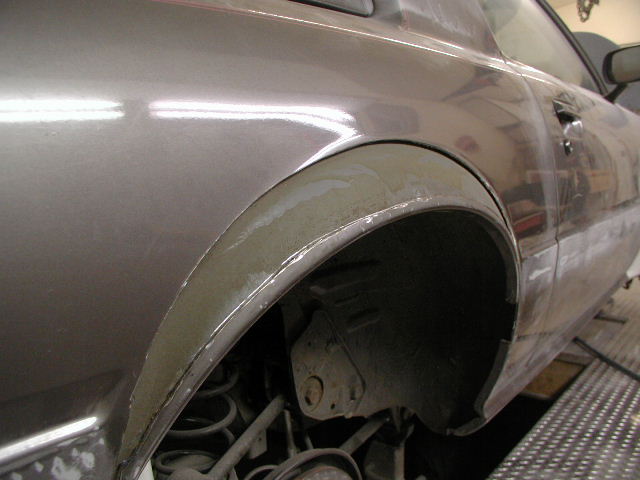
Heres the work I did today as far as prepping, marking, cutting and hammering the fender so my 225/50/15's can fit with the new lower rear springs.
First shot is the masking, then the marking, then bending the fender lip down, then making the first cut, then the second cut, sanding and wirewheel to get to bare metal, then started the hammering and bending the bottom around.
https://www.rx7club.com/showthread.p...9&page=1&pp=15
First shot is the masking, then the marking, then bending the fender lip down, then making the first cut, then the second cut, sanding and wirewheel to get to bare metal, then started the hammering and bending the bottom around.
https://www.rx7club.com/showthread.p...9&page=1&pp=15

 04-25-06, 05:07 PM
#4
You have the right idea, good job. When I did mine, I used the crease between the fender and the lip, which looks to be your top marker line, as the guide for my outer panel cut, then dropped down a 1/2" for the inner cut and folded that up like you did.
Mine looked perfect, until I welded it and heat warped the **** out of the fender, clear up to the bend at the side and top of the fender. Live and learn somedays. Didn't really matter since the widebody kit would hide all of it. What you see in the pics is all freehanded with the cutoff wheel and no masking used.
Mine looked perfect, until I welded it and heat warped the **** out of the fender, clear up to the bend at the side and top of the fender. Live and learn somedays. Didn't really matter since the widebody kit would hide all of it. What you see in the pics is all freehanded with the cutoff wheel and no masking used.
04-25-06, 05:36 PM
#5
Rotary Enthusiast
Thread Starter
iTrader: (14)
Join Date: May 2004
Location: Drifting a Roundabout near you!
Posts: 1,366
Likes: 0
Received 10 Likes
on
10 Posts
Yeah welding will do that if you don't stitch weld. I'm going to be using epoxy and rivets to seal and secure the new flange. Also this was not my idea, I found the DIY article in the March issue of Option2 magazine(Japanese Drifter Mag). I scaned the article and tried to post it but it was too big. You can find the PDF on NoPistons.com http://www.nopistons.com/forums/inde...howtopic=60753
04-25-06, 05:51 PM
#6
Pop rivets and body seam seam sealer might do the trick for holding and sealing the new joint. Use the heavy duty pop rivets and gun, not the standard hardware store ones.
I did stitch the weld. New mig welder and I hadn't done any welding for 20 years. First time I had used flux core wire too, I was way way out of practice.
On your flares, are the mounting screws above or below the crease between the fender and lip? I had to cut as high as I did on mine to get the suspension travel. With the stock fenders, I had a 5/8" gap between the tire tread and lip.
04-25-06, 06:07 PM
#7
Rotary Enthusiast
Thread Starter
iTrader: (14)
Join Date: May 2004
Location: Drifting a Roundabout near you!
Posts: 1,366
Likes: 0
Received 10 Likes
on
10 Posts
Yep, I got a pneumatic riveter and steel rivets. Yours looks really clean, better job on hammering then I did, I still have some touch up to do, had to beat it to work by 3pm so I will finish the side tomorrow and start the passenger side right after. More pics tomorrow!
Trending Topics
04-25-06, 06:28 PM
#8
This was my first one too. I have worked with metals off and on for many years though. The trick to getting the fold nice and smooth is take your time and bend a little at a time from one end to the other, start over and keep taking it little by little. I can see from your pics, where it's wavy, you bent too far at a time and and your hammer strikes are too far apart.
Bending metal in this application is more a matter of tippy-tippy-tappy, no bangys. As odd as it may sound, picture in your minds ear a woodpecker with a muscle deficiency. That should help give you a feel for the metal.
The waves in your bend shows the metal has stretched, that is what you want to avoid. Lighter taps, taps, closer together, and you will have a nice, flat, fold.
04-25-06, 07:24 PM
#9
Lives on the Forum
"a woodpecker with a muscle deficiency".

Not to be confused "with a pecker with a muscle deficiency."
I wonder, could you feed a woodpecker viagra?
Oh, and nice work both of you! I'm stuck with my 13s for now, but someday I'll be looking all of this up again.
Not to be confused "with a pecker with a muscle deficiency."
I wonder, could you feed a woodpecker viagra?
Oh, and nice work both of you! I'm stuck with my 13s for now, but someday I'll be looking all of this up again.
04-25-06, 07:54 PM
#12
Rotary Enthusiast
Thread Starter
iTrader: (14)
Join Date: May 2004
Location: Drifting a Roundabout near you!
Posts: 1,366
Likes: 0
Received 10 Likes
on
10 Posts
Yep, the sawsall was a real tense moment, that thing wants to chew everything in sight!
Thanks for the feedback, I'll put the wheel on it tomorrow with pics.
Thanks for the feedback, I'll put the wheel on it tomorrow with pics.
04-27-06, 01:55 AM
#16
Rotary Enthusiast
Thread Starter
iTrader: (14)
Join Date: May 2004
Location: Drifting a Roundabout near you!
Posts: 1,366
Likes: 0
Received 10 Likes
on
10 Posts
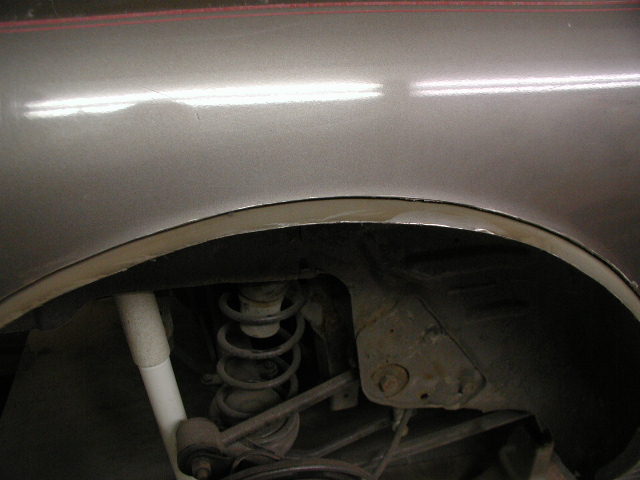
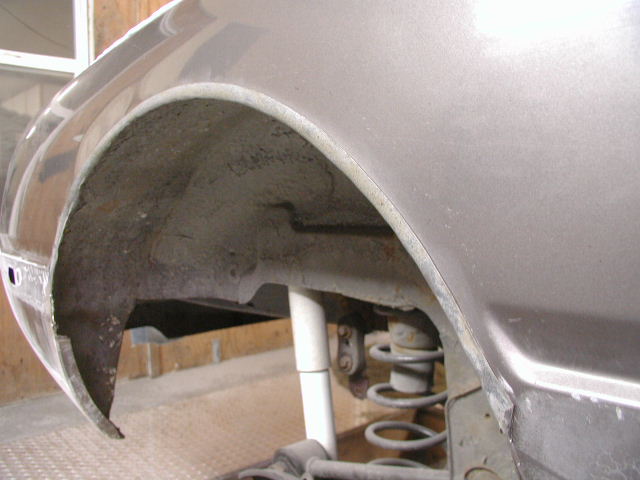
Here's some before the cut and after the cut shots for those who asked. Also a shot of the Magnaflow muffler(sorry no brand on the tip I got for it)
Primer should go on tomorrow and then the flares and skirts get a gloss finish.
Yea!!!!!
Primer should go on tomorrow and then the flares and skirts get a gloss finish.
Yea!!!!!
Last edited by Slammed_GSL; 04-27-06 at 01:57 AM.
05-09-06, 10:23 PM
#18
Old [Sch|F]ool
Originally Posted by Slammed_GSL
Yeah welding will do that if you don't stitch weld.
I'm still not 100% happy with it but OTOH I don't think I've ever been 100% happy with anything...
05-09-06, 10:35 PM
#19
Peejay you are too hard on yourself, the car is coming along nicely, still plenty to do but the welding under the circumstances has been great.
SlammedGSL's car is looking great, love that you stepped up and did things a bit different, the results are stunning.
SlammedGSL's car is looking great, love that you stepped up and did things a bit different, the results are stunning.

Thread
Thread Starter
Forum
Replies
Last Post