1st Gen General Discussion The place for non-technical discussion about 1st Gen RX-7s or if there's no better place for your topic

What did you do to your FB today?

Thread Tools
 
Search this Thread
 
Old 07-27-15, 09:40 AM
  #5951  
Waffles - hmmm good

iTrader: (1)
 
t_g_farrell's Avatar
 
Join Date: Jul 2004
Location: Lake Wylie, N.C.
Posts: 8,783
Received 282 Likes on 232 Posts
Rehung the exhaust after painting it. Used a jack and kept it all loosely bolted until it was in the
right position, got about 1/2 inch less drop at the rear and had to refab the hanger to make up for
it.

Replaced the oil cooler mounts. Struggled with the driver side mount until I remembered something
DD said and I actually must have done earlier. The front hole on the new mount needed to be
drilled out to match up with the mounting hole on the radiator. I must have done this when I
installed the new radiator and forgot.

Also changed the oil and filter. It needed it.

So in summary, after going to DGRR I had the following things to address:

1. Adjust and rebleed the rear brakes.
2. Replace the exhaust gaskets which had finally met their end.
3. Replace the broken oil cooler mounts.
4. Need to get new tires (probably wheels as well). My RWL tires are down to the wear bars and I will keep them on waffles for show.
5. Still need to clean out the little stones everywhere in the car (engine bay, interior). Some of the roads had recently been tarred and graveled.

So always more to do but the biggies are done and I can drive it some more.
Old 07-27-15, 06:19 PM
  #5952  
Always Wanting to Learn

iTrader: (49)
 
DreamInRotary's Avatar
 
Join Date: Aug 2011
Location: Cambridge, Minnesota
Posts: 3,078
Received 42 Likes on 40 Posts
Rear end of the car
Name:  2015-07-26%2017.34.47_zps5s4hruit.jpg
Views: 90
Size:  366.8 KB

Name:  2015-07-26%2017.34.56_zpskmef7gj6.jpg
Views: 105
Size:  322.7 KB

Front end of the car
Name:  2015-07-26%2017.35.10_zpsip3pdvvc.jpg
Views: 79
Size:  275.1 KB

Name:  2015-07-26%2017.35.25_zpsbr6bbmk3.jpg
Views: 88
Size:  358.9 KB

Name:  2015-07-26%2017.35.41_zps1u3vh4h9.jpg
Views: 99
Size:  357.2 KB

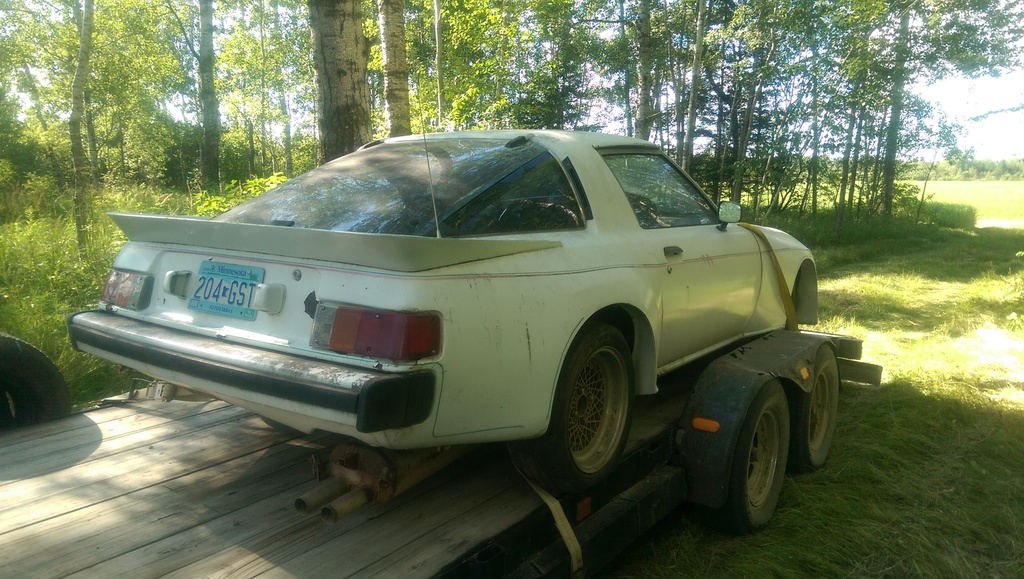
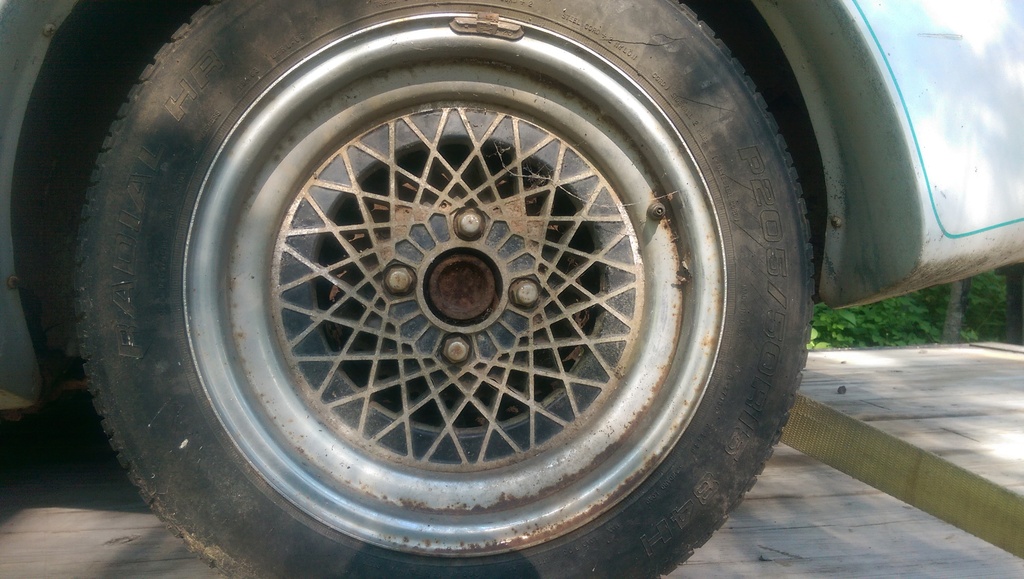
Some sort of snowflake-looking wheels that I don't recognize - any ideas?
Name:  2015-07-26%2017.35.56_zpscalvdlho.jpg
Views: 81
Size:  258.3 KB

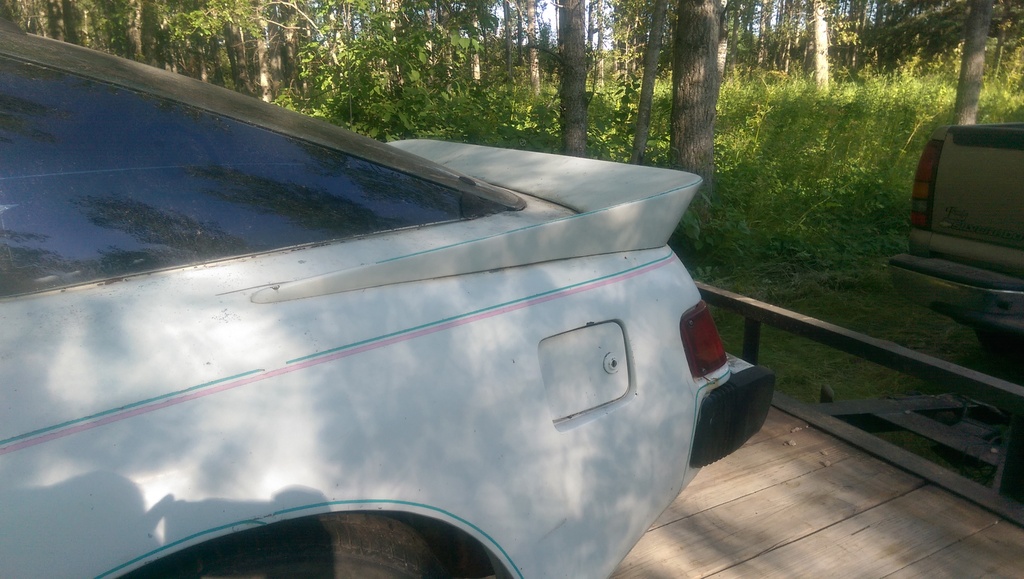
Nice small one-piece rear wing.
Name:  2015-07-26%2017.36.03_zpsmxavmmy2.jpg
Views: 77
Size:  247.4 KB

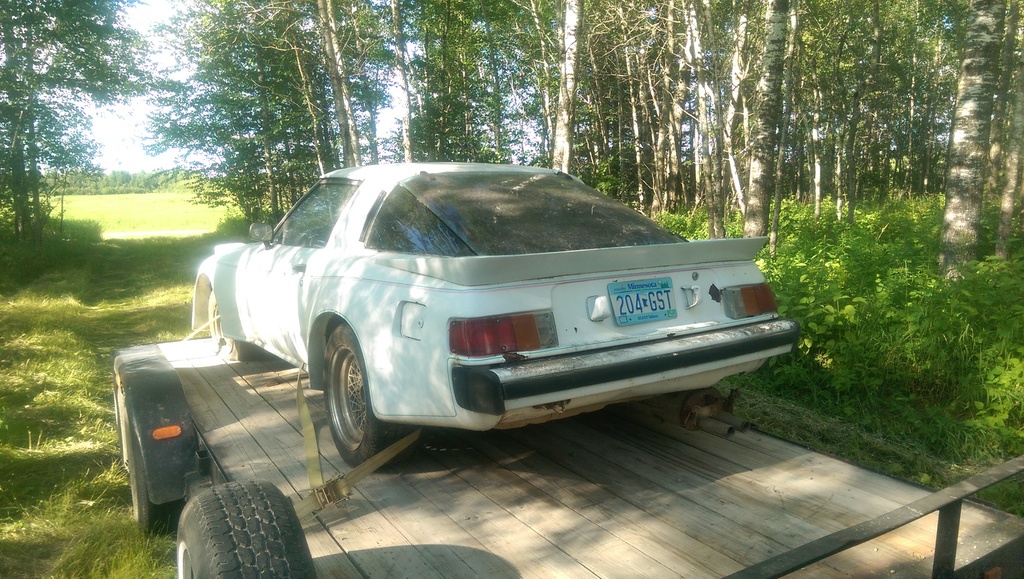
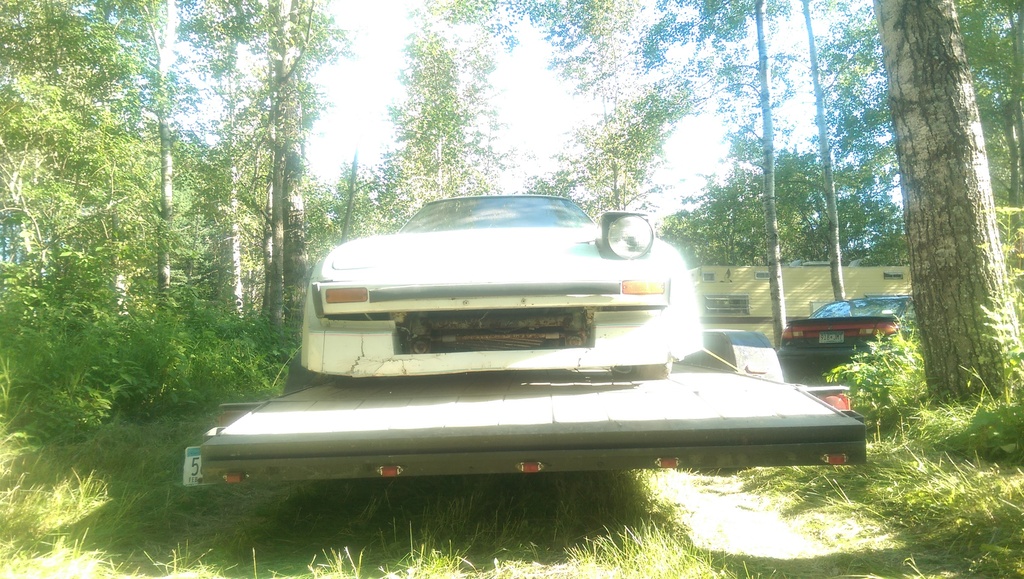
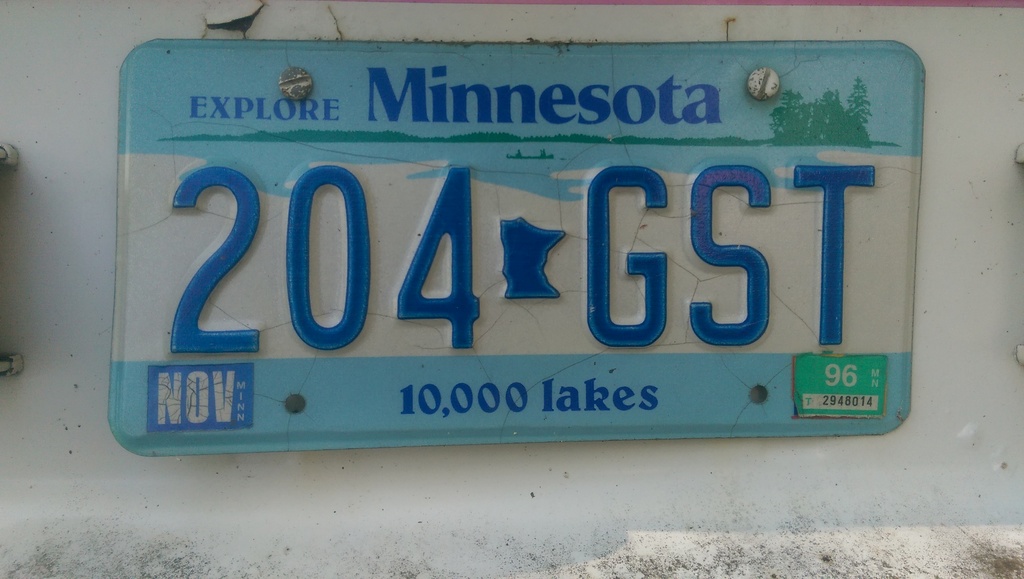
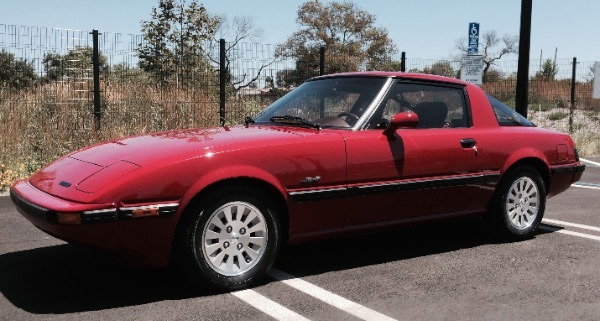
It's in pretty good shape for having sat for 20 years!
Name:  2015-07-26%2017.37.21_zpsy1ouyqj2.jpg
Views: 85
Size:  273.1 KB

Tabs were last renewed for the 1995-1996 year. Here in MN we buy our tabs before they expire, so this person would have bought tabs in November 1995 in order to drive the car for the next year, to 1996. So this car has most likely sat for the last 20 years.
Name:  2015-07-26%2017.37.34_zps8iozkzhz.jpg
Views: 90
Size:  198.8 KB
Old 07-27-15, 06:24 PM
  #5953  
Always Wanting to Learn

iTrader: (49)
 
DreamInRotary's Avatar
 
Join Date: Aug 2011
Location: Cambridge, Minnesota
Posts: 3,078
Received 42 Likes on 40 Posts
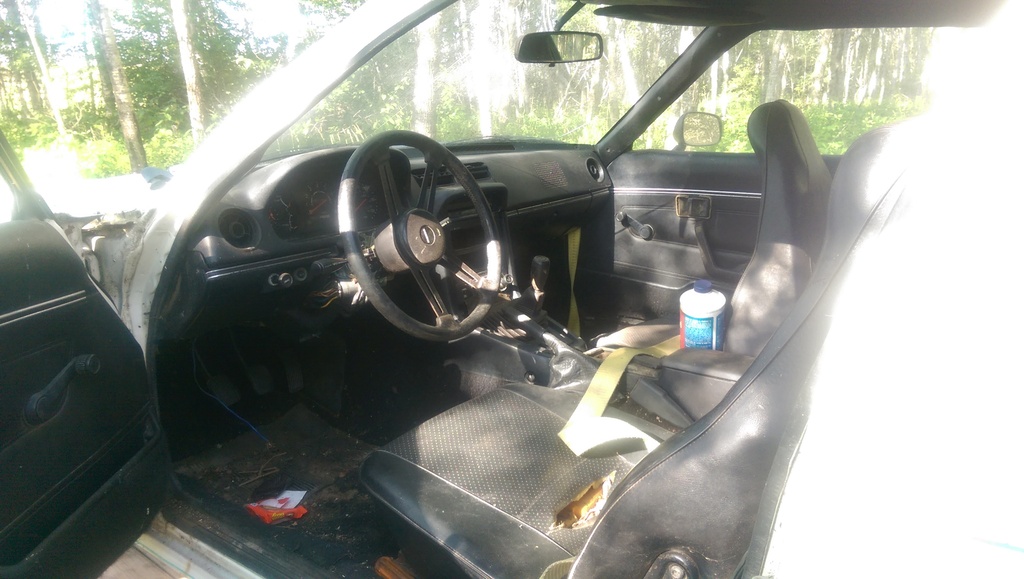
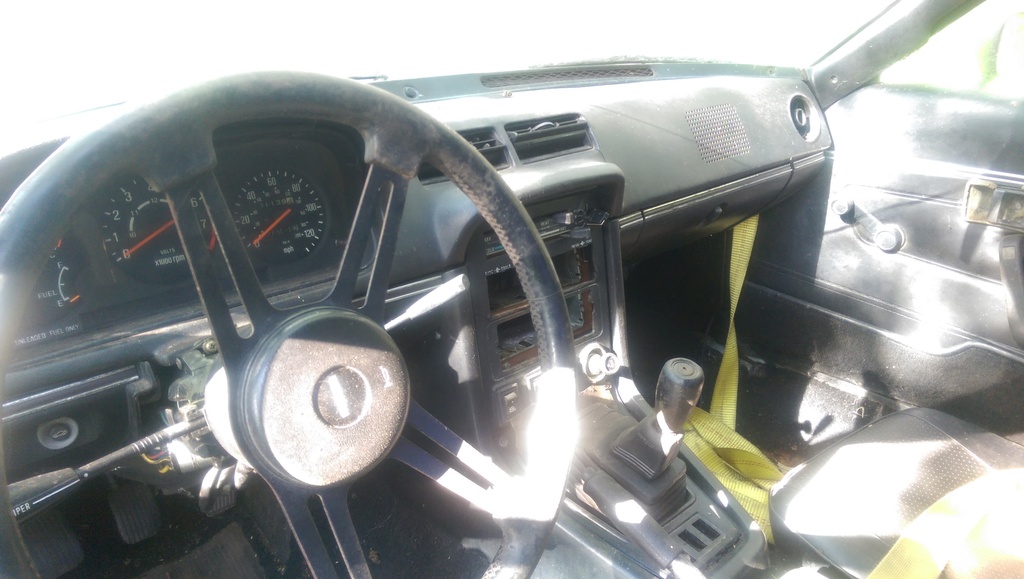
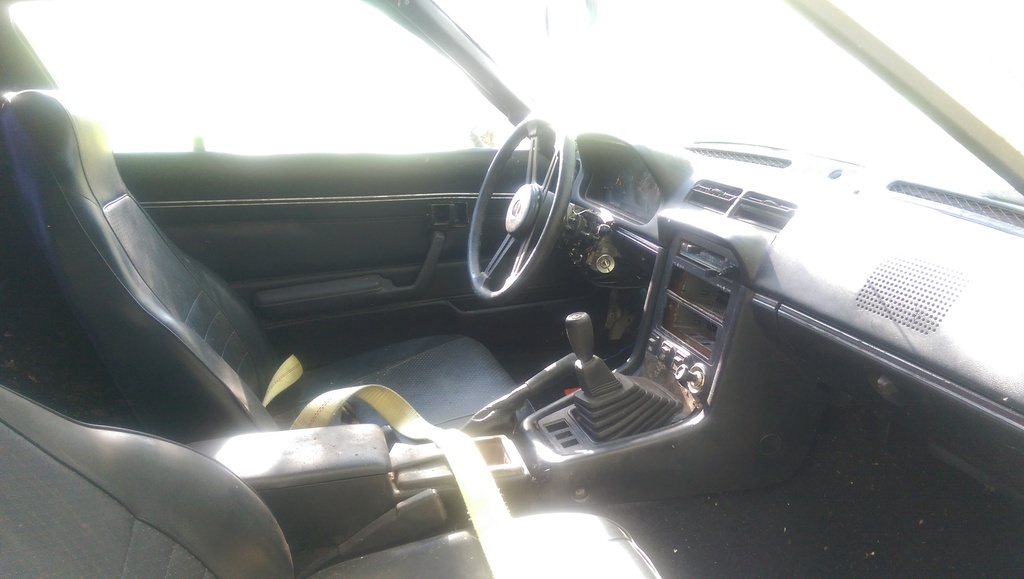
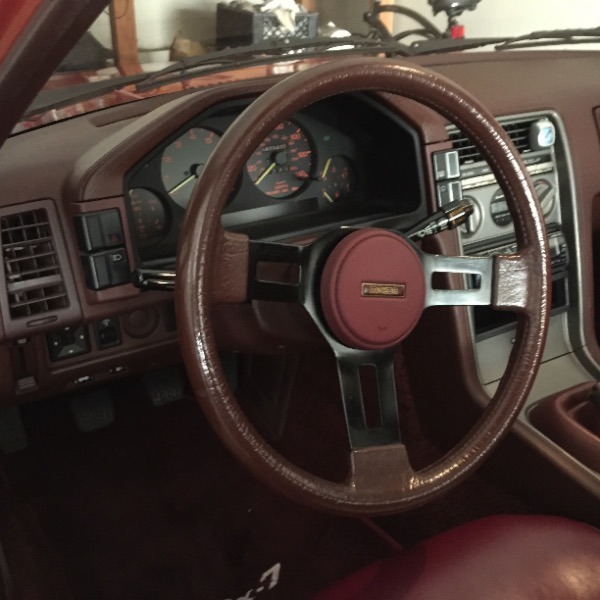
The interior is in pretty good shape for having sat for so long!
Name:  2015-07-26%2017.36.15_zpsp8sx9oau.jpg
Views: 89
Size:  211.8 KB

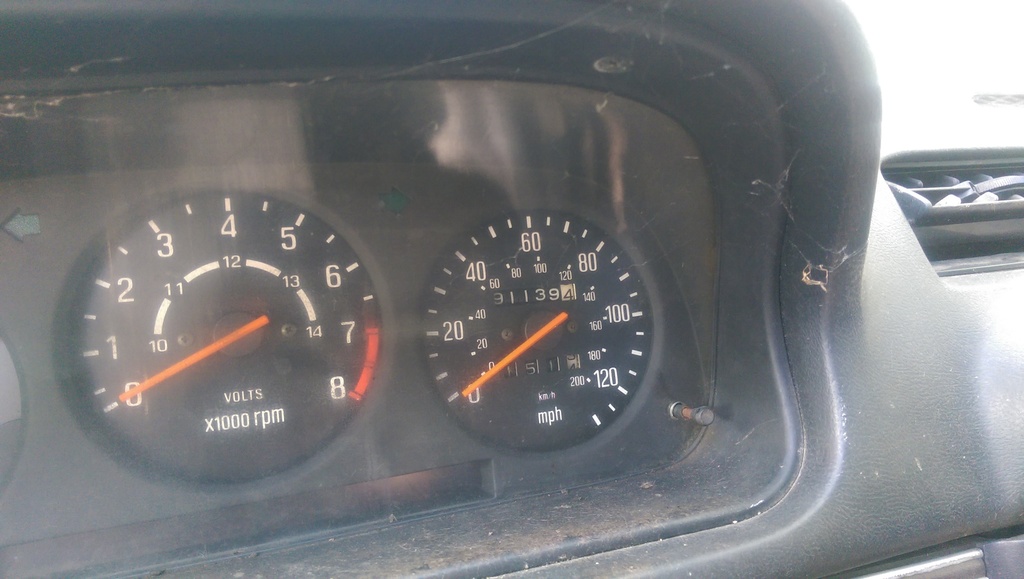
91,139 miles on this old gem, and I believe it.
Name:  2015-07-26%2017.36.50_zpsjaafstl4.jpg
Views: 93
Size:  183.0 KB

Name:  2015-07-26%2017.36.55_zps5eczhdis.jpg
Views: 81
Size:  202.1 KB

Name:  2015-07-26%2017.38.36_zps5tm2kap0.jpg
Views: 83
Size:  153.8 KB

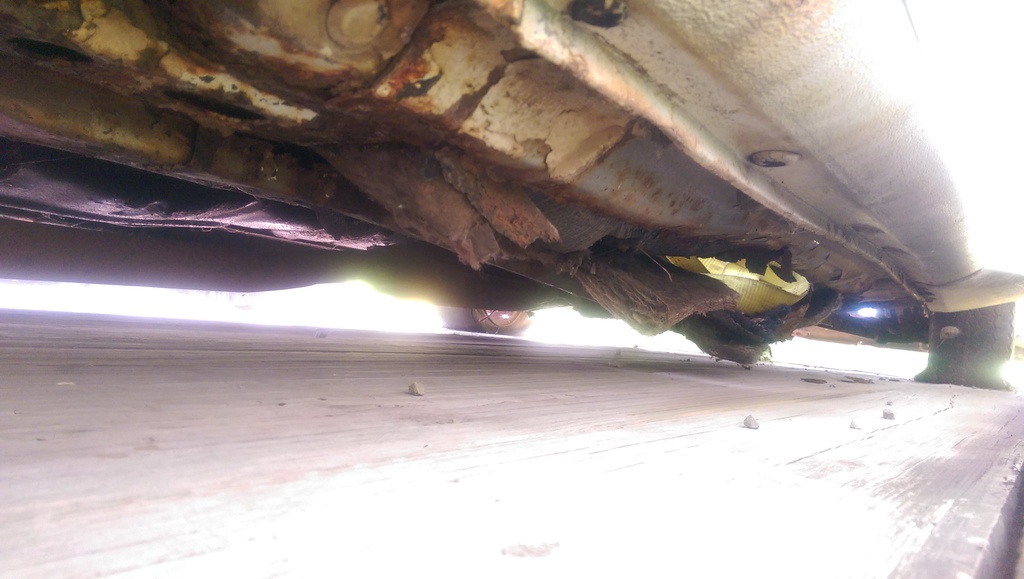
The whole floorboard on the passenger side is totally gone, as well as the frame rail. That yellow spot you see is part of the strap holding the car on the trailer. It's beyond repair so it'll need to get scrapped after every good part is removed from the car.
Name:  2015-07-26%2017.37.53_zpsk4bcjfix.jpg
Views: 91
Size:  168.2 KB

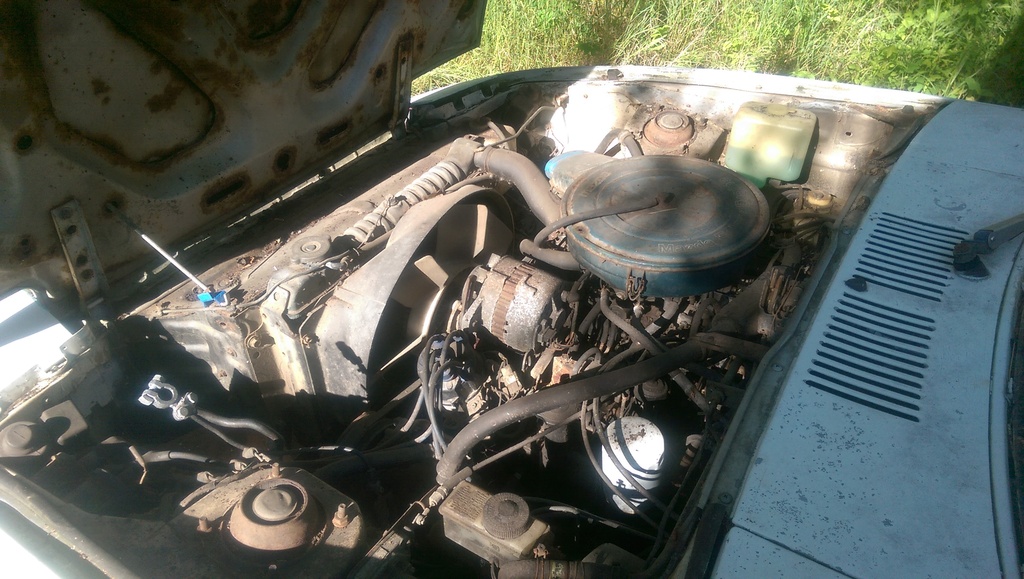
Poor, old, abused, misused and sad example of a 12a motor.
Name:  2015-07-26%2017.41.01_zpscfrbf0y2.jpg
Views: 83
Size:  287.4 KB

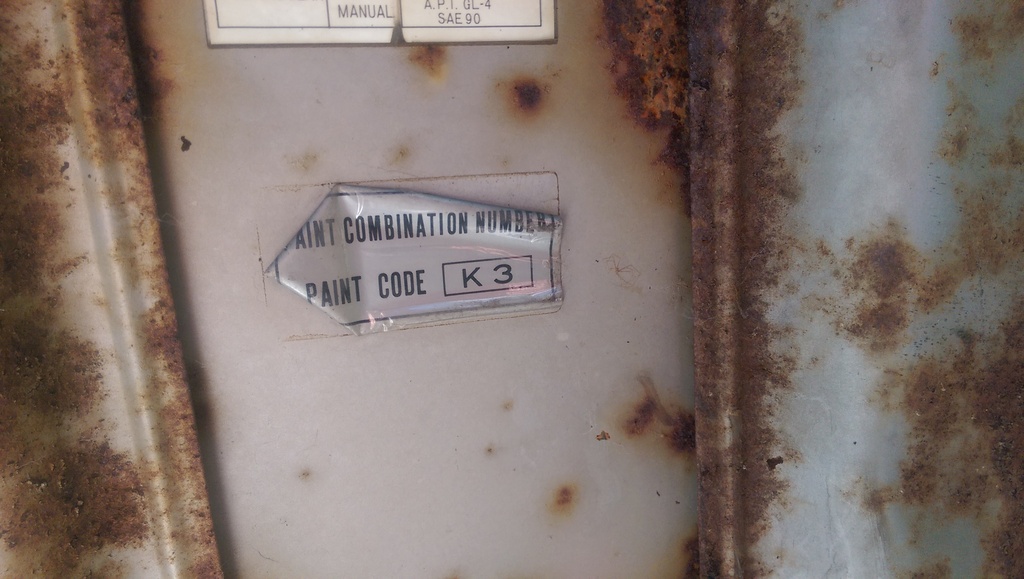
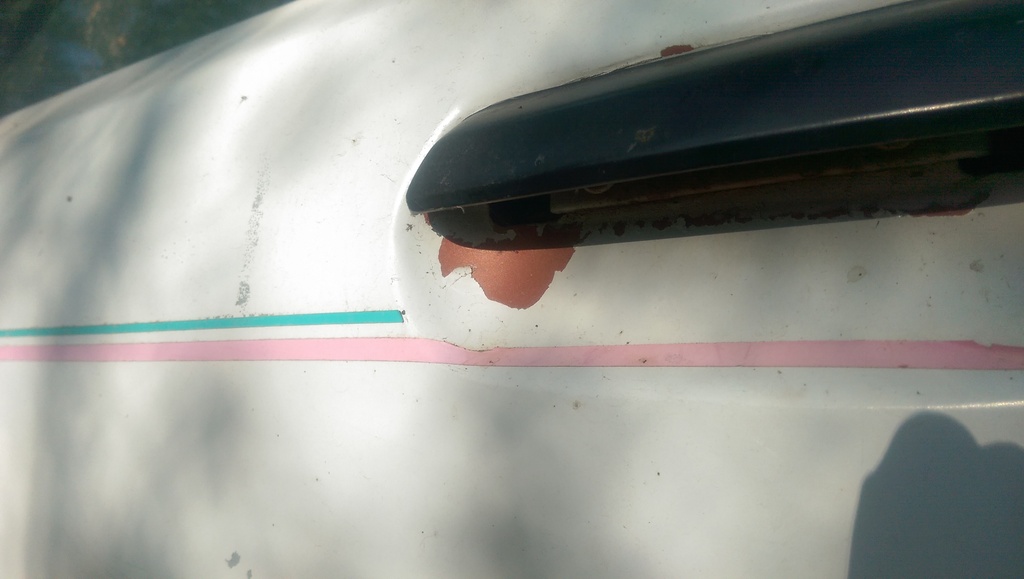
Paint code on the hood, which is not the same as the paint on the door.
Name:  2015-07-26%2017.41.08_zpsnuzggxek.jpg
Views: 82
Size:  207.9 KB

You can see the bronze color on the door here, I'm guessing this is the original body color.
Name:  2015-07-26%2017.41.29_zpsyz038jhf.jpg
Views: 96
Size:  129.7 KB
Old 07-28-15, 04:20 PM
  #5954  
Senior Member
iTrader: (2)
 
Cameron38's Avatar
 
Join Date: May 2013
Location: Los Angeles
Posts: 542
Likes: 0
Received 0 Likes on 0 Posts
Restored OEM Wheels and New Tires now back on the SE. And new steering wheel (courtesy of Roarinrotaryrx7) installed. Took all of 5 minutes to remove the old worn out steering wheel and install the new one.


Name:  RestoredWheels_zpspvvt3rqx.jpg
Views: 83
Size:  72.1 KB


Name:  NewSteeringWheel_zps8ddyouws.jpg
Views: 79
Size:  74.3 KB
Old 07-30-15, 04:45 AM
  #5955  
RX HVN

iTrader: (2)
 
7aull's Avatar
 
Join Date: Jan 2003
Location: Arizona
Posts: 3,889
Received 227 Likes on 167 Posts
Hey Cam - a "new-to-you" St wheel or actually New? Looks fab. Rims are beaut too...

Stu
80GS
Alaska
Old 07-30-15, 04:57 PM
  #5956  
Senior Member
iTrader: (2)
 
Cameron38's Avatar
 
Join Date: May 2013
Location: Los Angeles
Posts: 542
Likes: 0
Received 0 Likes on 0 Posts
It's a used steering wheel, but in pretty good shape.
Old 07-31-15, 01:03 AM
  #5957  
Now w/ 12A SP
iTrader: (3)
 
PK_12A's Avatar
 
Join Date: Jun 2010
Location: Collinsville, OK.
Posts: 538
Likes: 0
Received 1 Like on 1 Post
Finished clutch break in and got out our engine hoist to replace the engine mounts.
Old 07-31-15, 06:35 AM
  #5958  
I have a rotary addiction

iTrader: (18)
 
NCross's Avatar
 
Join Date: Jun 2006
Location: Columbia, Tennessee
Posts: 4,815
Received 23 Likes on 22 Posts
Shoot. I just use a floor jack and a block of wood.
Old 07-31-15, 07:18 PM
  #5959  
Now w/ 12A SP
iTrader: (3)
 
PK_12A's Avatar
 
Join Date: Jun 2010
Location: Collinsville, OK.
Posts: 538
Likes: 0
Received 1 Like on 1 Post
What did you do to your FB today?

^I would but, my partner in crime doesn't want to risk a slip and punctuated oil pan, plus if ya got it may as well use it.
Old 08-01-15, 02:22 AM
  #5960  
Rotary Onigiri

iTrader: (9)
 
Fungus Mungus's Avatar
 
Join Date: Nov 2012
Location: The Golden State
Posts: 910
Received 17 Likes on 5 Posts
Replaced leaking oil cooler with non-leaking oil cooler, courtesy of Craaaazzy. Welding the AN fittings to bungs was a really good idea. It was 10pm when I finished and I couldn't resist starting it up. Got a text from my wife (who was upstairs in the bath): "Would you please stop making that noise!!!!?"

Not today, but I started a build thread, retroactively filling in the details:

https://www.rx7club.com/build-thread...build-1087150/

fm
Old 08-01-15, 10:58 AM
  #5961  
Full Member

 
garagemahal76's Avatar
 
Join Date: Apr 2014
Location: Wheeling WV
Posts: 138
Received 1 Like on 1 Post
getting some keys cut today for the 80 10ae, hopefully dropping the tank to clean it out, give the fuel pump & its circuit a fix, oil change and filter, hopefully make some brapping happen thru the Rotary Engineering full exhaust before it rots off. LOL
Old 08-03-15, 04:06 PM
  #5962  
Rotary Onigiri

iTrader: (9)
 
Fungus Mungus's Avatar
 
Join Date: Nov 2012
Location: The Golden State
Posts: 910
Received 17 Likes on 5 Posts
Saturday night, I triple-checked for oil leaks and then set my camber to as negative as it would go.
Yesterday, I went to the Santa Clara Corvettes auto-x event in Marina. I'd since lowered the car, installed the roll bar, and adjusted the camber. The car was a lot different. Tended to break loose on in the rear a lot more. But it was predictable and controllable. The front tires would scrub when really pushed (which happened a lot on this course). I think it's time to replace the years-old Hoosiers with some fresh Hoosier auto-x tires. Probably for the next season.

Since the course was set up for big-horsepower cars, it was harder to compete, but I did well...beat plenty of Corvettes, but lost to plenty of them too. In a tighter course, they would have been hating life. Me, not so much.

fm

Old 08-04-15, 11:38 AM
  #5963  
Waffles - hmmm good

iTrader: (1)
 
t_g_farrell's Avatar
 
Join Date: Jul 2004
Location: Lake Wylie, N.C.
Posts: 8,783
Received 282 Likes on 232 Posts
Found my exhaust leak, thought it was just the gaskets but nooooo, its a gaping hole in the rear
header pipe.


From the other side:


Also repainted my center section. Before:


After:


Also replaced the broken oiler cooler mounts, changed oil, and lubed the front end bits.

Now working on a replacement for the header because thats not repairable in my book.
Old 08-04-15, 12:33 PM
  #5964  
Lapping = Fapping

iTrader: (13)
 
Jeff20B's Avatar
 
Join Date: Aug 2001
Location: Near Seattle
Posts: 15,725
Received 70 Likes on 64 Posts
t_g, could it be a timing issue? Or tuning?
Old 08-04-15, 04:03 PM
  #5965  
Waffles - hmmm good

iTrader: (1)
 
t_g_farrell's Avatar
 
Join Date: Jul 2004
Location: Lake Wylie, N.C.
Posts: 8,783
Received 282 Likes on 232 Posts
Could be a little of all those things plus this was a used setup I got a few years ago off of someone
that used to race his rx7, so it may not be solely caused by my car.

I do want to get a dual sensor AFR setup hooked up to the ends of the middle section so I can see
how my tune is doing.
Old 08-05-15, 06:32 PM
  #5966  
Always Wanting to Learn

iTrader: (49)
 
DreamInRotary's Avatar
 
Join Date: Aug 2011
Location: Cambridge, Minnesota
Posts: 3,078
Received 42 Likes on 40 Posts
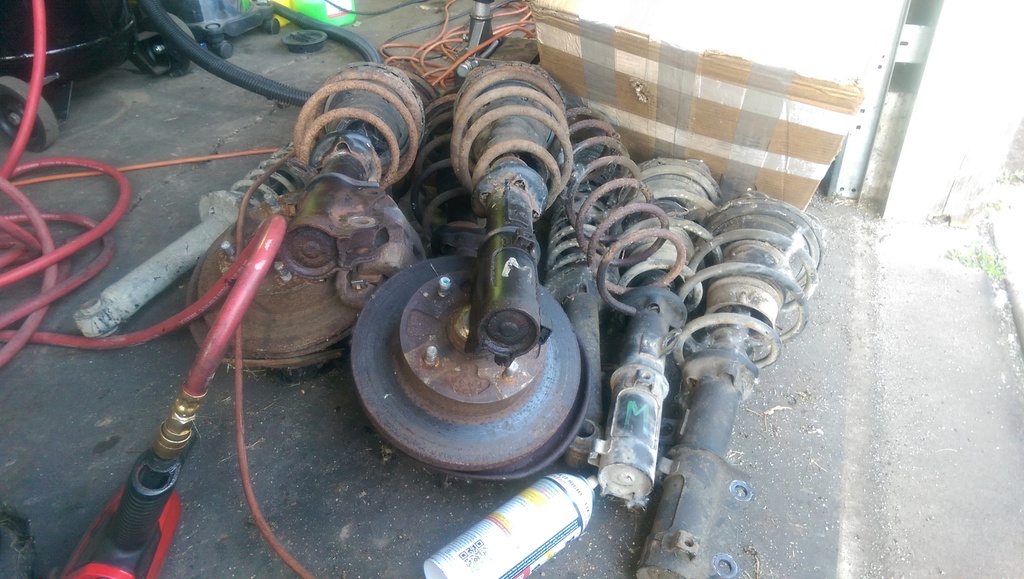
I spent some time tearing apart the FC front end parts that I bought in order to get ready for the subframe swap.
Name:  2015-08-03%2018.47.02_zpsuuzquy2l.jpg
Views: 81
Size:  291.8 KB

Name:  2015-08-03%2018.47.25_zpsd5lximjp.jpg
Views: 87
Size:  287.3 KB

Huge pile of suspension parts I have around - 2 sets of FC fronts, one FC rear, GSL-SE fronts and some rear springs for FB's.
Name:  2015-08-03%2018.47.20_zpsvr6sekxc.jpg
Views: 87
Size:  267.1 KB

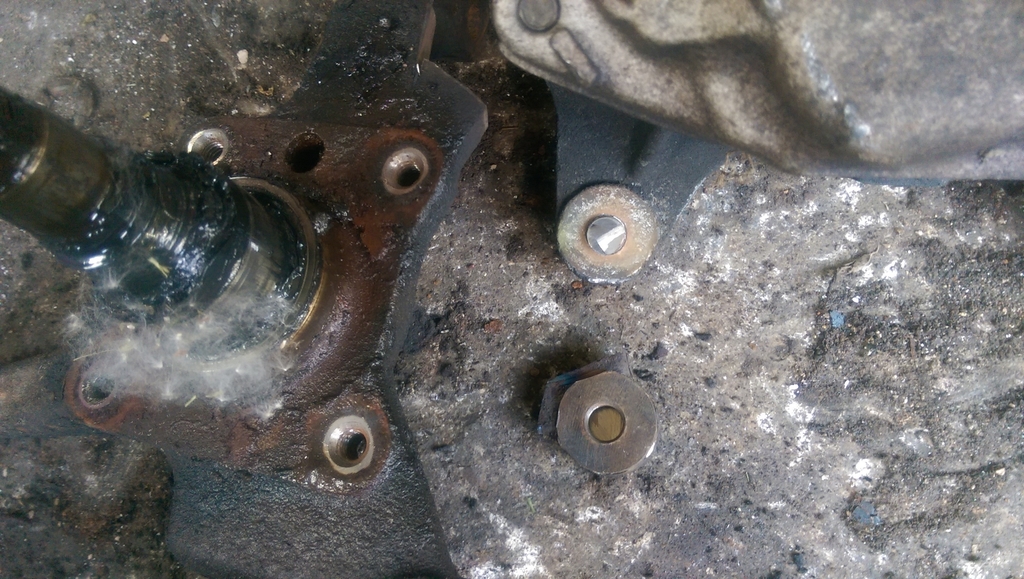
The stupid bolt for the caliper got stuck in the spindle so I had to cut off the spindle in order to save the caliper.
Name:  f4bfb265-4803-4341-86be-e1d6b63541f3_zpsc1gdgar5.jpg
Views: 85
Size:  510.5 KB

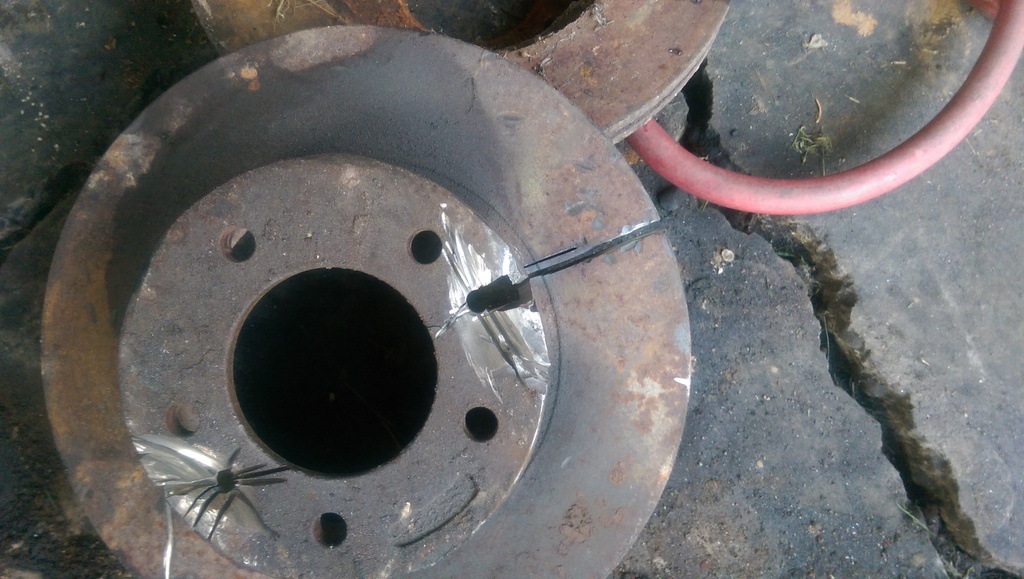
I had to break one of the rotors in half in order to remove it.
Name:  2015-08-03%2018.48.04_zpstnuixony.jpg
Views: 81
Size:  249.2 KB

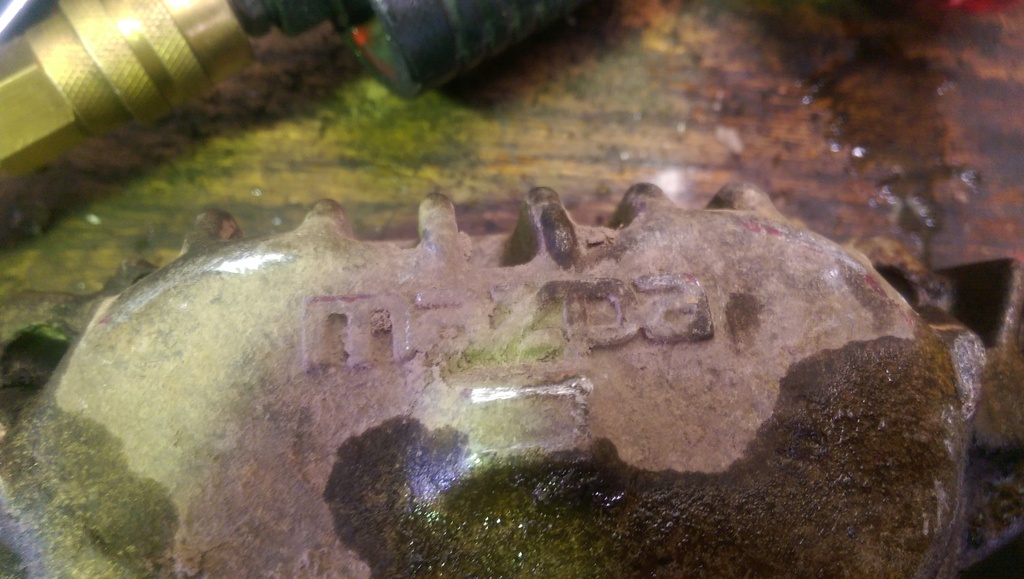
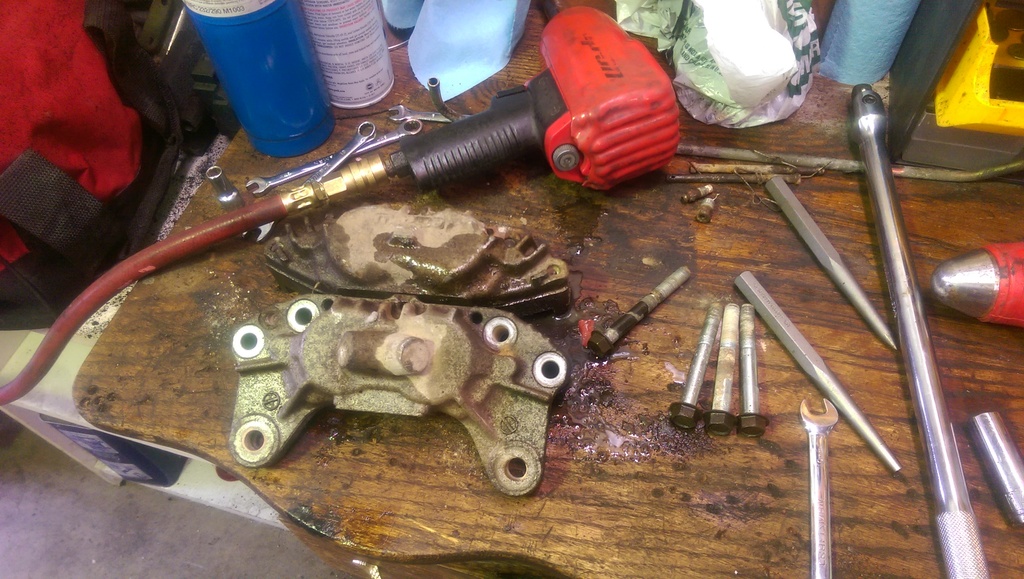
Refurbishing the FC calipers now, still have two long bolts stuck in the caliper that also had its bolt stuck to the spindle. That side must have sat outside and really corroded together.
Name:  2015-08-05%2017.25.03_zpsqsrtowb9.jpg
Views: 81
Size:  228.7 KB

Name:  2015-08-05%2017.24.51_zpsmpgeos16.jpg
Views: 77
Size:  302.8 KB
Old 08-09-15, 04:58 AM
  #5967  
Moderator

iTrader: (3)
 
diabolical1's Avatar
 
Join Date: Feb 2002
Location: FL
Posts: 10,807
Received 305 Likes on 265 Posts
1. made a 74-spec template
2. continued with work on the fuel tank. (my '84)
3. started stripping the S5 13B-T housings for cleaning and porting. (my brother's '83)
4. continued entertaining the idea of starting a "projects" thread.
Old 08-09-15, 09:30 AM
  #5968  
Always Wanting to Learn

iTrader: (49)
 
DreamInRotary's Avatar
 
Join Date: Aug 2011
Location: Cambridge, Minnesota
Posts: 3,078
Received 42 Likes on 40 Posts
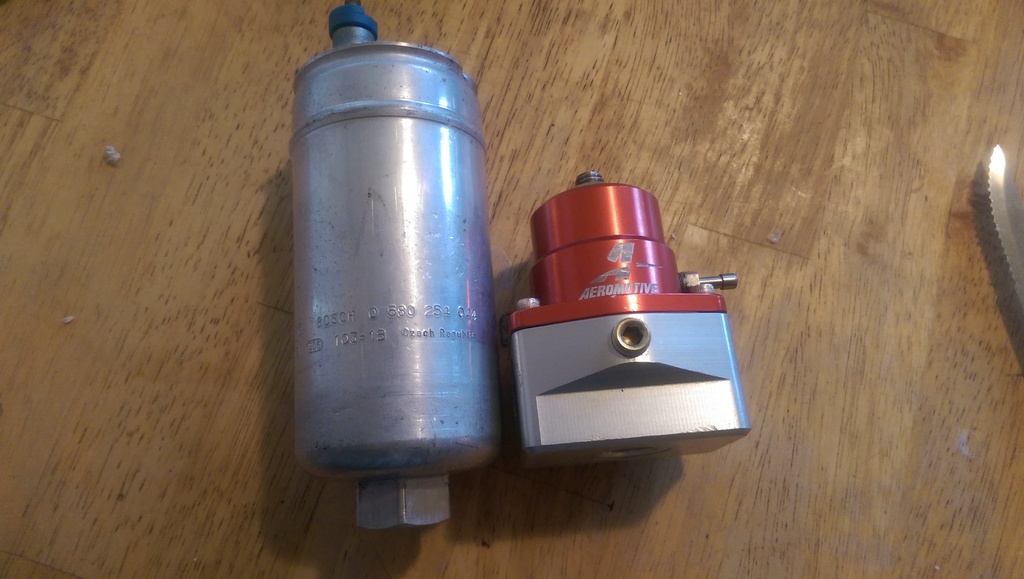
Well...I just built my dream fuel system for my car. This all stemmed from a killer deal I got on Facebook for a Bosch 044 and Aeromotive A1000-6 Bypass EFI Fuel Pressure Regulator for $250 shipped. I figured since this build is along the lines of the "go big or go home" mentality, I might as well make it so I never have to touch the fuel system again. By shopping around for parts and getting the best deal on each component I know that I easily saved $100-200 on this setup, probably more than that even if I had wanted to have every fitting match (brand name-wise). I went with an entirely black fitting setup with silver stainless steel line that I plan on doing something kinda cool to...

Picture of the 044 and Aeromotive FPR I got from a guy on Facebook:
Name:  2015-08-06%2017.54.10_zpskvbz0iw6.jpg
Views: 75
Size:  195.4 KB

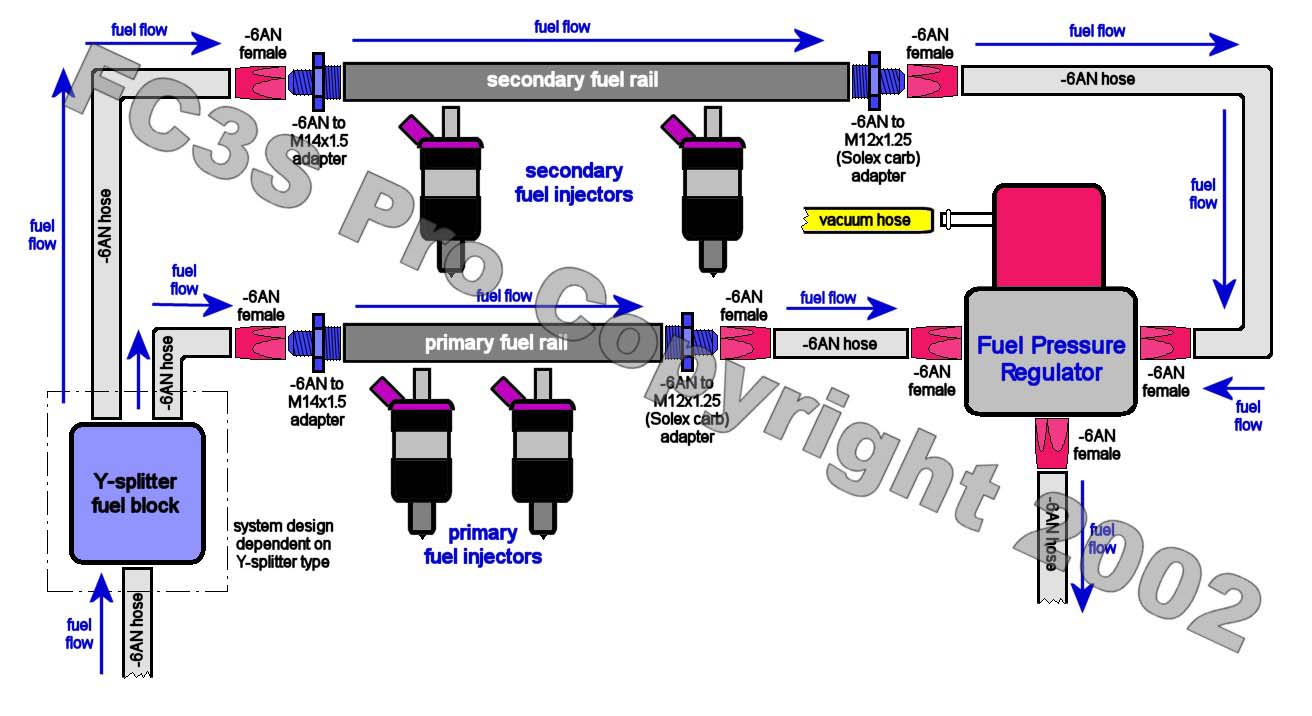
The fuel feed setup is based on this setup from FC3SPRO:


This is my actual list, with current prices as of 08/09/2015. Each item is hyperlinked to the exact product that I bought (this was truly painstaking )
$4.97 ---- 3/8" Barb to AN-6 Female- Summit
$25.97 --- AN-6 Male In/Out 40mic Fuel Filter - Summit
$5.97 ---- AN-6 Female/Female Coupler - Summit
$14.00 --- Bosch Adapters to AN-6 Males - B&R
$125.00 - Bosch 044 Fuel Pump - Facebook Deal
$6.99 ---- 3/8" Hard Line to AN-6 Female - Jegs
$18.97 -- 3/8" 25' Aluminum Fuel Line - Summit
$6.99 ---- 3/8" Hard Line to AN-6 Female - Jegs
$18.20 --- Fuel Y-Block AN-6 Inlet/Outlets - TRE
$4.97 ---- AN-6 Straight Hose End - Summit
$16.65 -- AN-6 120deg Hose End - TRE
$4.40 ---- M14x1.5 to AN-6 Male - TRE
$4.40 ---- M12x1.25 to AN-6 Male - TRE
$4.97 ---- AN-6 Straight Hose End - Summit
$125.00 - Aeromotive A1000-6 Bypass Regulator - Facebook Deal
$19.97 --- 0-100psi Fuel Pressure Gauge - Summit
$8.97 ---- AN-6 O-Ring to AN-6 Male Flare - Summit
$6.99 ---- 3/8" Hard Line to AN-6 Female - Jegs
$34.99 -- AN-6 10' SS Hose - Summit
$14.99 -- Bosch 044 Mounting Ring Red - eBay
TOTAL(without shipping/handling or tax)
$536.63

Now, if you were to purchase a new Bosch 044 and Aeromotive FPR:
$163.97 - Aeromotive FPR A1000-6 - Summit
$194.99 - Bosch 044 Fuel Pump - MAP I have to support the local MN businesses, and MAP is one of them!
TOTAL ALL NEW PARTS(without shipping/handling or tax)
$645.59

So right there I can see I already saved over $100 compared to buying new, when the pump and regulator I bought were only run for about 500 miles. Shows that it pays to shop around for parts!

Directional plan of the fuel system:
FEED
Fuel tank pickup
3/8" EFI rubber fuel line
3/8" barb to AN-6 Female
AN-6 Male In/Out 40mic Fuel Filter
AN-6 Female/Female Coupler
Bosch Adapter to AN-6 Male
Bosch 044 Fuel Pump (on mouning bracket)
Bosch Adapter to AN-6 Male
3/8" Hard line to AN-6 Female
3/8" Aluminum Fuel Line
3/8" Hard Line to AN-6 Female
Fuel Y-block AN-6 Male Outlets
2 AN-6 Female Hose Ends
2 AN-6 Lines towards Fuel Rails
2 120deg Swivel Hose End
2 M14x1.5 to AN-6 Male Adapters with Crush Washers
Fuel Rails
2 M12x1.25 to AN-6 Male Adapters with Crush Washers
2 AN-6 Female Hose Ends
2 AN-6 Lines towards Aeromotive FPR
2 AN-6 Female Hose Ends
Aeromotive A1000-6 FPR (w/0-100psi Fuel Gauge)
2 AN-6 Straight Cut O-ring to AN-6 Male

RETURN
Aeromotive FPR Return Port
AN-6 Straight Cut O-ring to AN-6 Male
AN-6 Female to 3/8" Hard Line Adapter
3/8" Aluminum Fuel Line
Flared end of the aluminum fuel line
Rubber fuel line to return on fuel pickup

Hopefully I can get around to building this awesome system sometime this week - I'm super stoked!
Old 08-09-15, 08:16 PM
  #5969  
Senior Member

 
rotaryjunkee's Avatar
 
Join Date: Oct 2008
Location: palmetto
Posts: 380
Likes: 0
Received 3 Likes on 2 Posts


Street strip 4 puck clutch and pressure plate came in


Started cleaning the tranny on the outside


Outside nice and clean


Inside was as bad or worse than outside.<br/>But heres a pic of almost fully cleaned.


And of course after removing the old pilot bearing and seal and cleaning everything up.<br/>I installed the new mazda pilot bearing and seal and mazda throwout bearing, then followed by the clutch and pressure plate and tranny.<br/>Getting her ready for the future upgrades (boost prepped nikki and t4 turbonetics turbo) 👍
Old 08-14-15, 04:04 AM
  #5970  
RX HVN

iTrader: (2)
 
7aull's Avatar
 
Join Date: Jan 2003
Location: Arizona
Posts: 3,889
Received 227 Likes on 167 Posts
2 years in the Making - spare 12a is being finished in my Man Shed (™) - do-or-die coolant Seal pressurization (20 lbs for an hour) check up! Passed (*gasp*) with flying colors (thanks for a GREAT tool, Pineappleracing!). Next was the End Float: .0013" is tight, but my Guru has said its acceptable and to just back off the front pulley bolt a few ft/lbs to compensate. Onward…

Stu
80GS
Alaska
Attached Thumbnails What did you do to your FB today?-12a-pressure-test-1-sm.jpg  
Old 08-15-15, 06:01 PM
  #5971  
1st-Class Engine Janitor

iTrader: (15)
 
DivinDriver's Avatar
 
Join Date: Jun 2008
Location: Chino Hills, CA
Posts: 8,376
Received 26 Likes on 24 Posts
Sulking today... finally have a Saturday where I don't have to work, don't have any commitments, REALLY wanted to get some wheel time on the -7 & then replace the e-brake cables with new ones that have been sitting on the workbench for months now...

So of course it's 108* today. And I have no AC in the -7. Or the garage.

Argh.

Stu: well done!
Old 08-16-15, 02:38 AM
  #5972  
RX HVN

iTrader: (2)
 
7aull's Avatar
 
Join Date: Jan 2003
Location: Arizona
Posts: 3,889
Received 227 Likes on 167 Posts
Thx DD - I will pout w/you from AZ once down there. No AC = "Winter Driver" for me too. Ah the irony…
;D
Stu
80GS
Alaska
Old 08-16-15, 09:35 AM
  #5973  
Moderator

iTrader: (3)
 
diabolical1's Avatar
 
Join Date: Feb 2002
Location: FL
Posts: 10,807
Received 305 Likes on 265 Posts
i had another late night session and got a decent amount of work done.

1. i did a little more work on my gas tank

2. i pretty much finished the primary ports on my brother's engine
Old 08-16-15, 05:19 PM
  #5974  
1st-Class Engine Janitor

iTrader: (15)
 
DivinDriver's Avatar
 
Join Date: Jun 2008
Location: Chino Hills, CA
Posts: 8,376
Received 26 Likes on 24 Posts
Originally Posted by 7aull
Thx DD - I will pout w/you from AZ once down there. No AC = "Winter Driver" for me too. Ah the irony…
;D
Stu
80GS
Alaska
The day got even BETTER when my daily-driver 350Z decided to throw a MIL and drop into Limp Mode at 6pm (right after all the dealerships closed), when it was still about 100* out.

So I ended up working in the heat anyway, as the car had to be on-line Monday and I'm working at the wife's store today.

(It was a failed Bank 1 Camshaft Position Sensor - clearly the heat was too much for it, too. 2 hours, $80 and a half-bucket of sweat later, back on line.)
Old 08-16-15, 07:33 PM
  #5975  
turbo or bust
iTrader: (8)
 
erick31876's Avatar
 
Join Date: May 2012
Location: bristol,pa
Posts: 870
Likes: 0
Received 0 Likes on 0 Posts
Did some rust repair


Finished welding in my last patch, and went around the edges with panel bond


Re-seam sealed. The entire wheel well

One side down, one more to go. Hopefully it won't be 100 degrees out


Quick Reply: What did you do to your FB today?


All times are GMT -5. The time now is 09:45 PM.