(INTERIOR) How-to: Remove your dashboard (84 and 85)
 09-03-05, 07:04 PM
#1
On the prowl for an FB
Thread Starter
iTrader: (1)
Join Date: Sep 2002
Location: Surrounded by Sebey parts, Rhode Island
Posts: 2,932
Likes: 0
Received 6 Likes
on
4 Posts
(INTERIOR) How-to: Remove your dashboard (84 and 85)
This is going to be LONG.
Tools needed:
Digital Camera. IMPORTANT!!!
#2 phillips head screwdriver (get the removable kind that can swap heads. Trust me on this.)
9, 10, 11 mm sockets
Small vise grips
13/16 inch socket
Gear puller
Zip-loc container. Not a bag, get the containers. $3 at Wal-Mart, worth every penny.
Common Sense
Ok, for today, I didn't need the gear puller. I swapped my steering wheel 2 weeks ago for a Grant wheel, so I didn't need the gear puller to pop it off. If you have a stock steering wheel, you'll need the puller. You can borrow one from your local Advance or Auto Zone.
I started on the passenger side. The drivers side is a bigger pain in the ***, so if you want to get the difficult stuff out of the way first, start on the drivers side.
Take out the center console stuff. Either remove your radio at the same time, or do it later. My console was already out, so there you go.
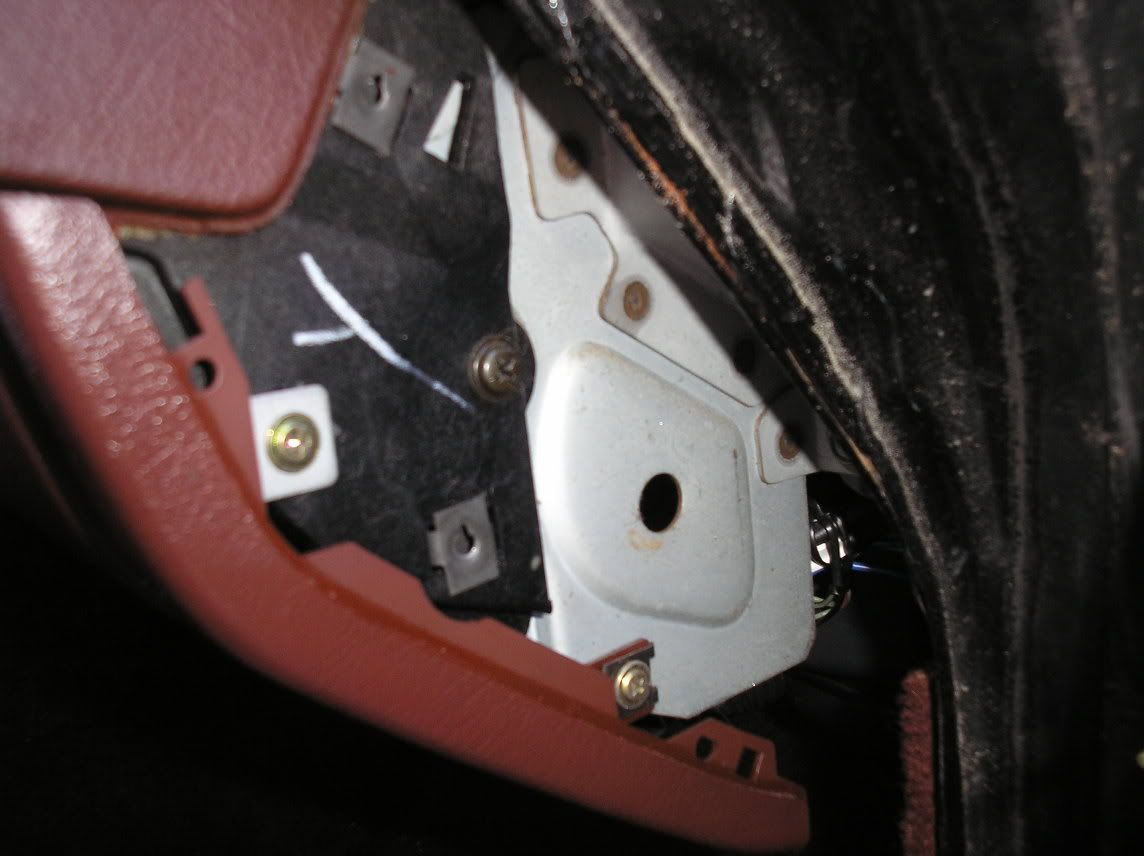
I started with this small panel on the side by the door:
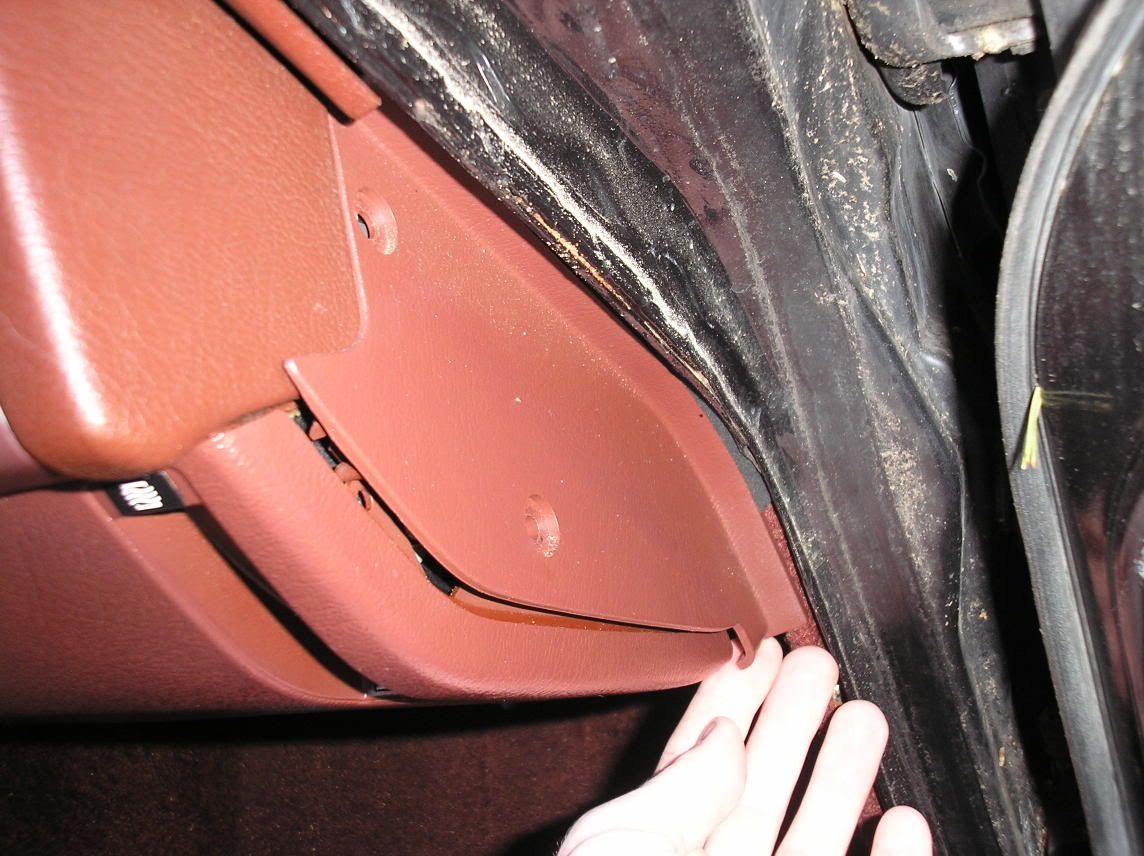
I went ahead and took out all these screws. They're coming out eventually, so do it now.
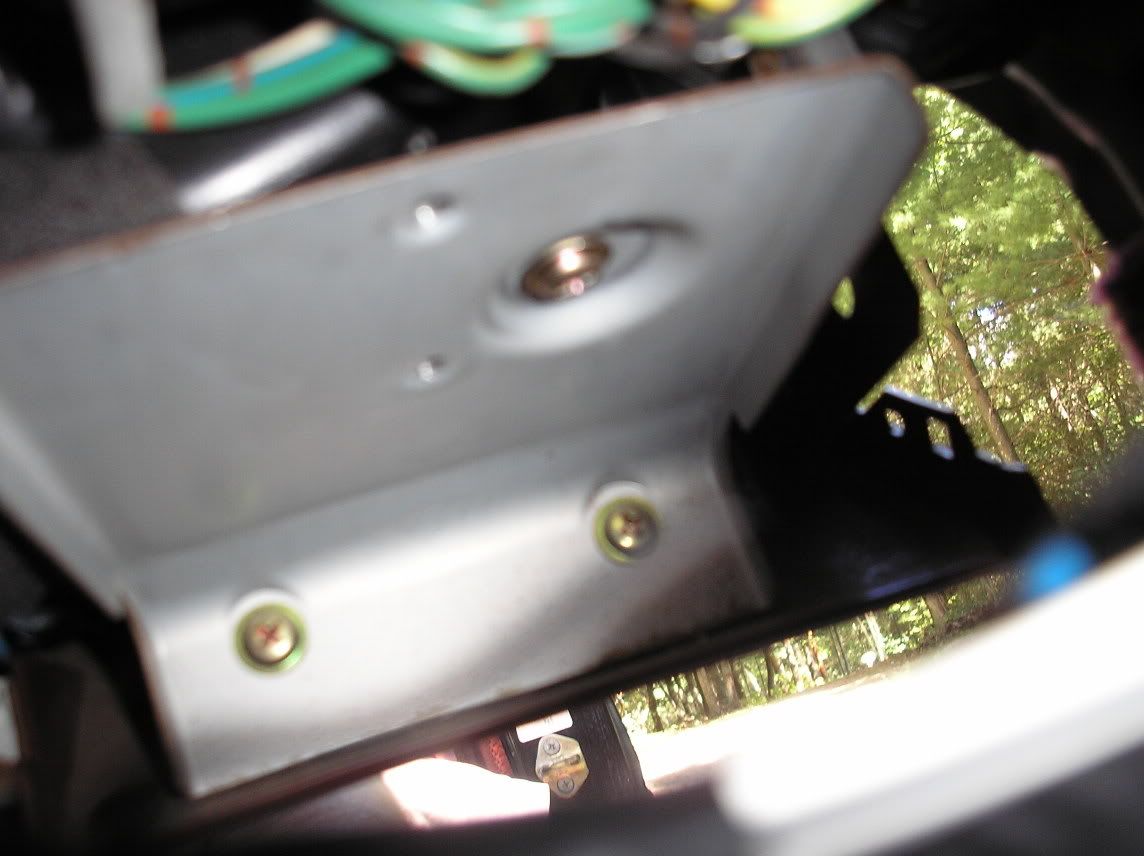
Remove the panel underneath the glove box:
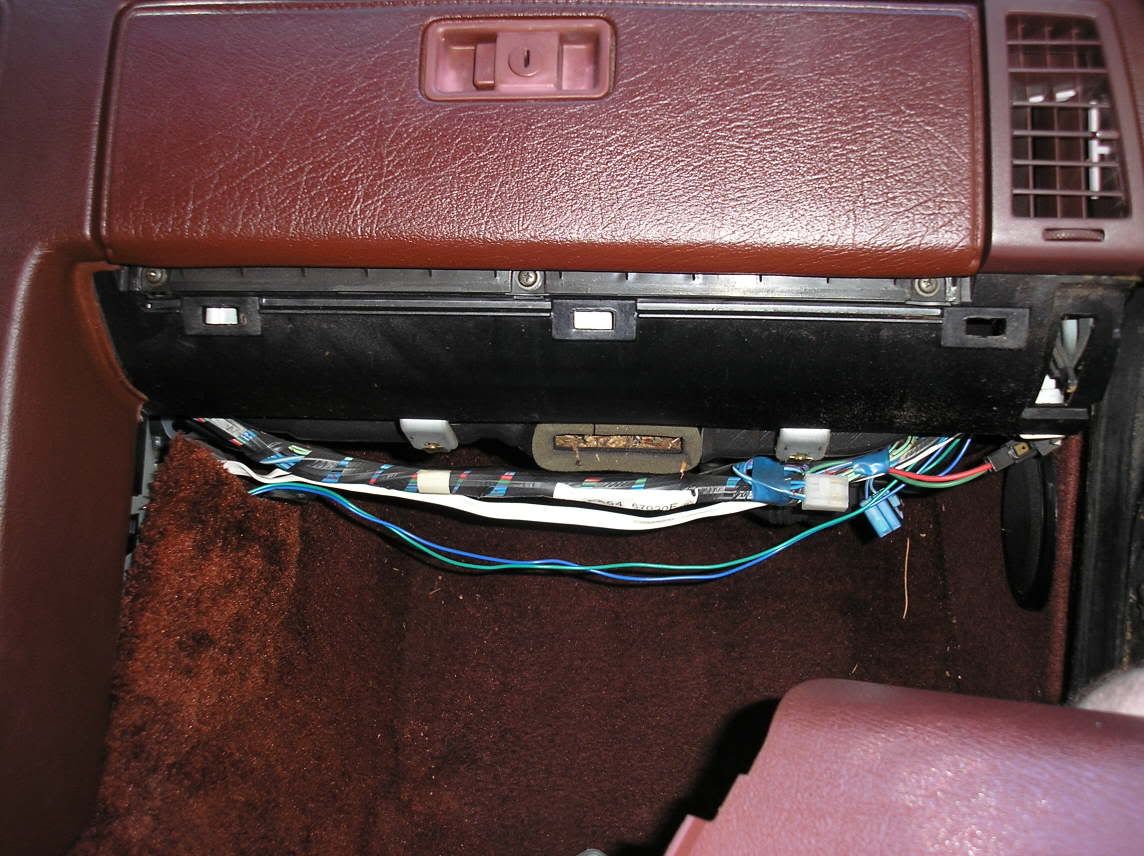
Then, you will find three screws shown here. They must be removed to get the glove box out:
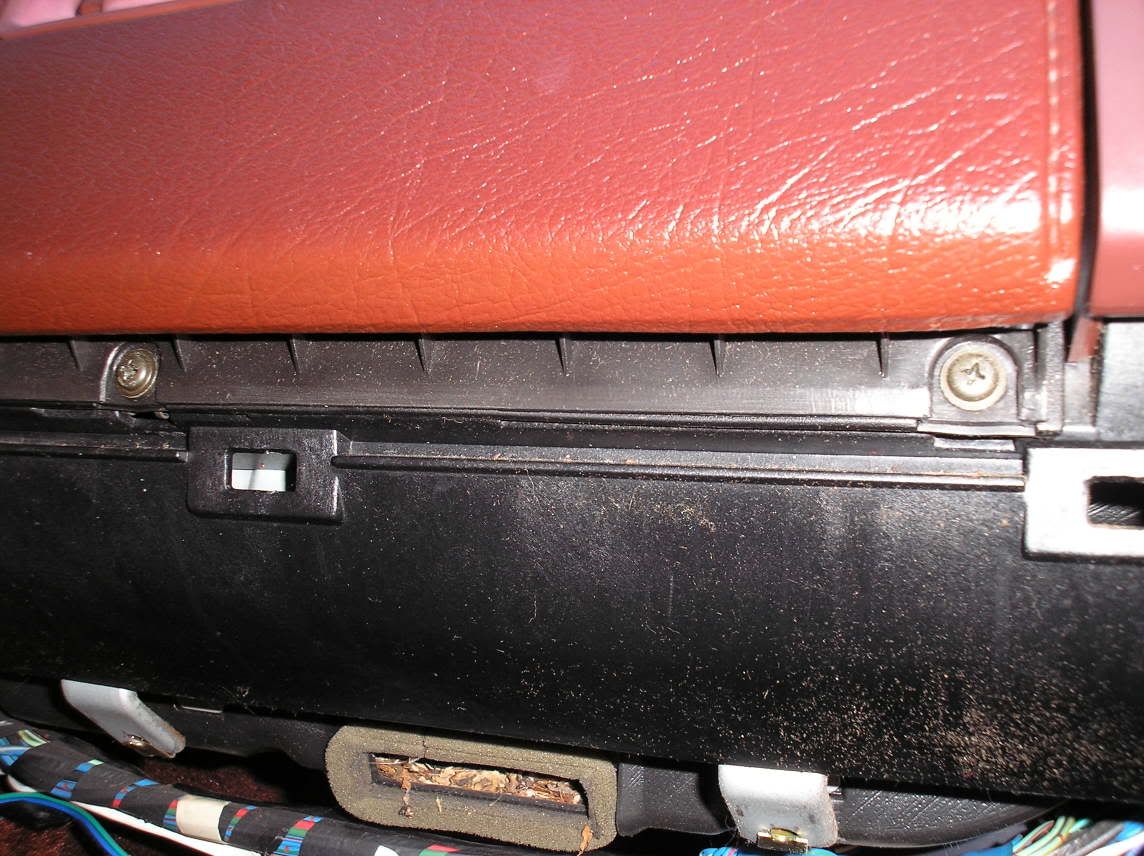
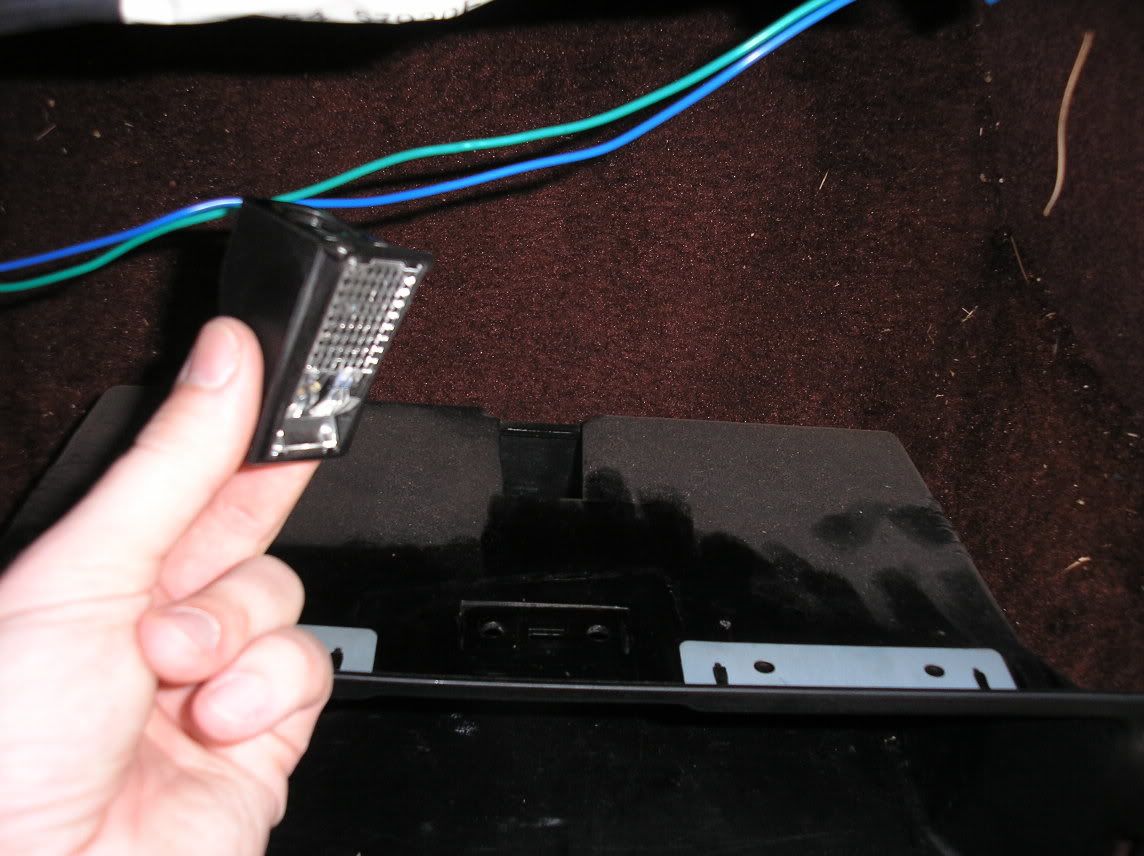
When you take out the glove box liner, you will notice the cute little light on the top of it. By reaching underneath and around the back, you can pop the lightbulb out of the housing. Then, you can pop the housing forward through the glovebox liner and out! Removing the door to the glovebox is simple. You just have to twist the little sliders a bit, and it comes right off. Remember, don't just twist away, use as little force as possible. It's 20 years old, you don't want to break it.
You should now be looking at something like this:
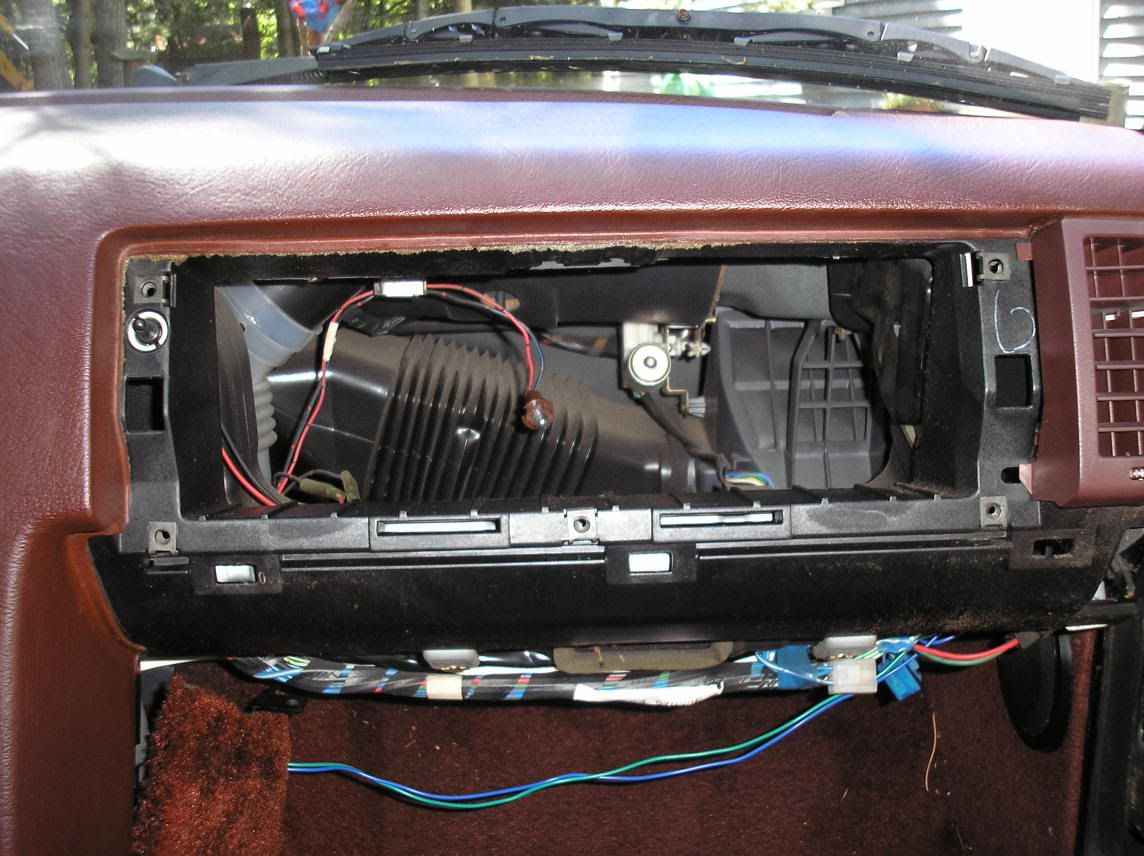
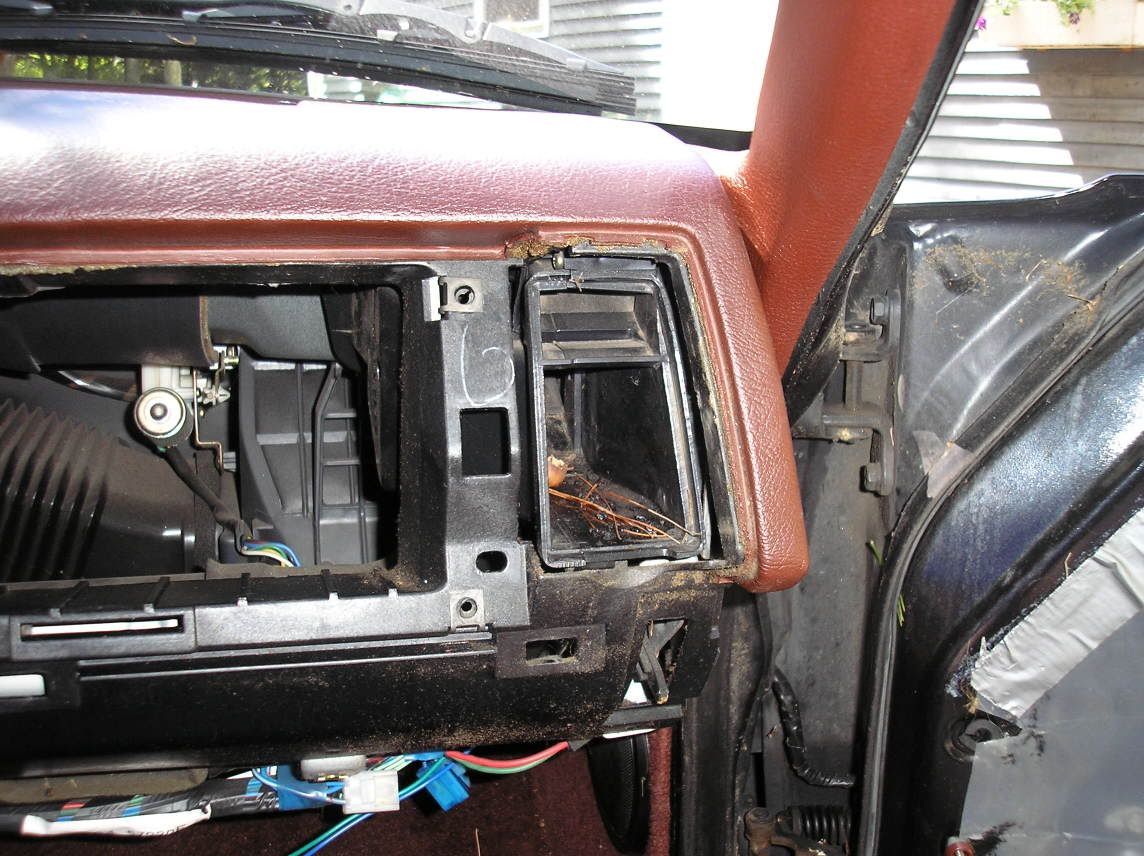
Remove the A/C vent. Just give it a little push on the side and wiggle it out. Again, be careful not to break it:
Tools needed:
Digital Camera. IMPORTANT!!!
#2 phillips head screwdriver (get the removable kind that can swap heads. Trust me on this.)
9, 10, 11 mm sockets
Small vise grips
13/16 inch socket
Gear puller
Zip-loc container. Not a bag, get the containers. $3 at Wal-Mart, worth every penny.
Common Sense
Ok, for today, I didn't need the gear puller. I swapped my steering wheel 2 weeks ago for a Grant wheel, so I didn't need the gear puller to pop it off. If you have a stock steering wheel, you'll need the puller. You can borrow one from your local Advance or Auto Zone.
I started on the passenger side. The drivers side is a bigger pain in the ***, so if you want to get the difficult stuff out of the way first, start on the drivers side.
Take out the center console stuff. Either remove your radio at the same time, or do it later. My console was already out, so there you go.
I started with this small panel on the side by the door:
I went ahead and took out all these screws. They're coming out eventually, so do it now.
Remove the panel underneath the glove box:
Then, you will find three screws shown here. They must be removed to get the glove box out:
When you take out the glove box liner, you will notice the cute little light on the top of it. By reaching underneath and around the back, you can pop the lightbulb out of the housing. Then, you can pop the housing forward through the glovebox liner and out! Removing the door to the glovebox is simple. You just have to twist the little sliders a bit, and it comes right off. Remember, don't just twist away, use as little force as possible. It's 20 years old, you don't want to break it.
You should now be looking at something like this:
Remove the A/C vent. Just give it a little push on the side and wiggle it out. Again, be careful not to break it:
 09-03-05, 07:06 PM
#2
On the prowl for an FB
Thread Starter
iTrader: (1)
Join Date: Sep 2002
Location: Surrounded by Sebey parts, Rhode Island
Posts: 2,932
Likes: 0
Received 6 Likes
on
4 Posts
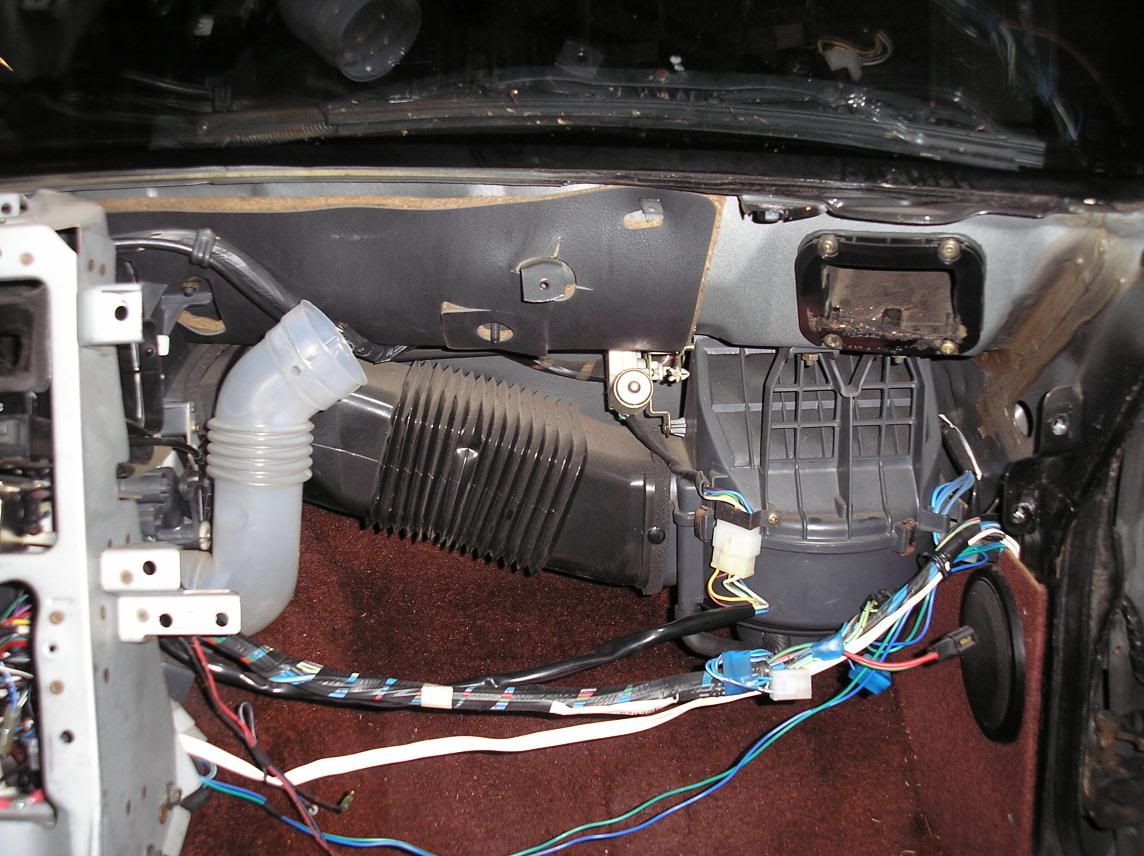
It turns out that when the previous owner let the car sit in his driveway, a mouse made his home in my A/C ducting. He **** all over it and made a nest. I took this opportunity to take out the A/C ducting and wash the hell out of it.
09-03-05, 07:12 PM
#3
On the prowl for an FB
Thread Starter
iTrader: (1)
Join Date: Sep 2002
Location: Surrounded by Sebey parts, Rhode Island
Posts: 2,932
Likes: 0
Received 6 Likes
on
4 Posts
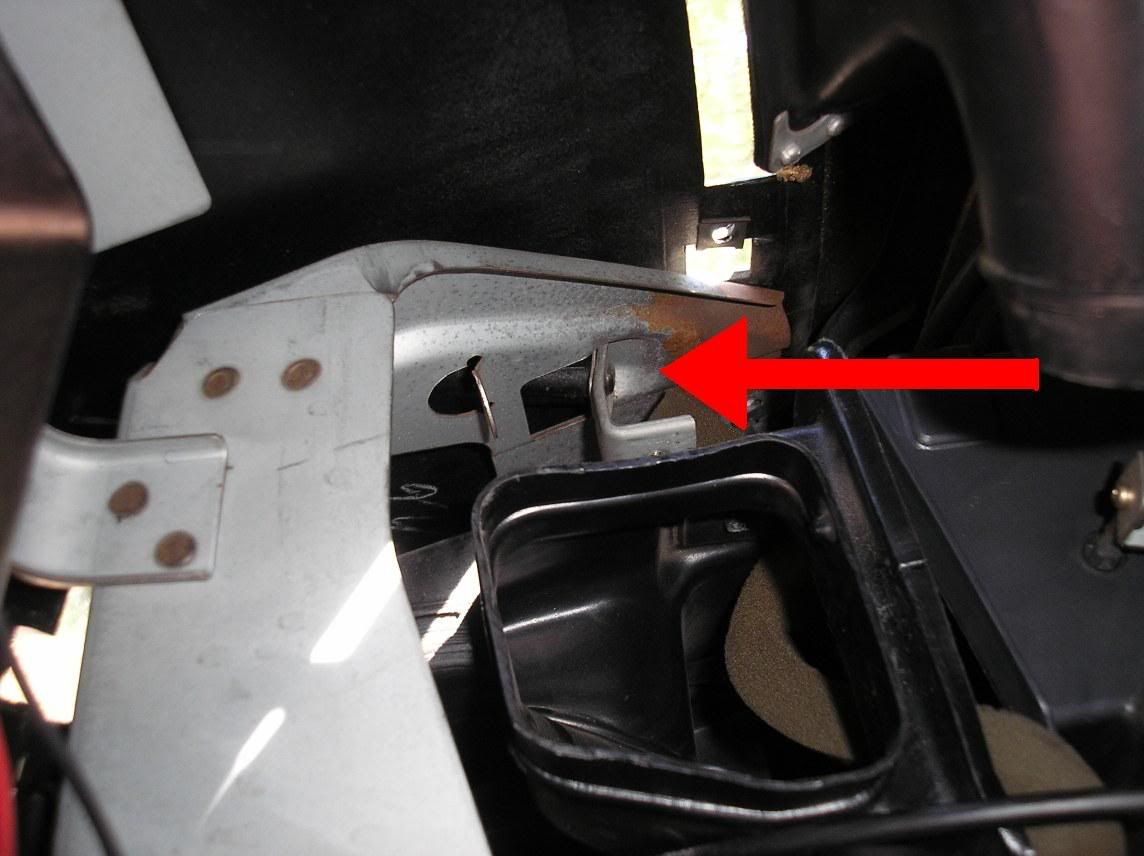
See these two bolts? They're coming out later. You can do it now if you want.
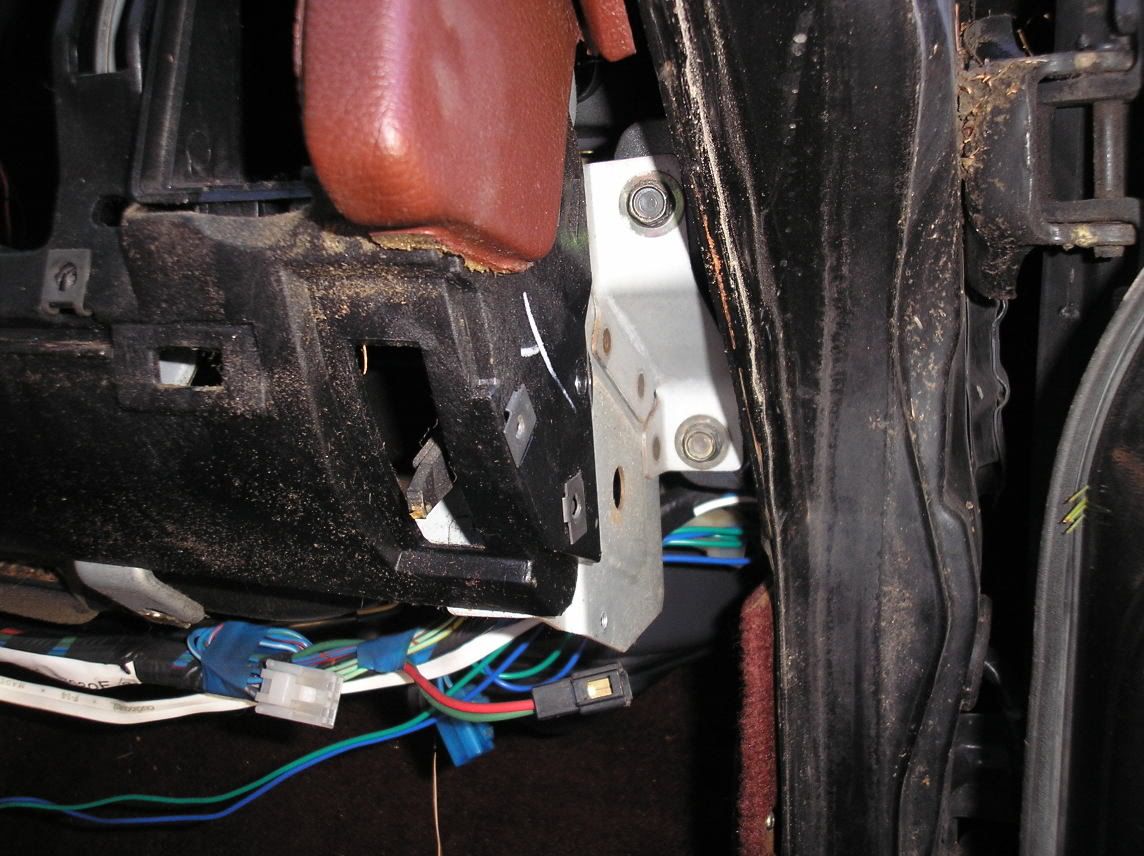
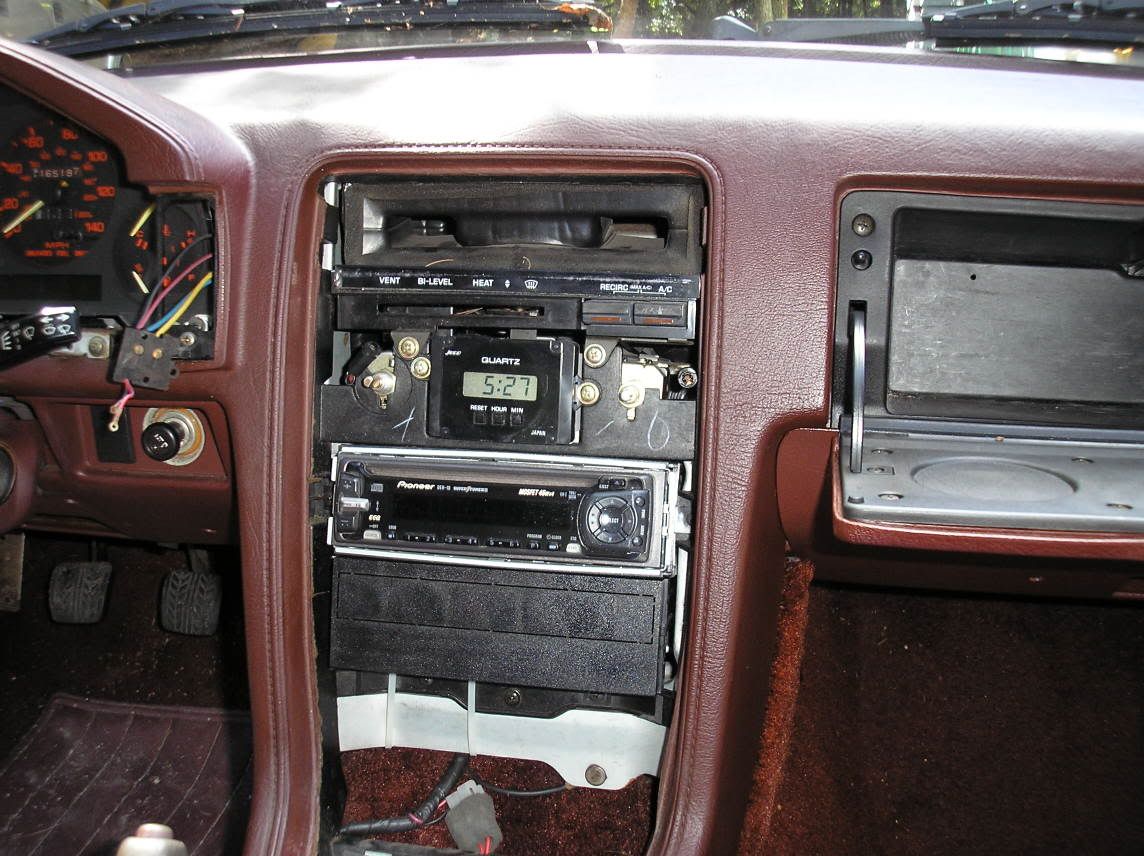
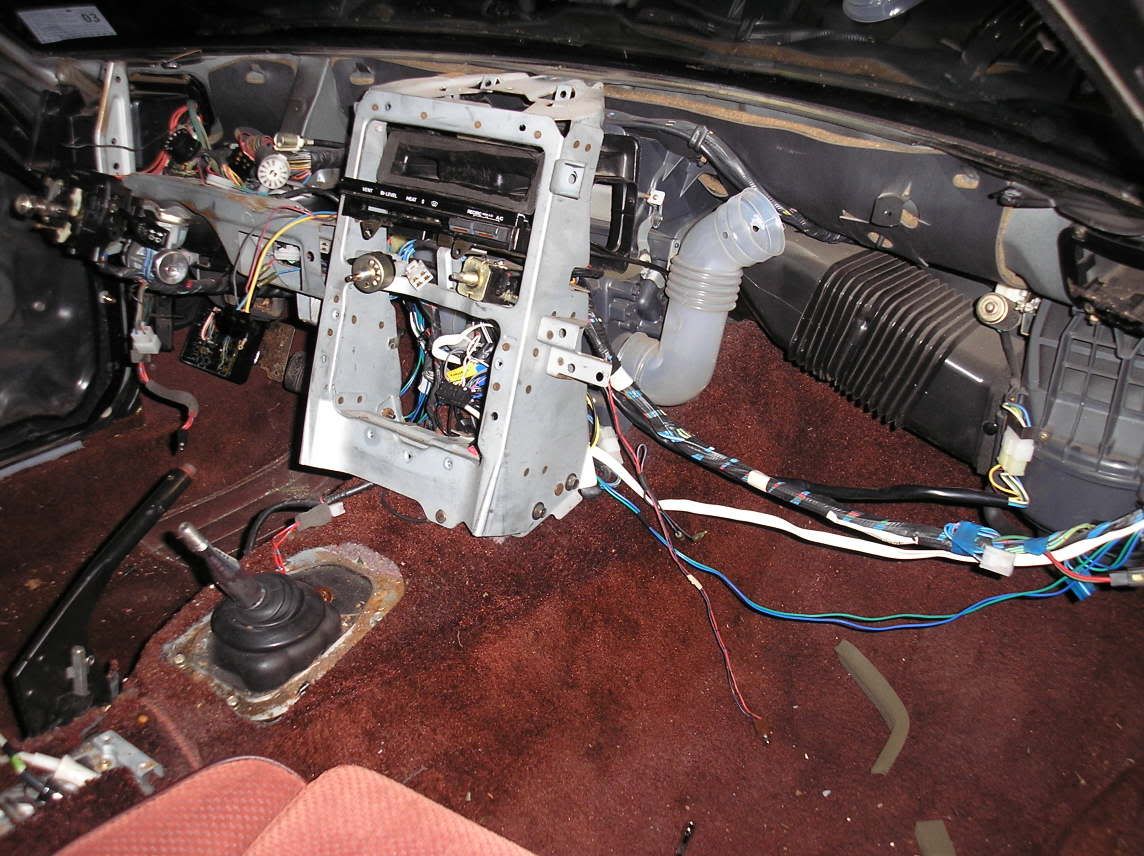
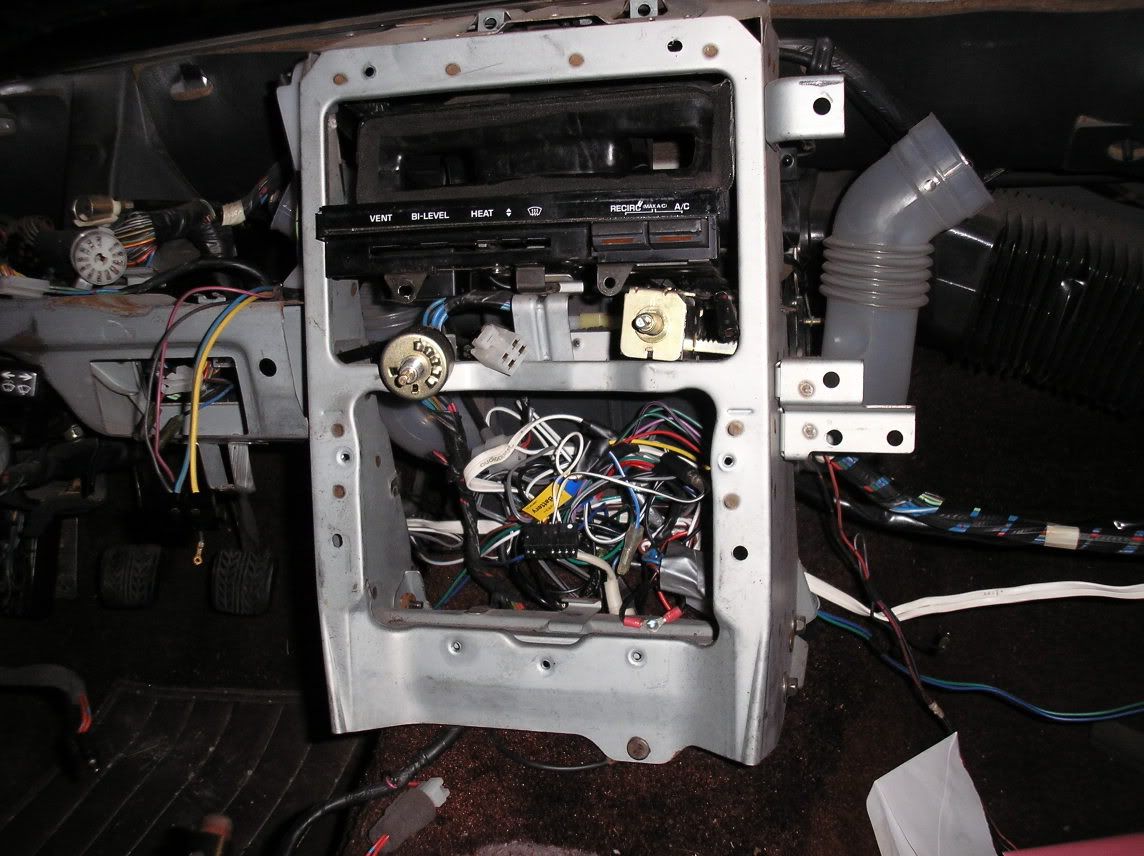
Here's when I yanked my stereo:
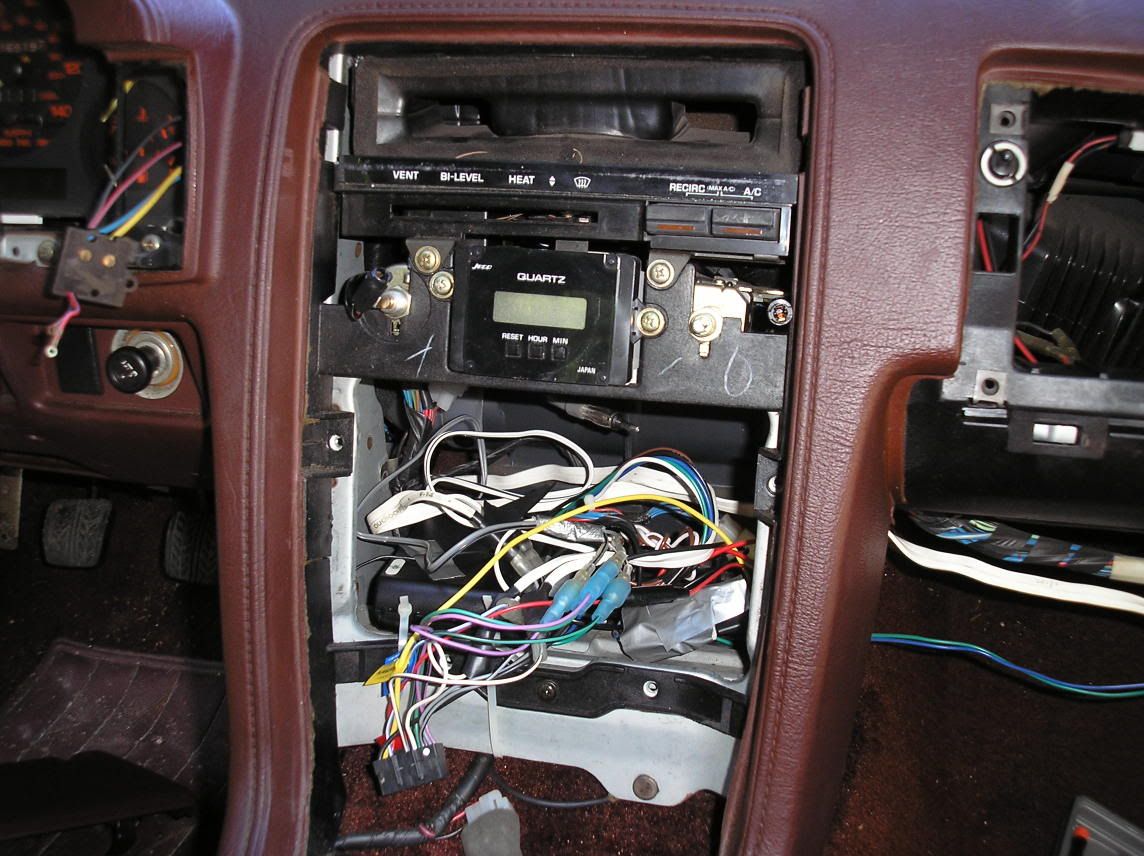
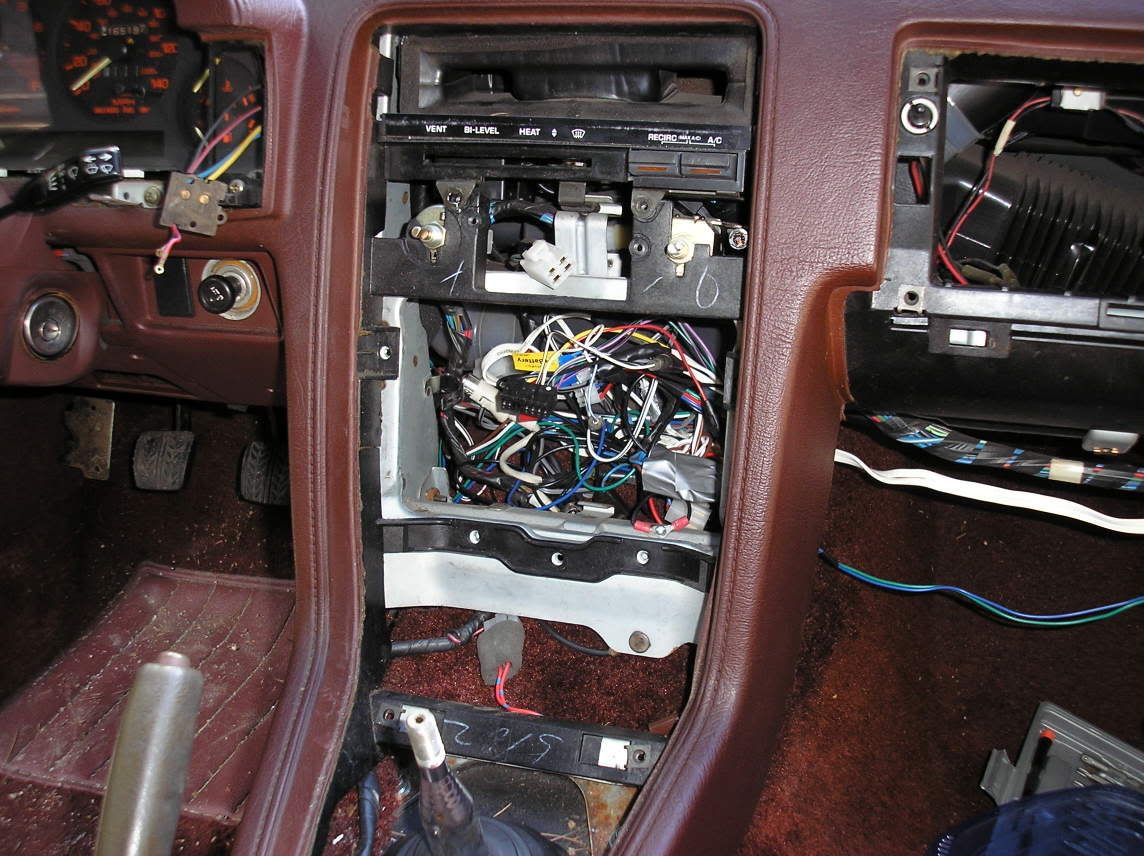
Go ahead and take out the clock, and while you're at it, get a deep socket to remove the two hex nuts holding the panel to the A/C controls:
Here's when I yanked my stereo:
Go ahead and take out the clock, and while you're at it, get a deep socket to remove the two hex nuts holding the panel to the A/C controls:
09-03-05, 07:13 PM
#4
On the prowl for an FB
Thread Starter
iTrader: (1)
Join Date: Sep 2002
Location: Surrounded by Sebey parts, Rhode Island
Posts: 2,932
Likes: 0
Received 6 Likes
on
4 Posts
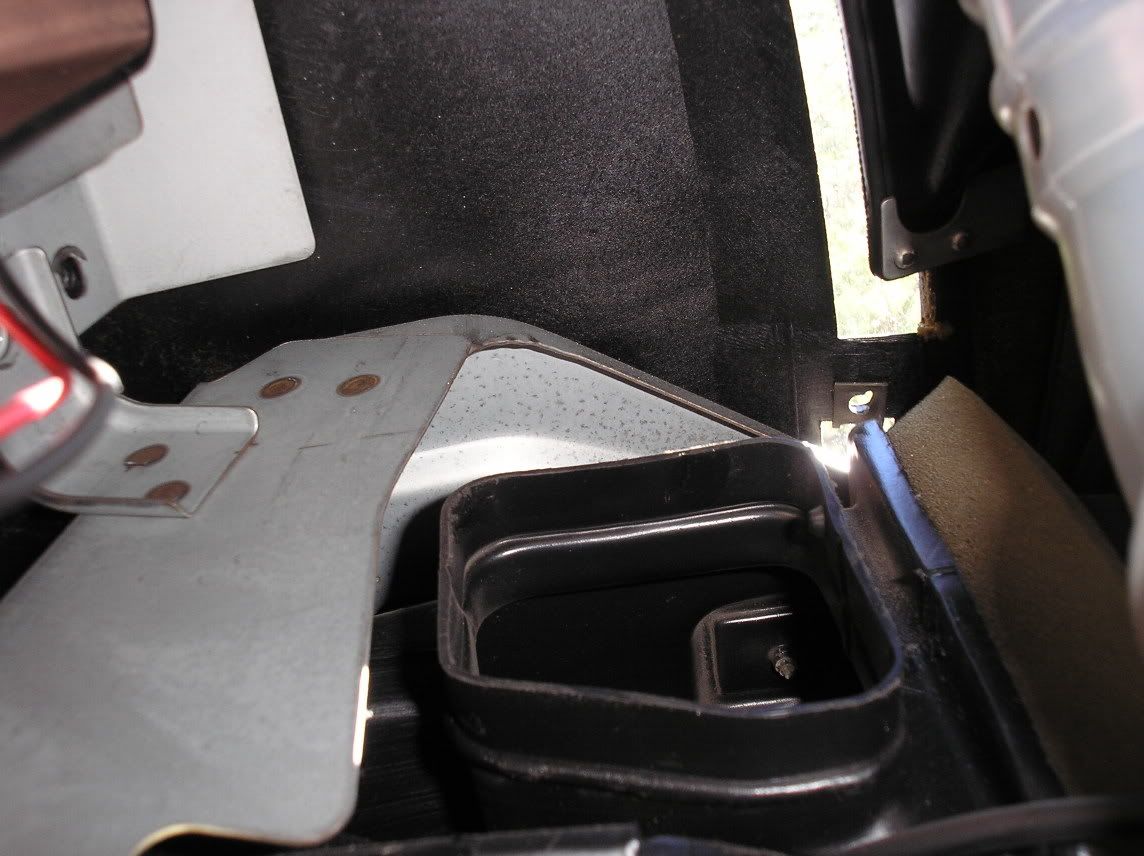
Moving on to the center armrest. These two screws need to come out:
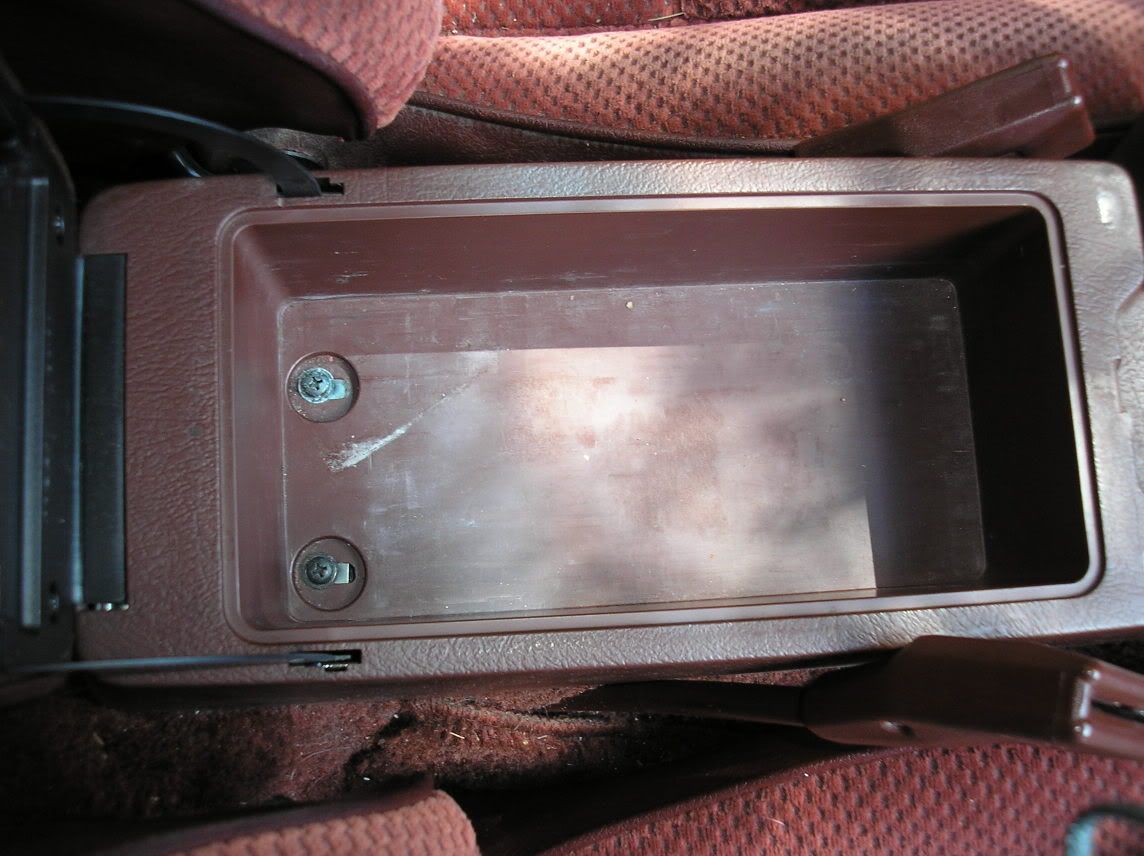
Pop out the coin holder thingy. I used a very, very small jewelers screwdriver to pop it out without damaging it:
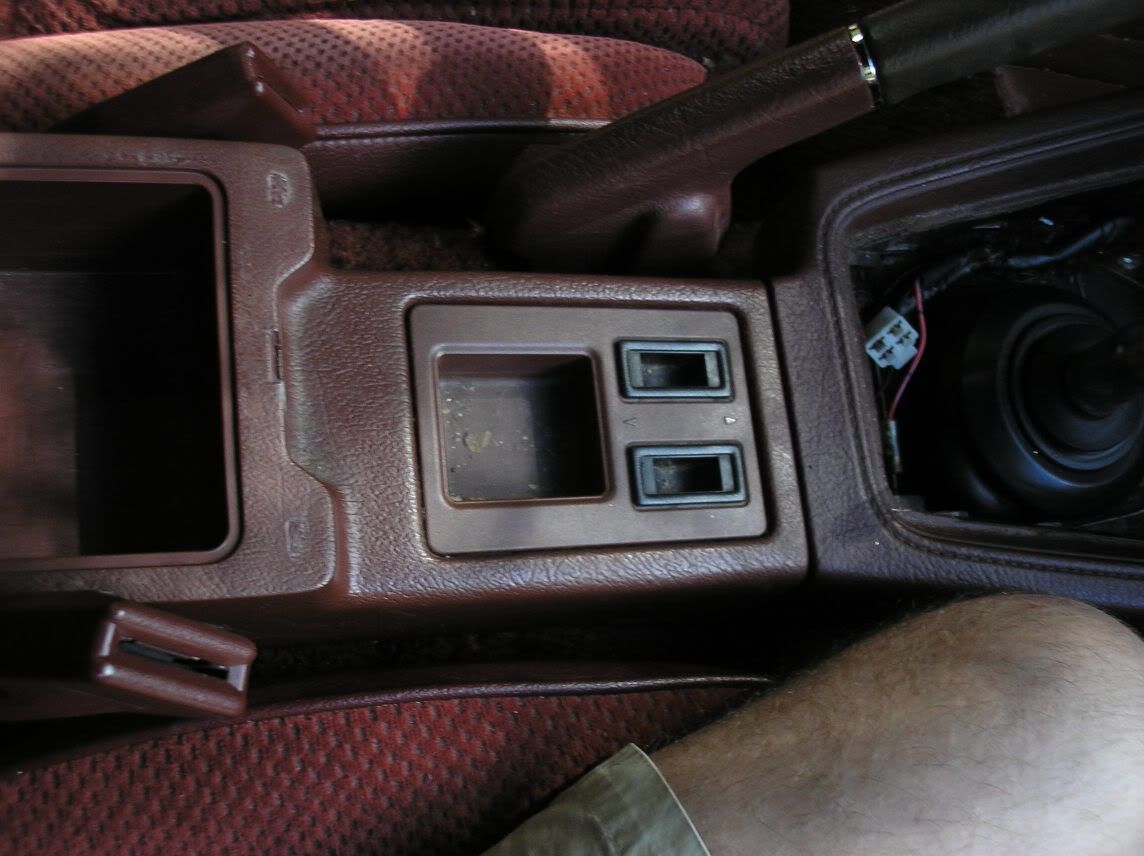
Remove these two screws, and lift it out of the way. Simple:
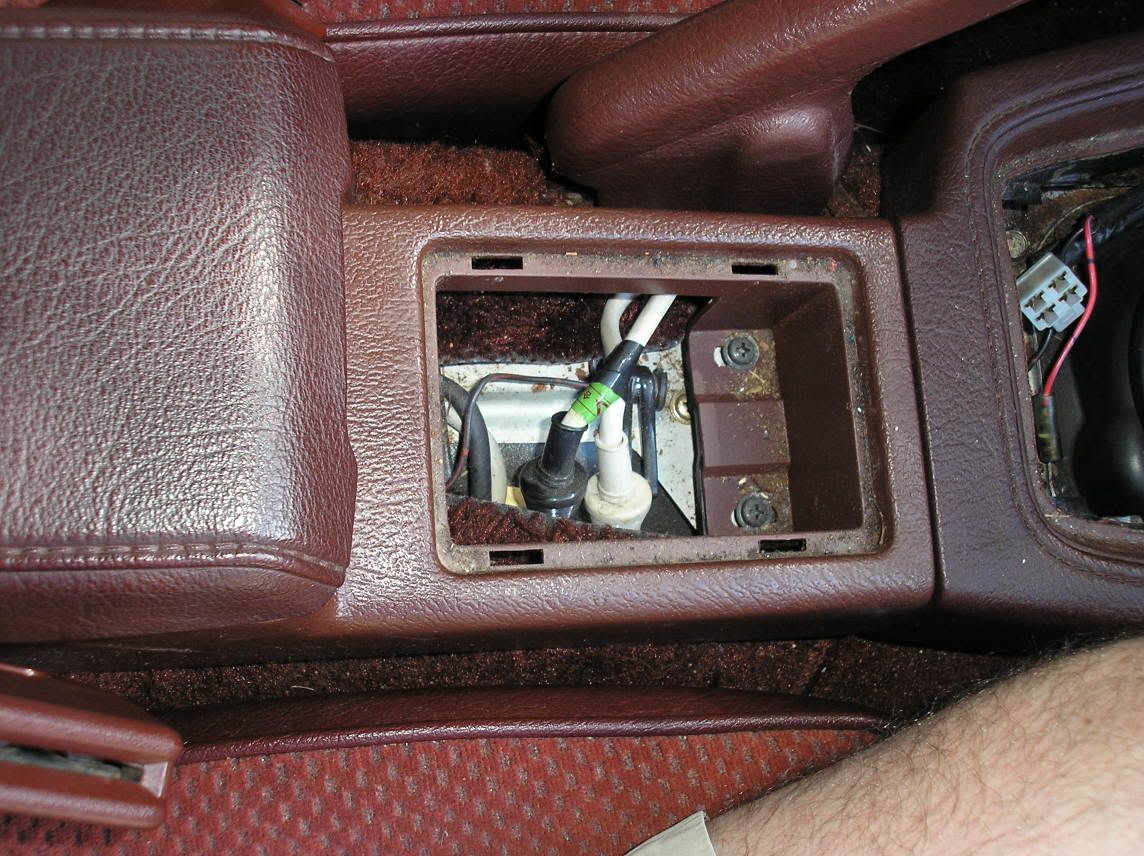
Moving on to the drivers side... Remove the same panel you started with on the passenger side.
Pop out the coin holder thingy. I used a very, very small jewelers screwdriver to pop it out without damaging it:
Remove these two screws, and lift it out of the way. Simple:
Moving on to the drivers side... Remove the same panel you started with on the passenger side.
09-03-05, 07:22 PM
#5
On the prowl for an FB
Thread Starter
iTrader: (1)
Join Date: Sep 2002
Location: Surrounded by Sebey parts, Rhode Island
Posts: 2,932
Likes: 0
Received 6 Likes
on
4 Posts
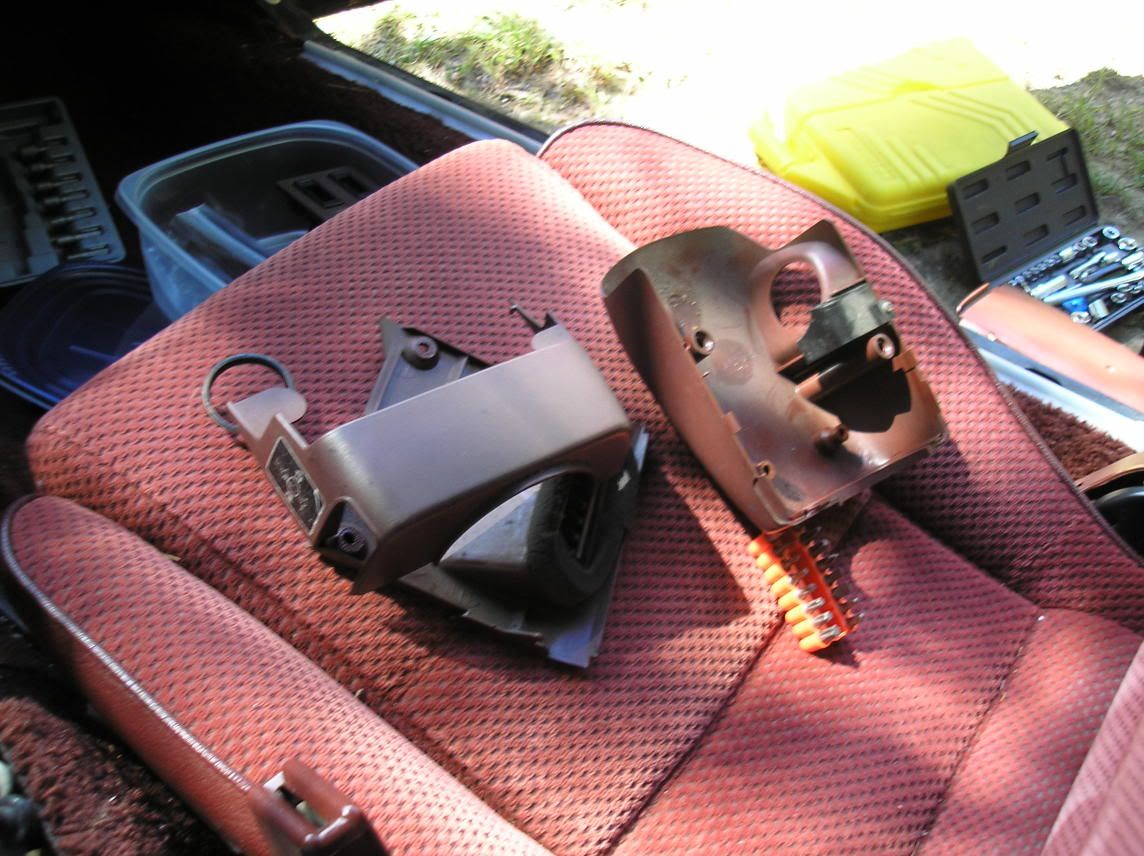
Then, remove the steering column covers. There's something like 6 screws holding it in place. Remove them all.
Here's the removed parts from this side. Notice that big zip-lock container? It's holding all the screws. You are going to end up removing probably 100 or so screws, it's nice to have them all in one place. It's also a good dumping ground for small parts.
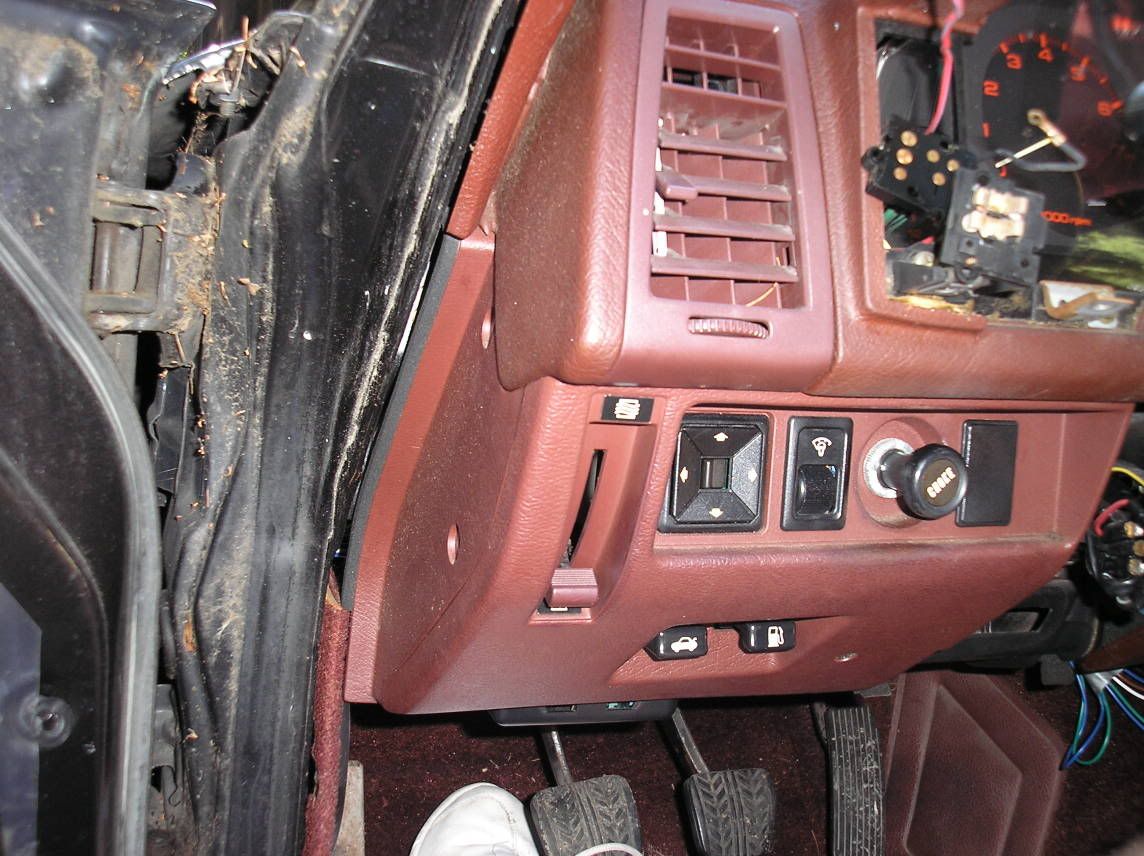
I used the digital camera to take some shots of what screws to remove next. Beats the hell out of laying on my back under the dash to look. Remove the choke **** at the same time. There's a screw on the **** you need to loosent to be able to pull the **** off:
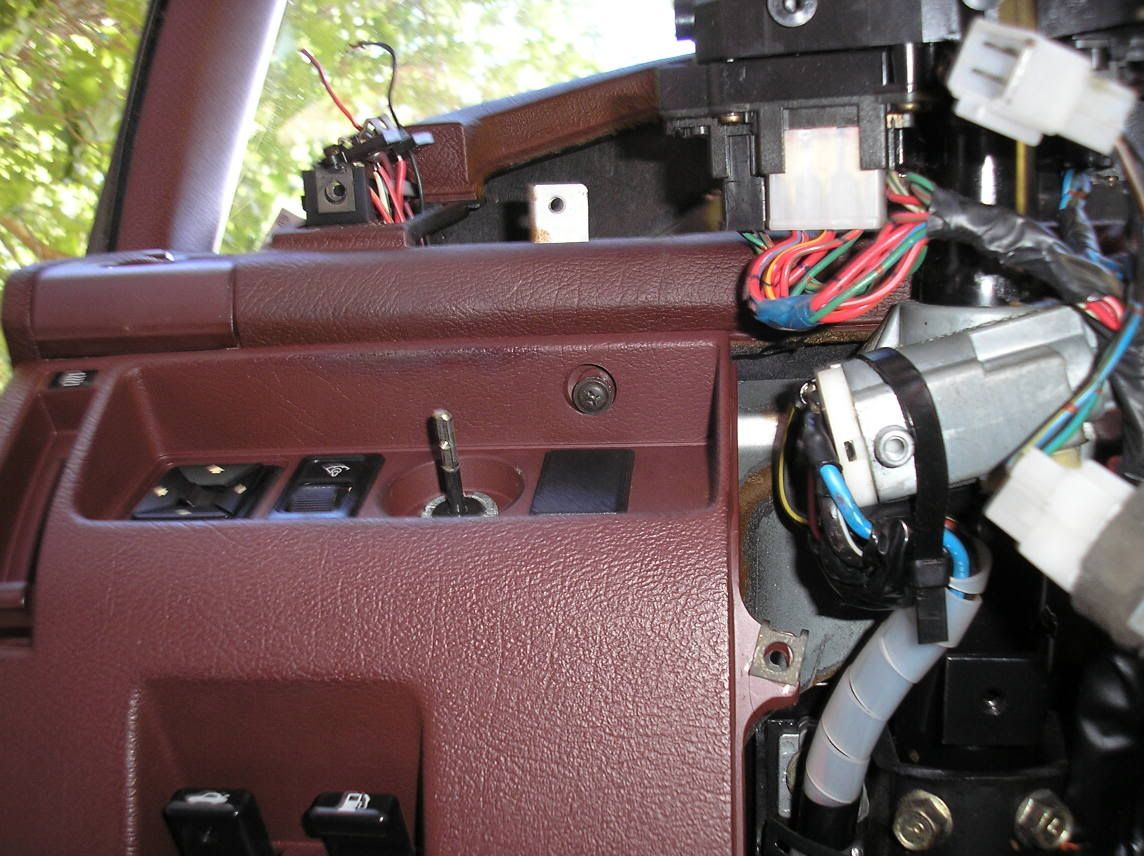
Remove these as well:
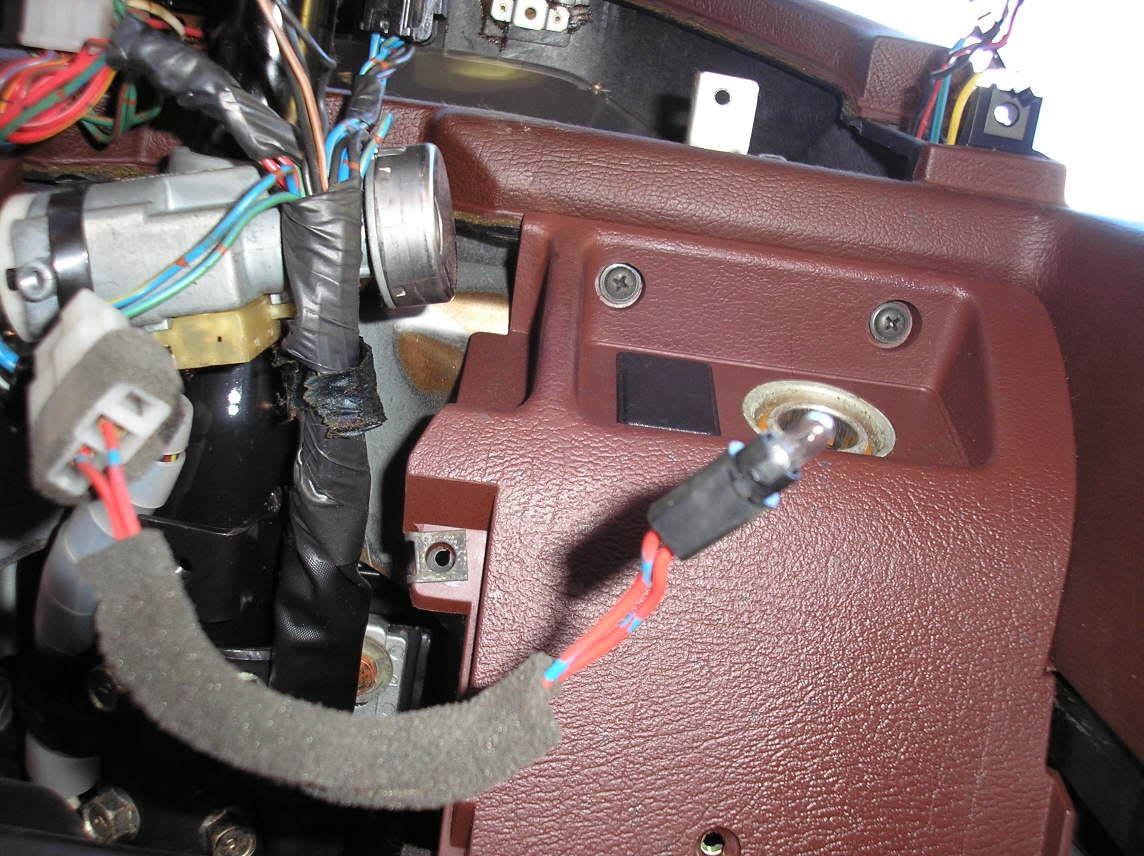
Remove the nut that goes on the choke ****. I used a flat-head screwdriver to break it loose, then just twisted it off.
If you want this lower piece off, you have to undo the two screws in the fuse block.
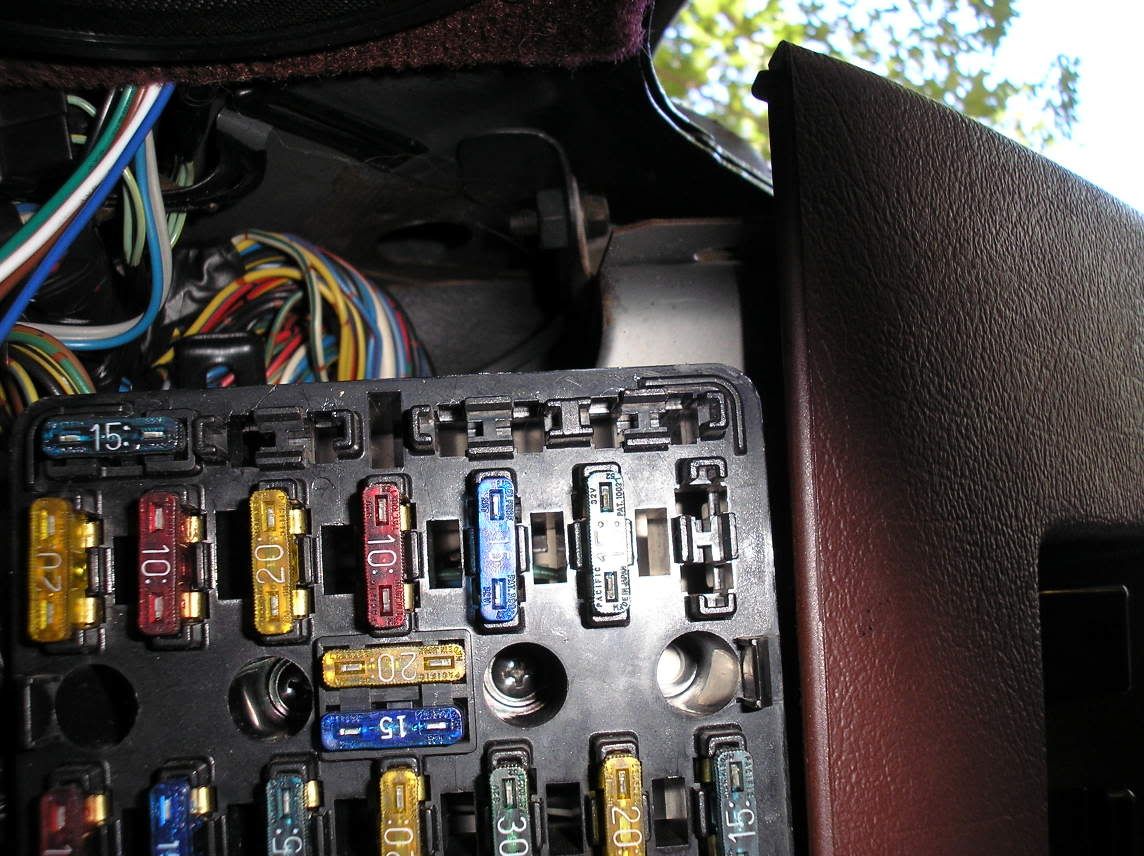
This is where I'm laying on my back to get the damn fuse block off. It's times like this that is sucks to be 6'3".
This is the braket that holds the fuse box in place. Remove it, too:
Here's the removed parts from this side. Notice that big zip-lock container? It's holding all the screws. You are going to end up removing probably 100 or so screws, it's nice to have them all in one place. It's also a good dumping ground for small parts.
I used the digital camera to take some shots of what screws to remove next. Beats the hell out of laying on my back under the dash to look. Remove the choke **** at the same time. There's a screw on the **** you need to loosent to be able to pull the **** off:
Remove these as well:
Remove the nut that goes on the choke ****. I used a flat-head screwdriver to break it loose, then just twisted it off.
If you want this lower piece off, you have to undo the two screws in the fuse block.
This is where I'm laying on my back to get the damn fuse block off. It's times like this that is sucks to be 6'3".
This is the braket that holds the fuse box in place. Remove it, too:
09-03-05, 07:26 PM
#6
On the prowl for an FB
Thread Starter
iTrader: (1)
Join Date: Sep 2002
Location: Surrounded by Sebey parts, Rhode Island
Posts: 2,932
Likes: 0
Received 6 Likes
on
4 Posts
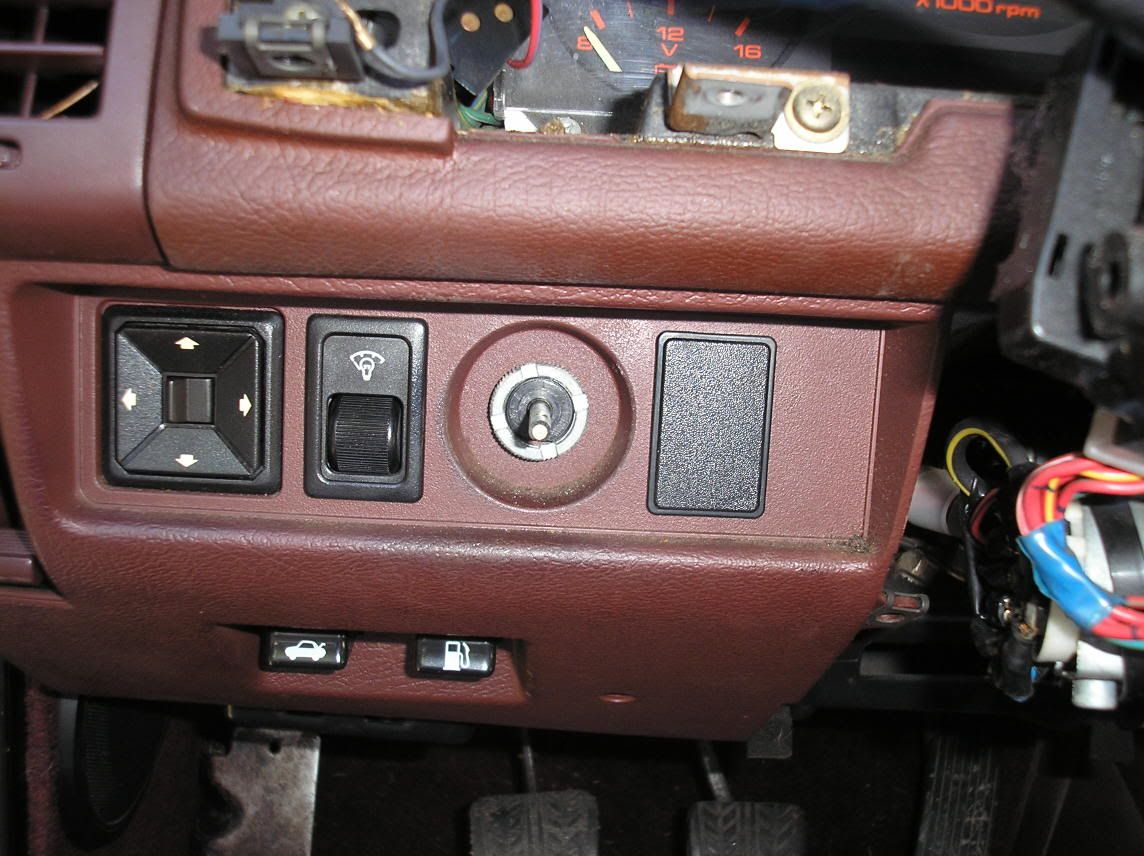
You'll notice my headlight controls are already removed in these pics. I had taken them off so I could paint them earlier this week. It's not difficult to do, it's actually pretty self explanatory.
09-03-05, 07:40 PM
#7
On the prowl for an FB
Thread Starter
iTrader: (1)
Join Date: Sep 2002
Location: Surrounded by Sebey parts, Rhode Island
Posts: 2,932
Likes: 0
Received 6 Likes
on
4 Posts
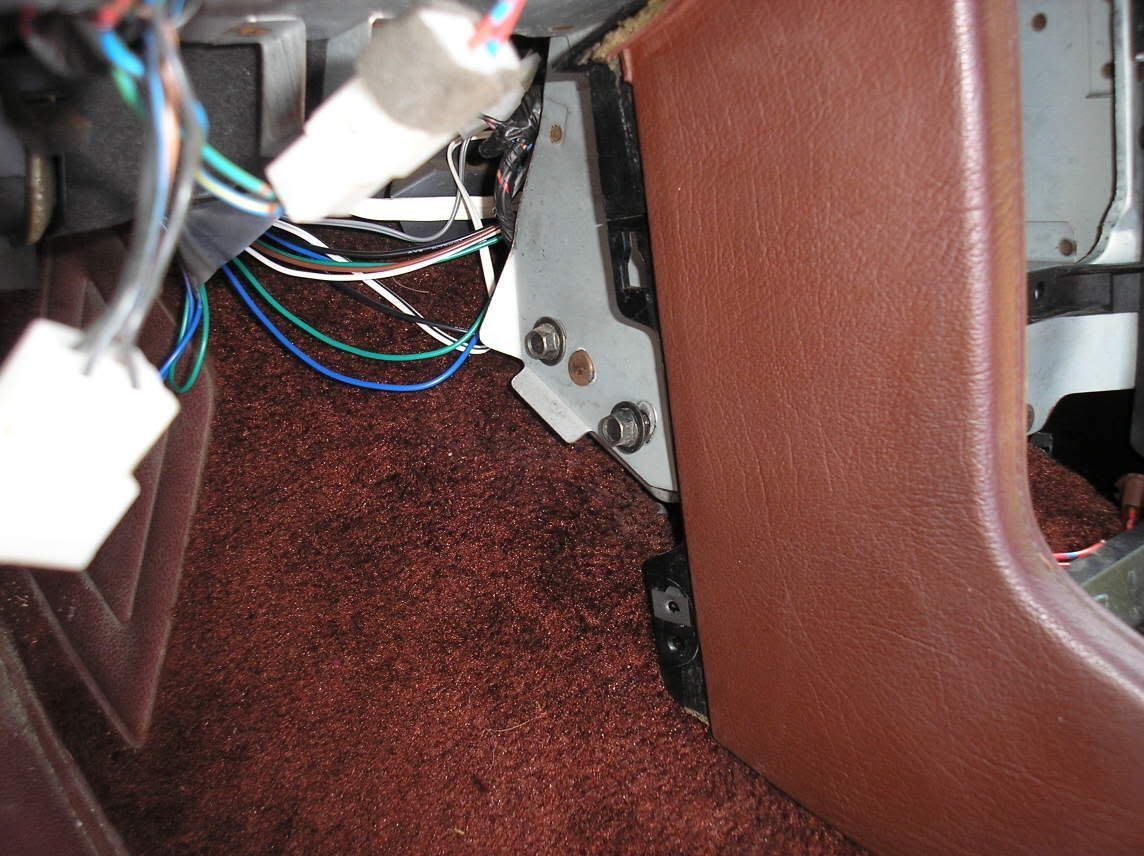
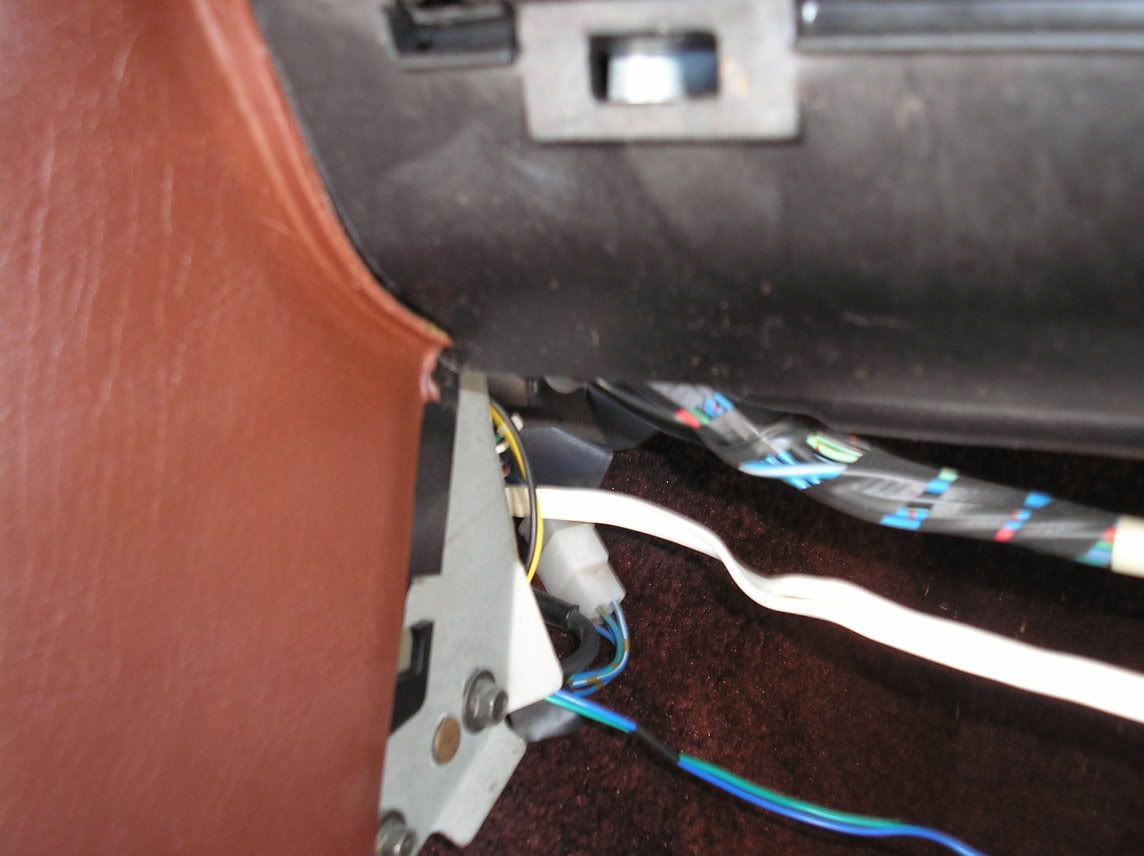
Now, while you're down on the floor, most likely swearing, remove the four screws that hold the hatch release and fuel door release:
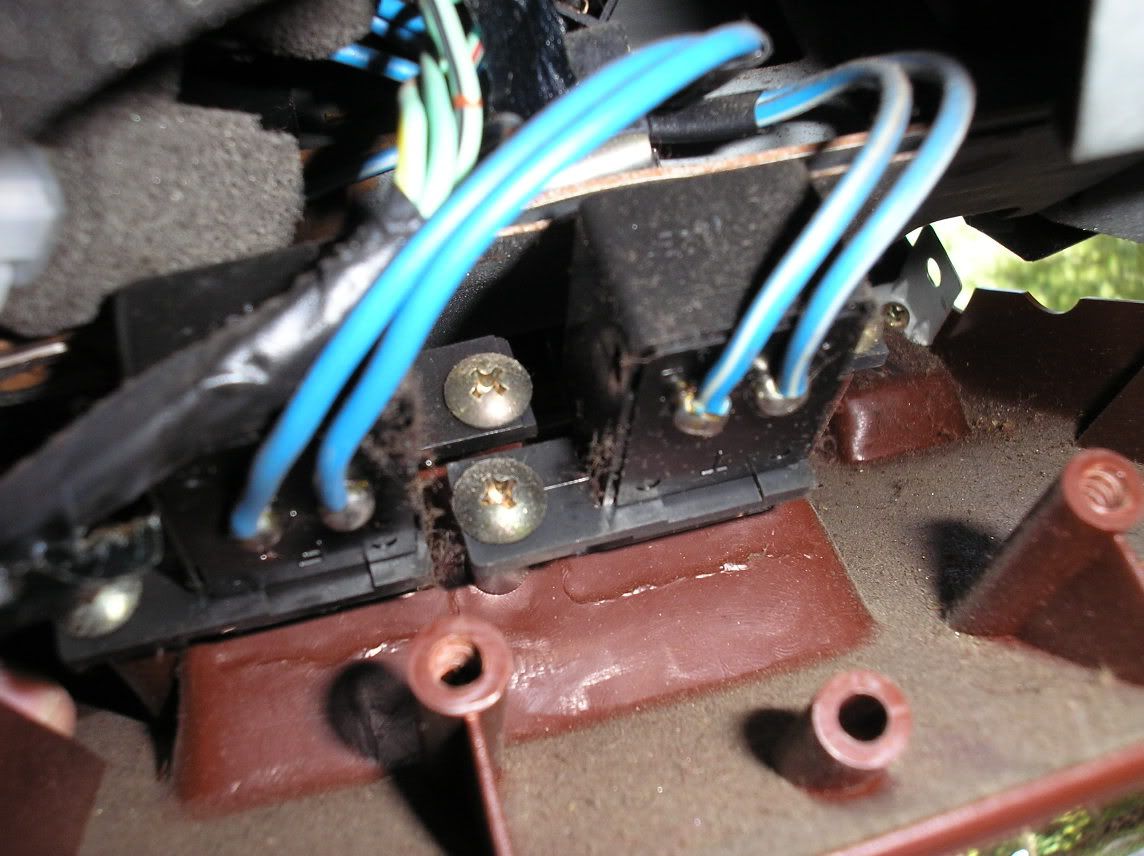
The panel should be *mostly* free by now. Yank the cord that goes to the dimmer controls so that you can unclip it.
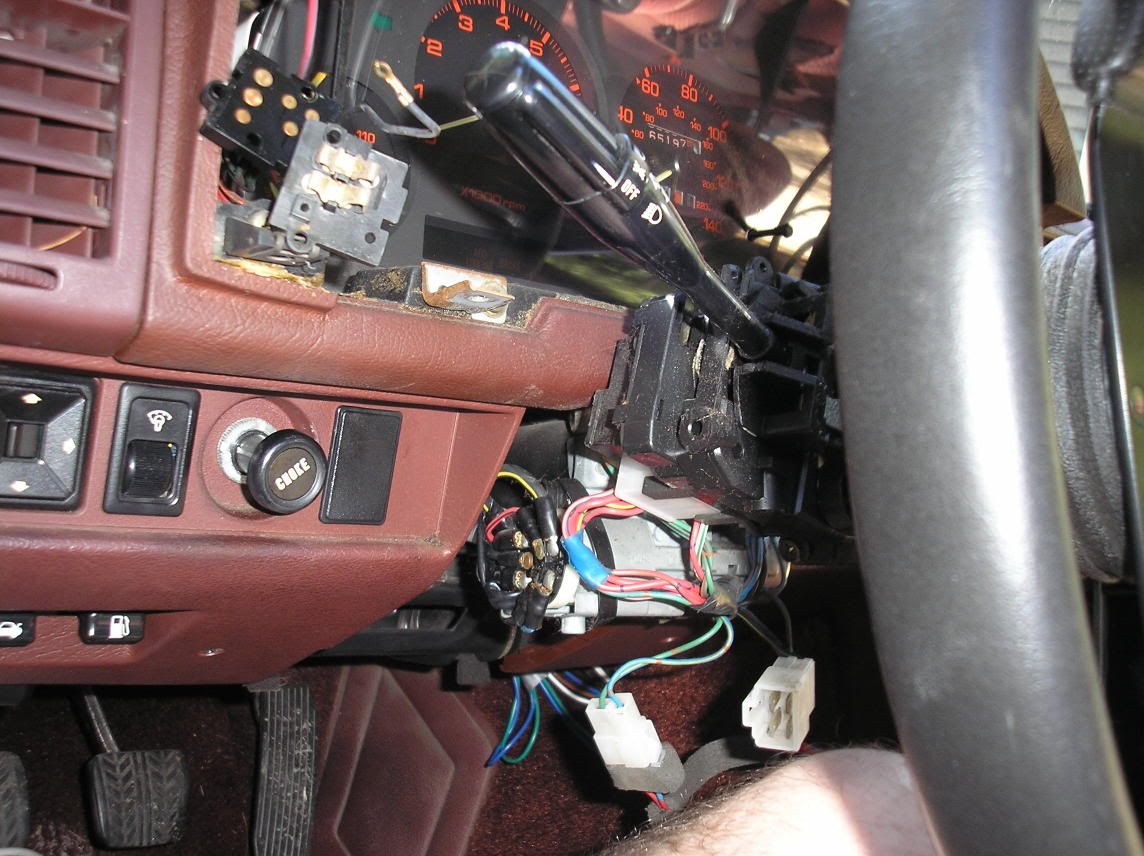
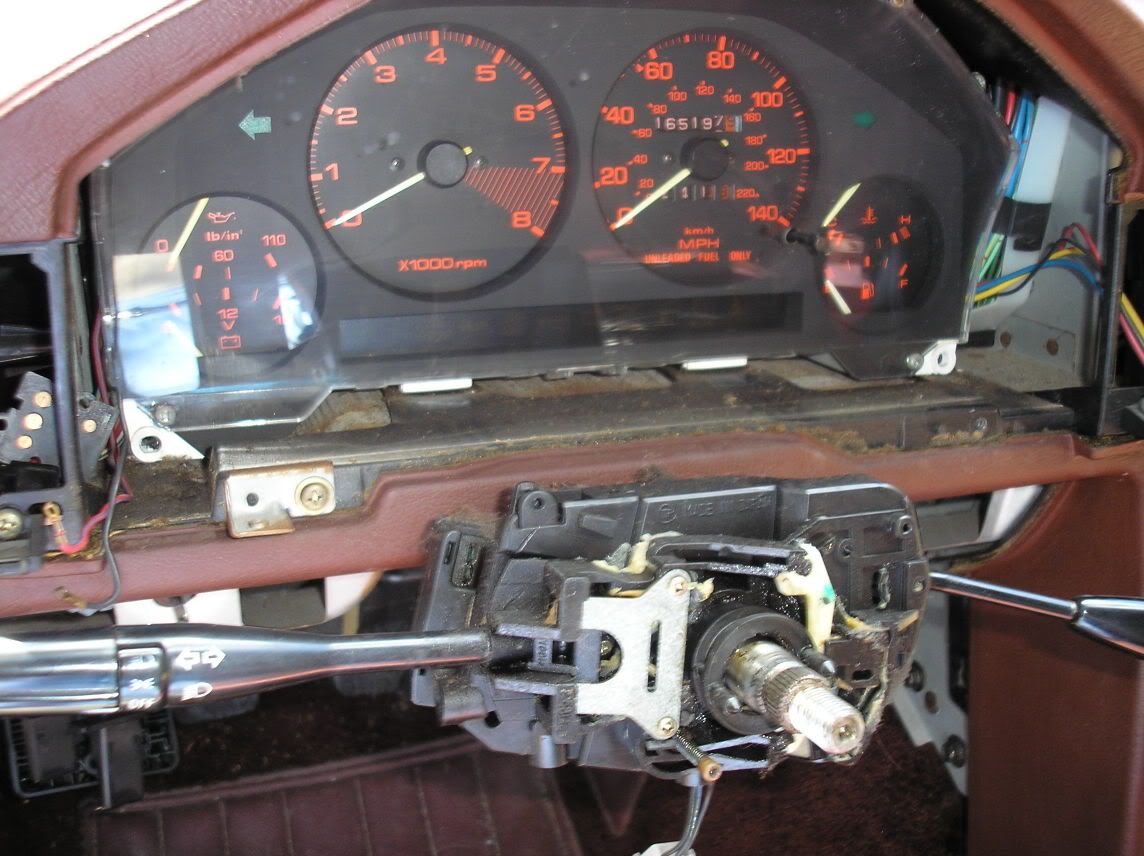
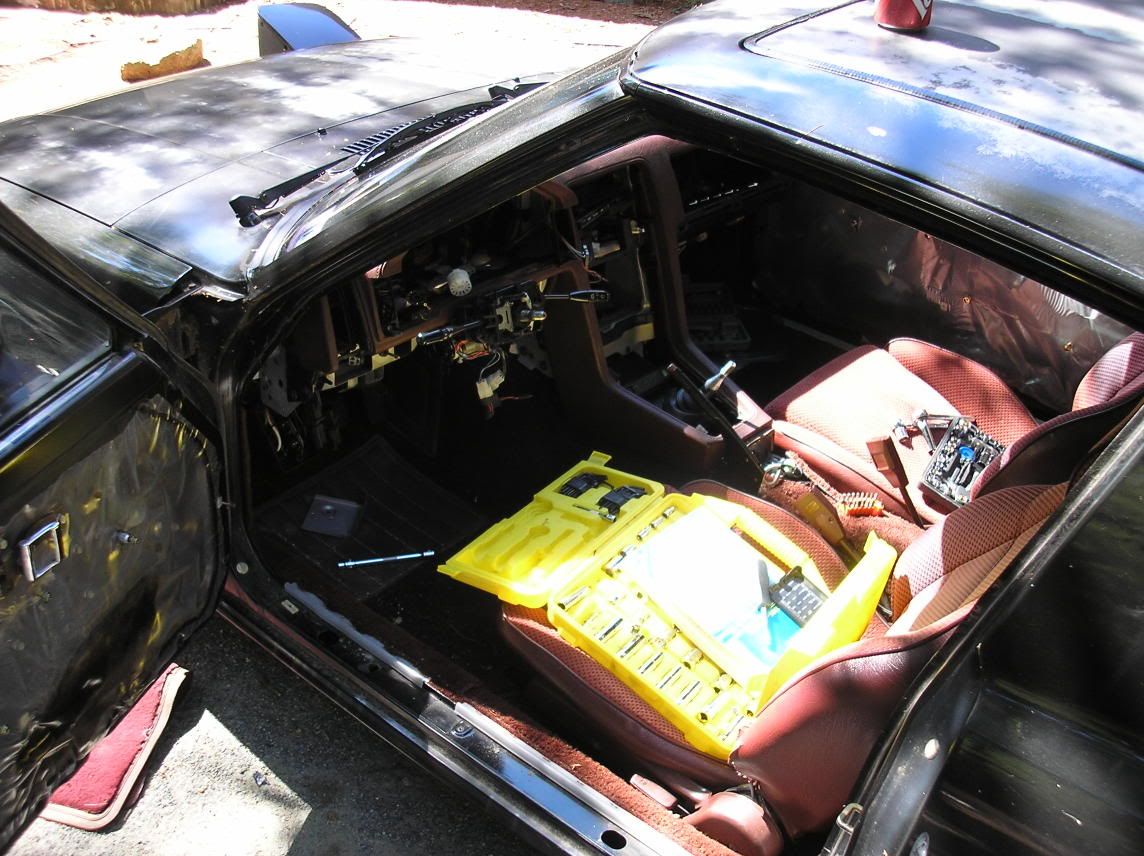
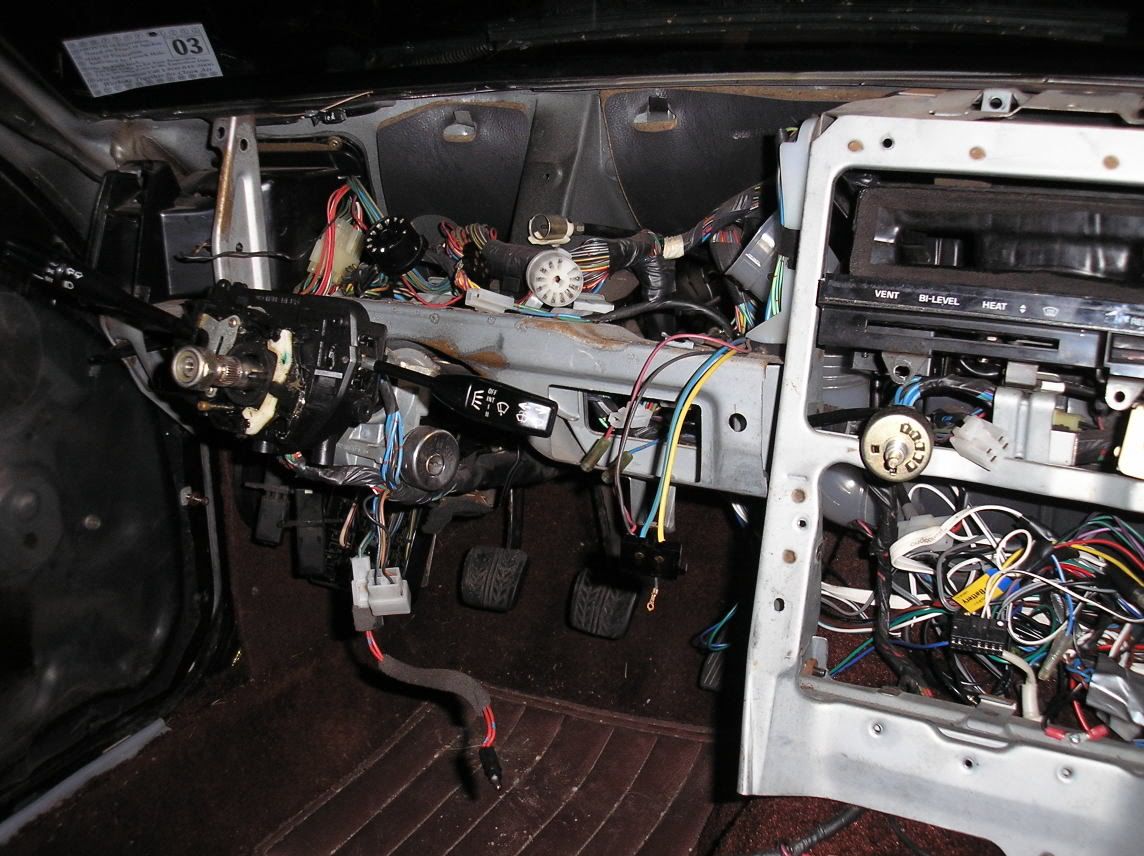
I pulled off my steering wheel when I had to flip around on the floor underneath the dash. You should be looking at something like this now:
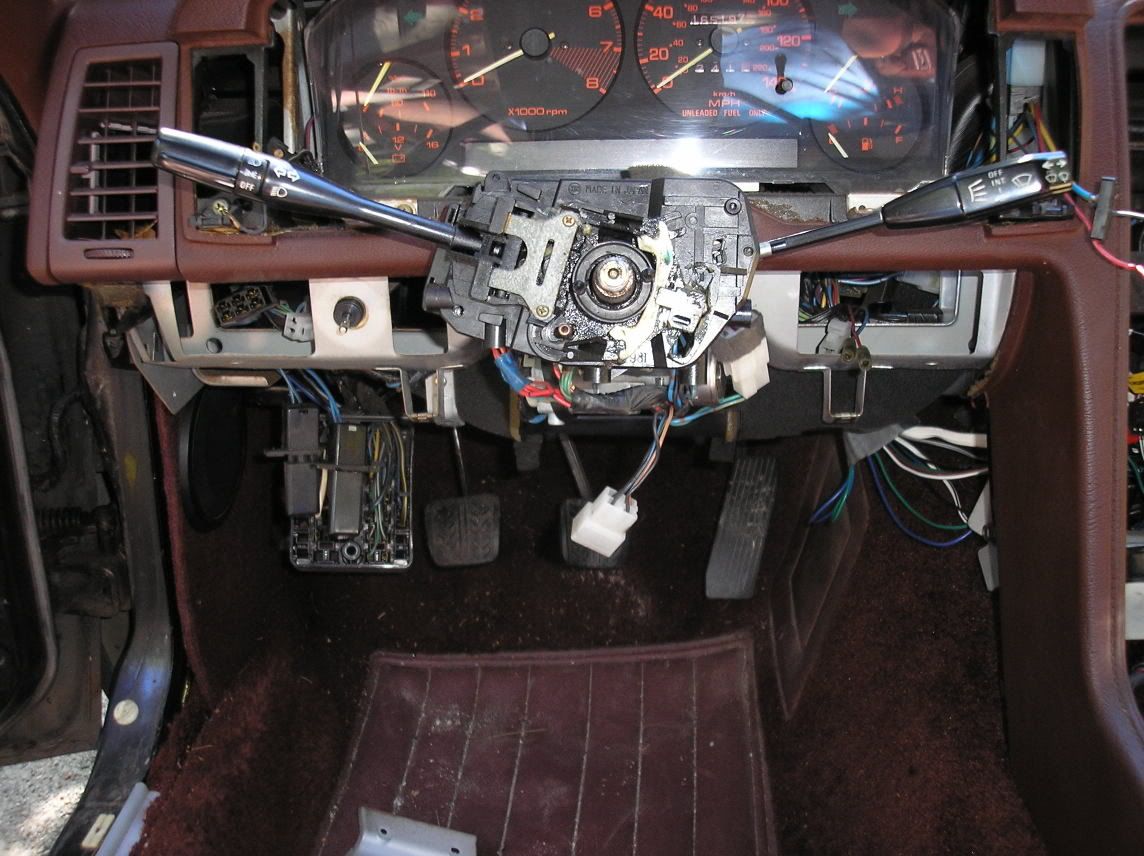
Oh, by the way, go ahead and unscrew and remove the two small pieces of carpet that are shown missing here:
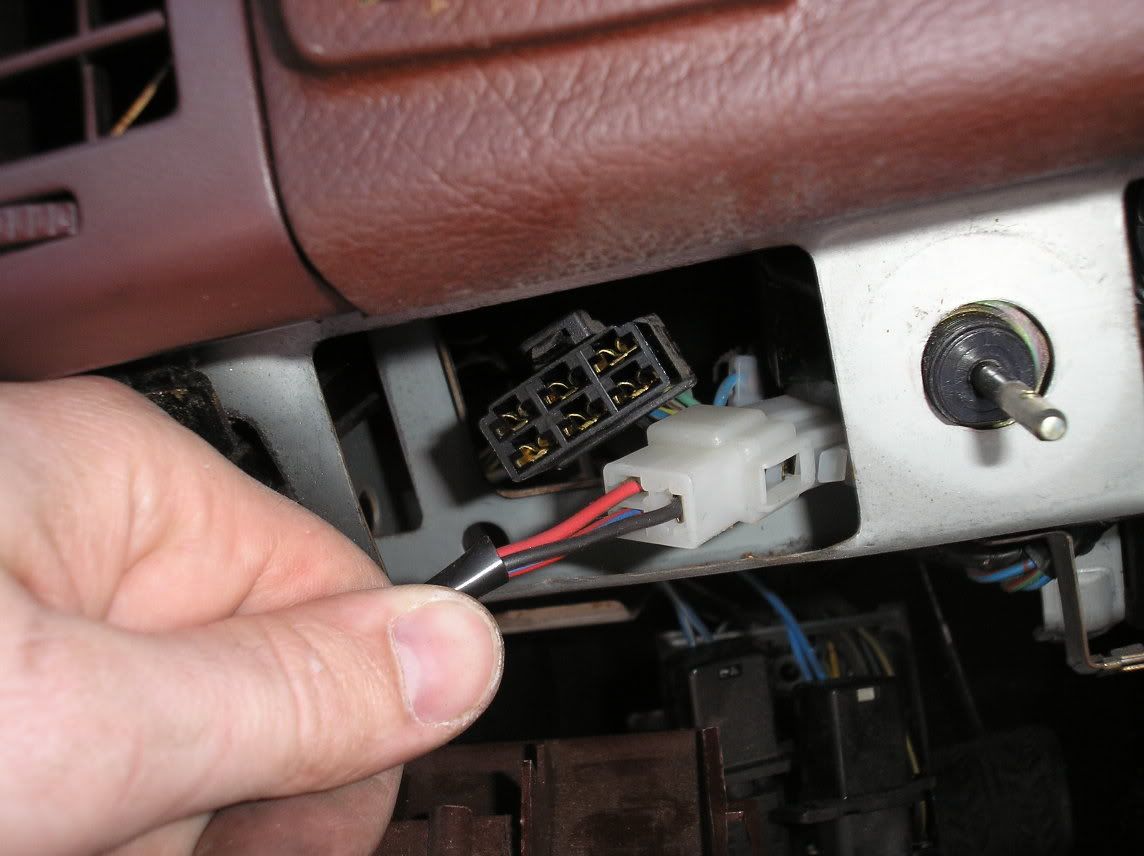
Next up, the gauge cluster needs to come out. It's a pain in the ***, I'm telling you now. Especially if you have big hands like I do. You need to reach up under the dash, around the back of the cluster, and unhook the cable that goes to the speedometer. You also need to remove the screws that hold the cluster in place.
Now, there are four electrical connectors on the back of the gauge cluster. Remove them. The two big round ones are going to be on tighter than a virgins'... you know. You need to push the lever in the center of the round connectors down while pulling them off. Yes, it sucks. Luckily, they go back on easier than they come off.
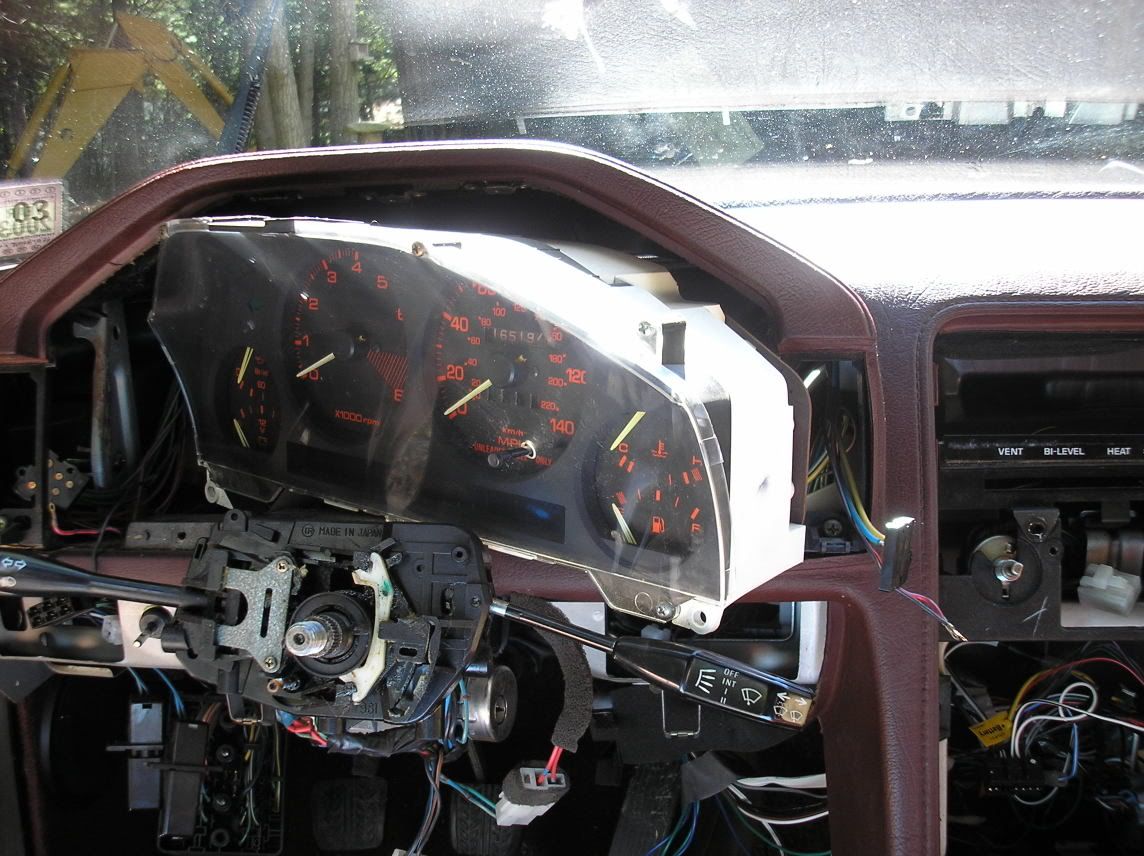
Voila!!
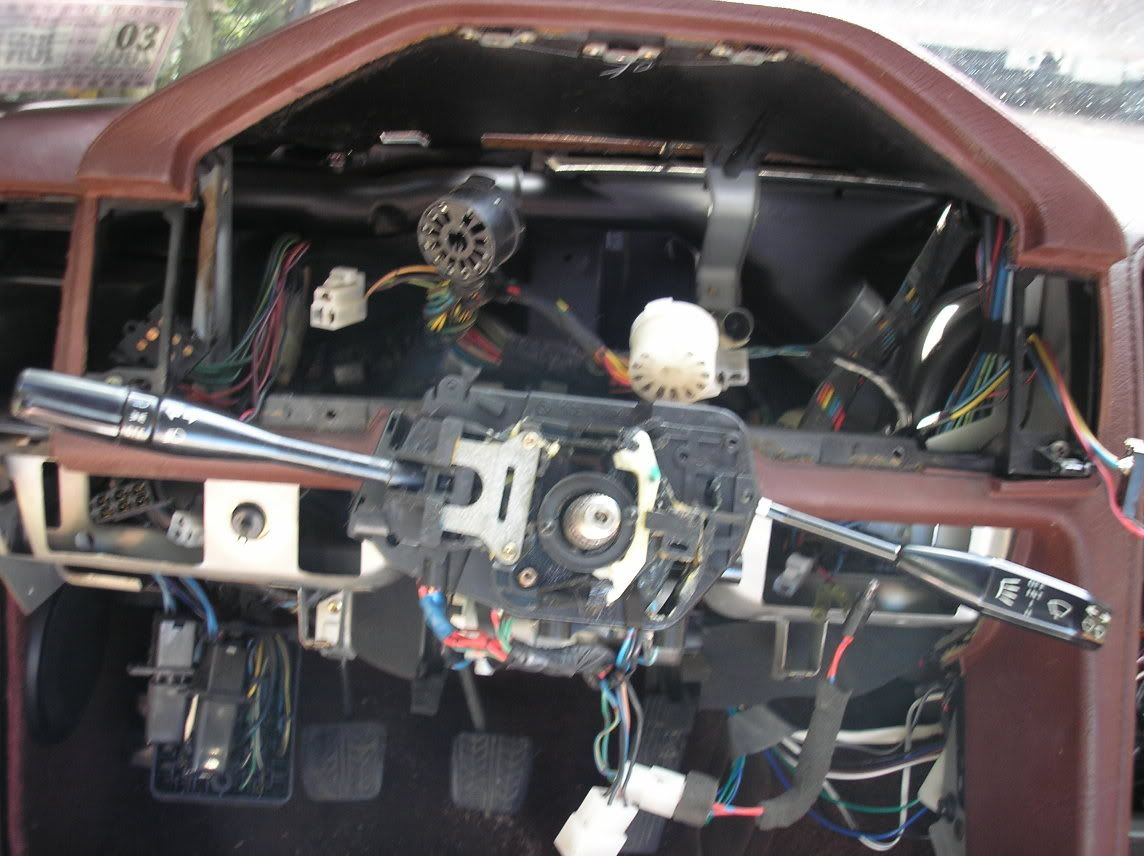
Here's where I started yanking out more A/C ducting. It just gets in the way.
Now that the big pieces are out, the only thing left to do is get out the actual dash cover. Take this opportunity to have a coke and a smile, because it's the last time you're going to smile for the day. I popped out the demister grilles at this time, because all you have to do is reach up from underneath and carefully pop them out. Simple.
See this? This is where your radio goes. What you can't see is the two screws that are inserted from the back that need to be removed. They are about an inch down from the two empty holes from the screws you removed before. Take 'em out.
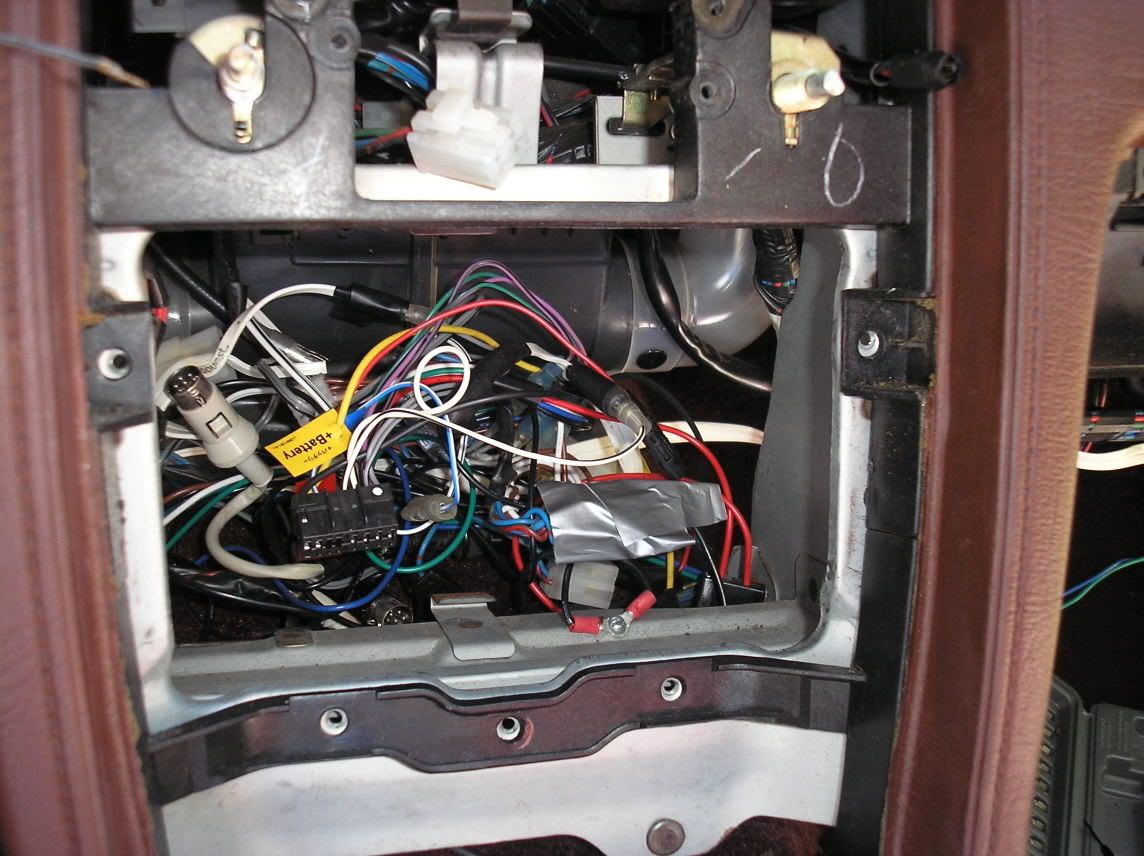
The panel should be *mostly* free by now. Yank the cord that goes to the dimmer controls so that you can unclip it.
I pulled off my steering wheel when I had to flip around on the floor underneath the dash. You should be looking at something like this now:
Oh, by the way, go ahead and unscrew and remove the two small pieces of carpet that are shown missing here:
Next up, the gauge cluster needs to come out. It's a pain in the ***, I'm telling you now. Especially if you have big hands like I do. You need to reach up under the dash, around the back of the cluster, and unhook the cable that goes to the speedometer. You also need to remove the screws that hold the cluster in place.
Now, there are four electrical connectors on the back of the gauge cluster. Remove them. The two big round ones are going to be on tighter than a virgins'... you know. You need to push the lever in the center of the round connectors down while pulling them off. Yes, it sucks. Luckily, they go back on easier than they come off.
Voila!!
Here's where I started yanking out more A/C ducting. It just gets in the way.
Now that the big pieces are out, the only thing left to do is get out the actual dash cover. Take this opportunity to have a coke and a smile, because it's the last time you're going to smile for the day. I popped out the demister grilles at this time, because all you have to do is reach up from underneath and carefully pop them out. Simple.
See this? This is where your radio goes. What you can't see is the two screws that are inserted from the back that need to be removed. They are about an inch down from the two empty holes from the screws you removed before. Take 'em out.
Trending Topics
09-03-05, 07:45 PM
#8
On the prowl for an FB
Thread Starter
iTrader: (1)
Join Date: Sep 2002
Location: Surrounded by Sebey parts, Rhode Island
Posts: 2,932
Likes: 0
Received 6 Likes
on
4 Posts
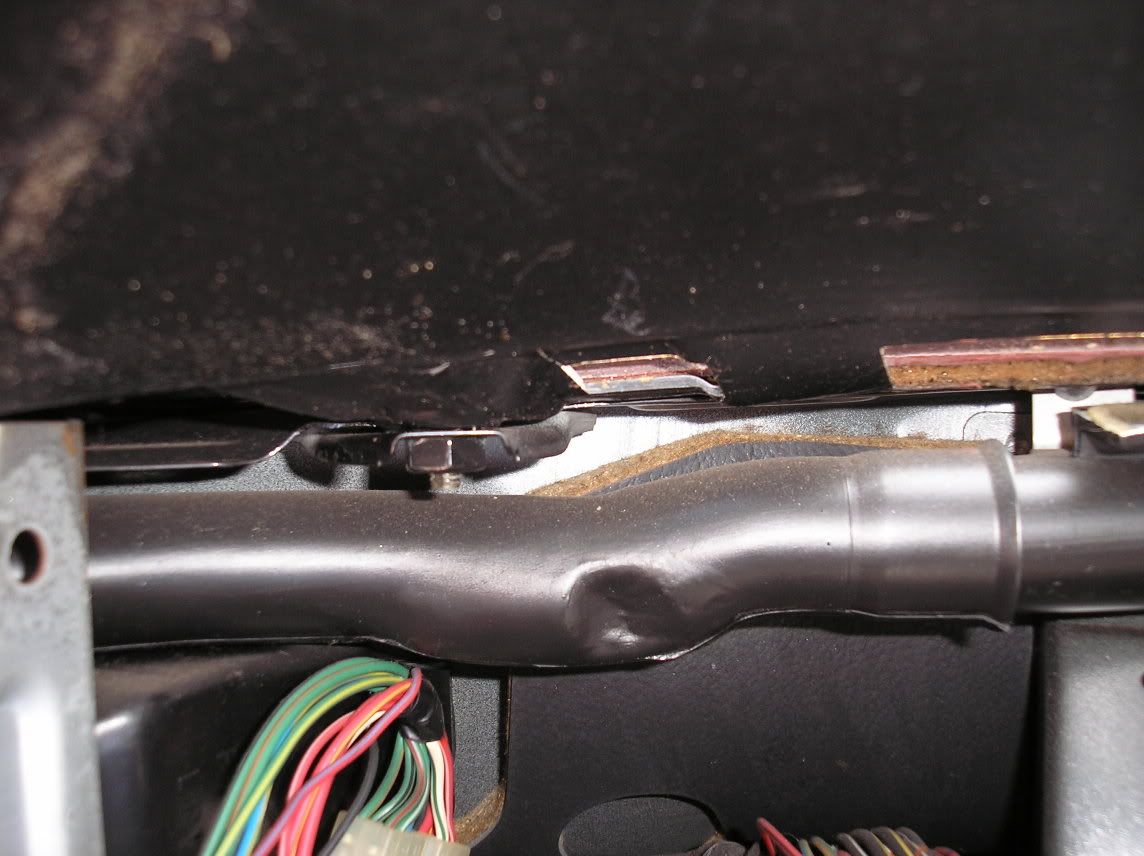
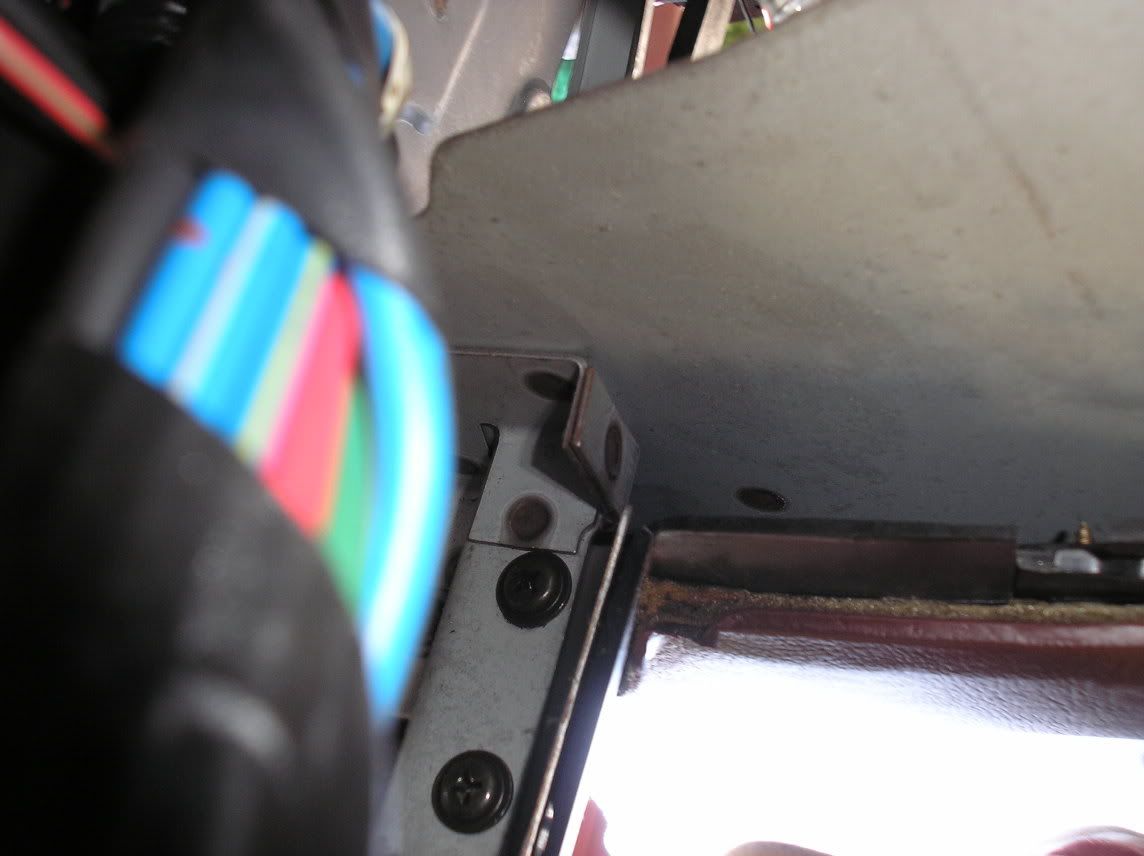
Now, here's the really fun part. The dash is held on by an assload of screws where the glovebox was. You might not have to remove them, because the further you progress, the more screws you take out, and a bracket comes loose that may or may not handle the problem. I already took the damn screws out, so I couldn't tell you.
Remove these too:
Remove these too:
09-03-05, 07:47 PM
#9
On the prowl for an FB
Thread Starter
iTrader: (1)
Join Date: Sep 2002
Location: Surrounded by Sebey parts, Rhode Island
Posts: 2,932
Likes: 0
Received 6 Likes
on
4 Posts
And here's where I quit for the day and took the kids to the town fair:

Elapsed time for today, about an hour and a half. Tomorrow, final removal of the dash. Tonight, all the other small pieces are in the metal pan dyeing blue before I dye them black with the leather dye. See my "How-to: Dye your interior pieces" thread for that info.
-$100
Elapsed time for today, about an hour and a half. Tomorrow, final removal of the dash. Tonight, all the other small pieces are in the metal pan dyeing blue before I dye them black with the leather dye. See my "How-to: Dye your interior pieces" thread for that info.
-$100
09-03-05, 10:09 PM
#10
Rotary Enthusiast
iTrader: (1)
Join Date: Feb 2004
Location: Waterloo & Mississauga, Ontario, Canada
Posts: 838
Likes: 0
Received 1 Like
on
1 Post
Very impressive so far, this is going to be interesting to watch. You have motivated me to take my dash out to dye it soon as well from the brown colour.
09-04-05, 01:41 AM
#11
Looks like it is coming along nicely what is funny about this is that I am right in the middle of doing this same thing you are only its to an SE I have done this b4 to my 84 gsl that i no longer have. What you just did was the easy part the hard part is the dash and if you dont want to save the POS maroon colored dash remove everything valuable and a few of the 10mm bolts and obvious screws and rip the ***** right out I had a replacement out of my last car i kept that was black I painted it with krylon plastic it came out great but I am converting everything to black from maroon I am in no rush though, as well as battery in Pass. storage bin and rounting speaker wires and speakers too I hate the maroon color it is the worst color for an interior I cant wait for the final product. Good luck and keep up the pics id post pics but i dont know how.
09-04-05, 09:48 AM
#14
On the prowl for an FB
Thread Starter
iTrader: (1)
Join Date: Sep 2002
Location: Surrounded by Sebey parts, Rhode Island
Posts: 2,932
Likes: 0
Received 6 Likes
on
4 Posts
Originally Posted by brandon davis
Looks like it is coming along nicely what is funny about this is that I am right in the middle of doing this same thing you are only its to an SE I have done this b4 to my 84 gsl that i no longer have. What you just did was the easy part the hard part is the dash and if you dont want to save the POS maroon colored dash remove everything valuable and a few of the 10mm bolts and obvious screws and rip the ***** right out I had a replacement out of my last car i kept that was black I painted it with krylon plastic it came out great but I am converting everything to black from maroon I am in no rush though, as well as battery in Pass. storage bin and rounting speaker wires and speakers too I hate the maroon color it is the worst color for an interior I cant wait for the final product. Good luck and keep up the pics id post pics but i dont know how.
09-04-05, 11:40 AM
#16
REW'd FB
Join Date: Dec 2004
Location: WA
Posts: 2,685
Likes: 0
Received 0 Likes
on
0 Posts
Yep there is but there are no pictures. The write up is great but for those who are picture oriented this one is a little easier to follow. When I did mine about 4 months ago there were a couple of times that I wished I had some pictures. Oh yeah and have fun removing that dash. Took me about 10 mins of manuvering...eventually I found the sweet spot and it poppred right out of the car!
09-04-05, 08:50 PM
#17
On the prowl for an FB
Thread Starter
iTrader: (1)
Join Date: Sep 2002
Location: Surrounded by Sebey parts, Rhode Island
Posts: 2,932
Likes: 0
Received 6 Likes
on
4 Posts
Well, this is where I picked up at today:
I only had about 5 or 6 screws left. Each of them presented their own problems. This is where we get to play everyone's favorite new game, called "What the **** are you stuck on now???" Turns out that Mazda has some Smurfs working for them, because that's the only way some of these screws could have gone in:
Most of these screws are in backwards. So, how the hell do we get them out? Simple!! Someone at Sears tool design must own an FB, because they created these:
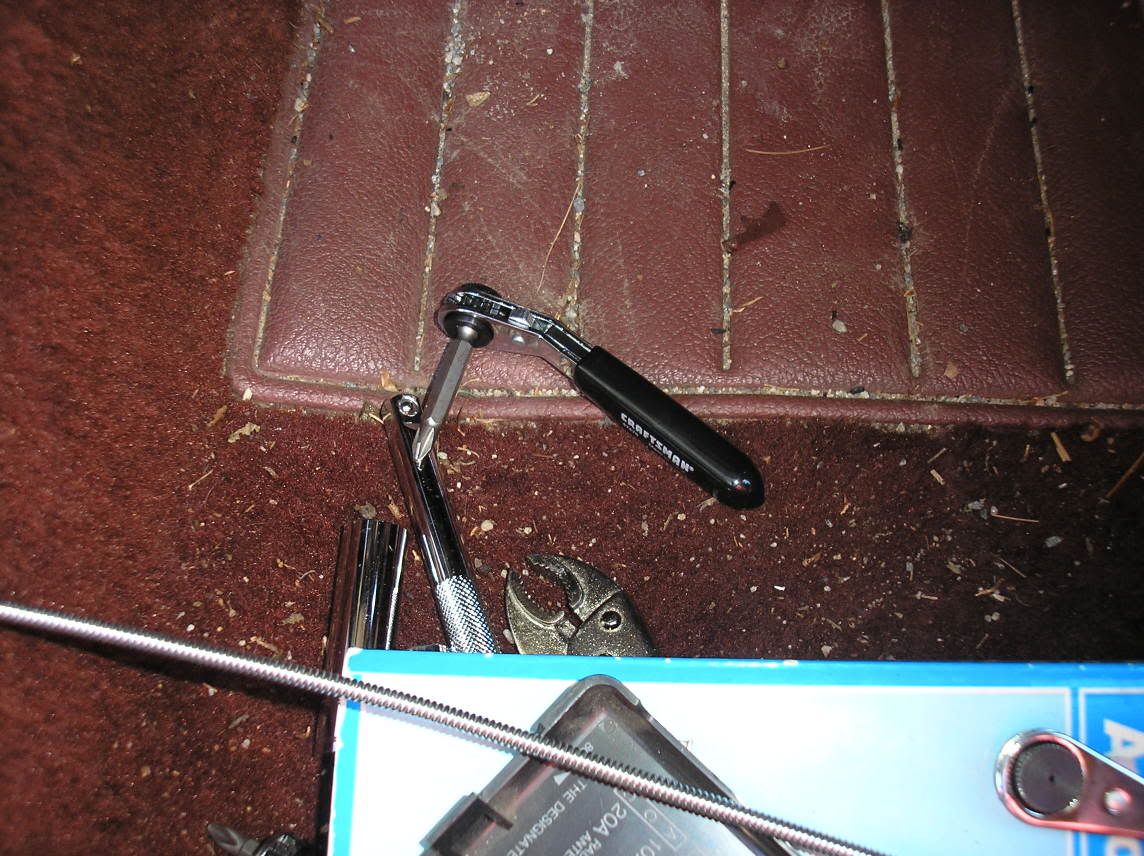
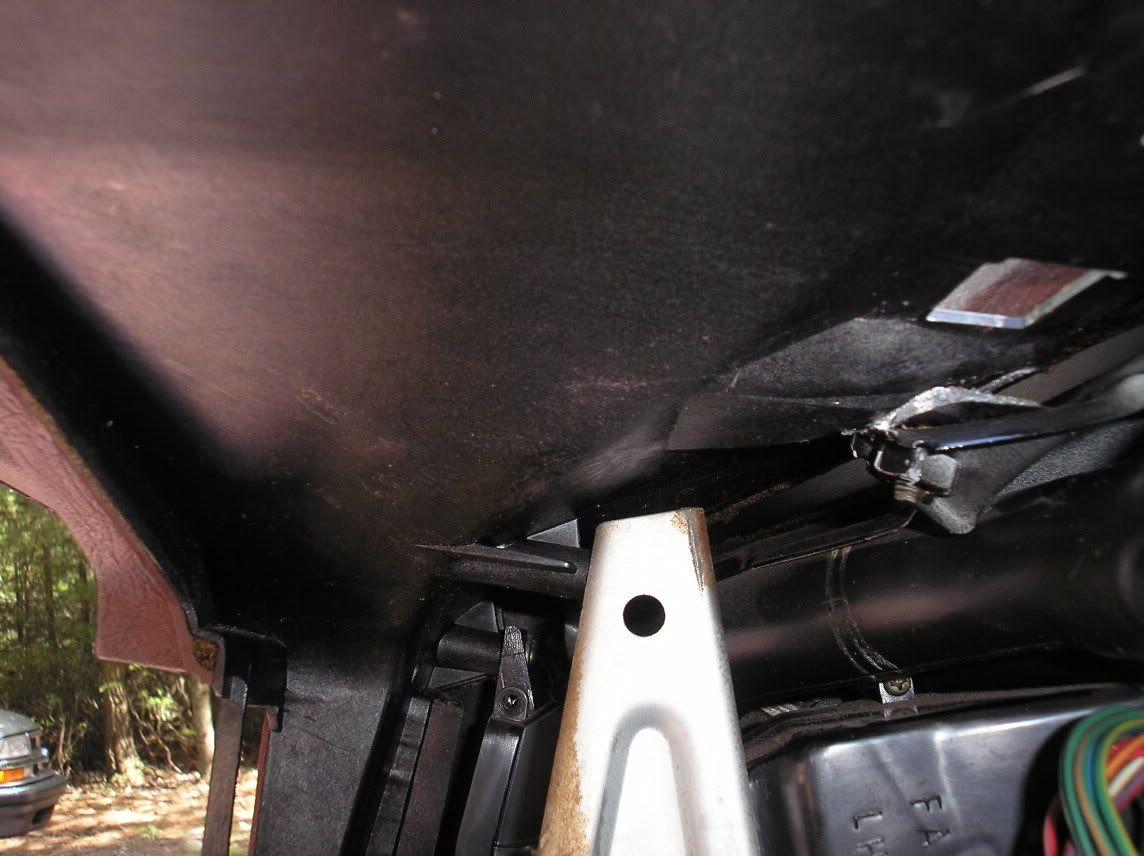
There are two screws buried, and I mean buried in the dash above the center A/C vents. The only way to get to 'em is to move the center vent (and by move, I mean I ripped the thing right off the screws holding it in place. Nothing a little epoxy can't fix) and use one of these wonderful little screwdriver/ratchets from Sears. $19.99, but priceless for doing this.
This is what you're dealing with. It sucks donkey dick. It was at this point that I removed the drivers side seat. It's just easier to lay down on the floor without it in, and seriously, at this point, you need to feel like you're accomplishing something.
After removing the last of these screws, I was able to lift the dash up and away. Sure, it took some of the A/C ducting with it, but whatever. The dash is out, that's all that matters to me.
Here's what's left!
My next how-to: How to remove your carpet. Because that **** is coming out next.
-$100
I only had about 5 or 6 screws left. Each of them presented their own problems. This is where we get to play everyone's favorite new game, called "What the **** are you stuck on now???" Turns out that Mazda has some Smurfs working for them, because that's the only way some of these screws could have gone in:
Most of these screws are in backwards. So, how the hell do we get them out? Simple!! Someone at Sears tool design must own an FB, because they created these:
There are two screws buried, and I mean buried in the dash above the center A/C vents. The only way to get to 'em is to move the center vent (and by move, I mean I ripped the thing right off the screws holding it in place. Nothing a little epoxy can't fix) and use one of these wonderful little screwdriver/ratchets from Sears. $19.99, but priceless for doing this.
This is what you're dealing with. It sucks donkey dick. It was at this point that I removed the drivers side seat. It's just easier to lay down on the floor without it in, and seriously, at this point, you need to feel like you're accomplishing something.
After removing the last of these screws, I was able to lift the dash up and away. Sure, it took some of the A/C ducting with it, but whatever. The dash is out, that's all that matters to me.
Here's what's left!
My next how-to: How to remove your carpet. Because that **** is coming out next.
-$100
09-04-05, 09:05 PM
#18
Aussie Rx7 Freak
Join Date: Nov 2002
Location: Adelaide, Australia
Posts: 412
Likes: 0
Received 0 Likes
on
0 Posts
Great work man...really good effort. Should be a sticky/or archieved... I love all the how to stuff people do... makes everyone elses cars a lot easier when they want to remove the items.
BTW, I love it how you just threw in a pic of your kids at the fair. lmao.
BTW, I love it how you just threw in a pic of your kids at the fair. lmao.
09-05-05, 12:23 AM
#19
I should have mentioned earlier I have done 3 dash removals and it is easist with the seats out and bins with a foam pad to kneel on I got a nice pad from work we use for organizing our tools and it is the best makes it alot easier to work in the car when the seats are out plus you dont ruin the seats by manuvering in all differnt ways to get some of those Fd up screws out. Good job Just wait till the interior goes back in in black. I am almost done and it looks great I have also painted the center consule pieces satin black and it looks great when my seats go in my SE will be one step closer to perfection.
09-05-05, 08:06 AM
#20
On the prowl for an FB
Thread Starter
iTrader: (1)
Join Date: Sep 2002
Location: Surrounded by Sebey parts, Rhode Island
Posts: 2,932
Likes: 0
Received 6 Likes
on
4 Posts
The interior on my car is actually coming along nicely. I've painted the smaller trim pieces that I wanted to offset all the black, the door panels are almost finished, and we're going to tackle the headliner soon.
When the interior is fully stripped, and I fit my rear fender flares (if they work out...) she's going in for paint.
When the interior is fully stripped, and I fit my rear fender flares (if they work out...) she's going in for paint.

Thread
Thread Starter
Forum
Replies
Last Post
KAL797
Test Area 51
0
08-11-15 03:47 PM